
Razor Cutting Techniques For Disconnected Texture

Learn Razor Cutting Techniques For Disconnected Texture
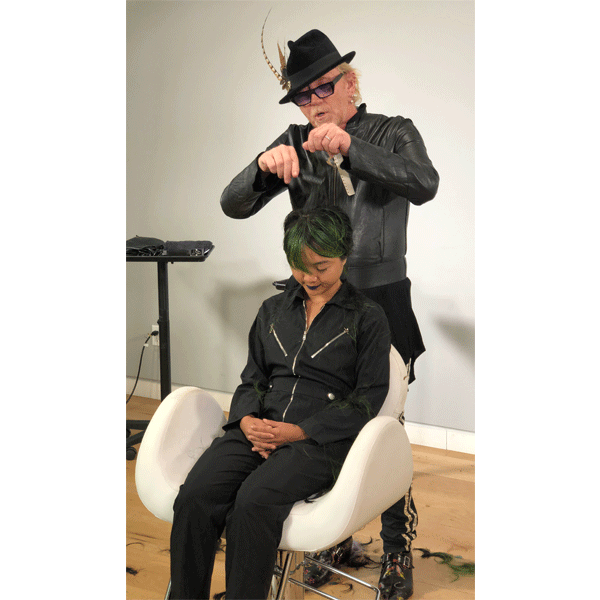
Ever wanted to create a cool, disconnected cut but don’t want to spend the entire appointment point cutting? A razor may be the best tool to create texture, but can be a little intimidating. Industry Icon and John Paul Mitchell Systems Global Artistic Director Robert Cromeans (@robertcromeans) stopped by The BTC House to to take the fear out of razor cutting and break down how to create texture with a blade. Scroll to see how he his techniques for a disconnected pixie cut and click here to purchase his class on BTC University (a little secret, he did THREE haircuts in ONE HOUR)!
Slide for this EPIC TRANSFORMATION!
Elevate Up To Remove Weight But Keep Length
When creating disconnection within the interior, Robert uses over direction to maintain length at the base, but remove weight in the mid-section. Here’s how Robert broke down his elevation technique:
- Bring a diagonal, slat section up, so the bottom sits perpendicular from the head. Use a thin-tooth comb to make sure the section is smooth and flat.
- Using the middle and index finger, hold the section tight and use long strokes with the razor. Once the blade has worked through the top of the section, use the corner of the razor to gently remove weight in the lower half, but be sure not to cut the section all the way through to maintain length.
Texture of Hair = Depth of Stroke
When cutting with a razor, the client’s hair texture plays a major role in how deep you cut into a section. If the client has thin or finer hair, use smaller strokes when cutting each section to preserve weight and avoid a cut that is too soft. If a client has thicker or coarse hair, take longer strokes and begin further up into the section.
Create Face Frame And Fringe With Over Direction
Robert compares cutting with a razor to sculpting art, “it’s about what you leave behind.” Over direction helps him to open the area around the face and create a soft shape that moves with the client’s natural texture.
- For the side face frame:
- Pick up a thin, diagonal section and rotate it so it is horizontal. Then, using the side edge of the blade, use small strokes to gently remove the hair, working from short to long. Brush the hair forward to see how it lays on the face. If the back of the section is still too heavy, pick it up again and use just the corner tip of the blade to remove a small amount of weight.

- For the fringe:
- When starting this cut, Robert began with a deep side part. When it was time to create the fringe, Robert took a large section from the heavier side, and redirected it all the way over to the opposite side of the head.
-
- Comb the section flat and smooth, and starting in the back of the section, use the corner of the blade, “like a pencil,” to edge out the fringe, moving from short to long.

Twisted Texture At The Crown
To create disconnected texture at the top, Robert takes radial sections at the crown and elevates them straight up. Then, using his fingers, he twists the section, bringing his razor closer to the head and uses a smooth motion to work the blade up the section, letting the textured pieces fall as he cuts.
Click through the slideshow to see more of Robert’s day at The BTC House and click here to purchase Robert’s entire class on BTC University and have lifetime access!
More from
Robert Cromeans
-
Best of 2020
7 Pricing Tips To Take Into 2021
-
Best of 2020
10 Salon Business Tips To Read Before 2021
-
BTC Events
How To See Fewer Clients For The Same Amount Of Money
-
#thebtcshow 2019
#THEBTCSHOW 2019: Day 1
-
#thebtcshow 2019
John Paul Mitchell Systems at #THEBTCSHOW2019
-
Business
These 6 Articles Will Help You Make More Money Next Month 💵
-
Business
5 Retail Tips To Help You Make More Money
-
Bobs
6 Razor Cutting Tips From Robert Cromeans
-
BTC Events
BTC “ON TOUR” New York City—Here’s What Went Down!
-
BTC Events
BTC “ON TOUR” New York City
-
BTC Events
BTC’s “On Tour” Show Is Coming To Chicago—Here’s The Artist Lineup!
-
Events
Paul Mitchell’s Awapuhi Farm: Understanding The Brand’s Cultural Roots
-
BTC Events
BTC Launches “On Tour” Show In New York City—Here’s The Artist Lineup!
-
Business
3 Ways To Boost Your Business After Moving To A Salon Studio
-
#THEBTCSHOW 2018
Improve Guests’ Experience With These 6 Tips
-
Balayage
THE BTC SHOW 2018: DAY 2
-
#thebtcshow Austin 2017
WATCH: 3 Tips from the Paul Mitchell Squad
-
#thebtcshow Austin 2017
The Behind The Chair Show 2017: Day 2
-
#thebtcshow Austin 2017
John Paul Mitchell Systems at #thebtcshow
-
BTC COLOR, Cut & Style Show
COLOR, Cut & Style 2016
-
Business
10 Things You Can Do Now To Sell More Retail
-
Business
4 Tips Every Salon Manager Should Read
-
Business
12 Add-Ons That Really Add Up
-
Business
Unfiltered with Robert Cromeans: We Started a Business rEvolution!

