
QUICKIE: Make Waves With This 3-Step Blowout Technique

Make the most of your blowout by styling lived-in, cool-girl waves as you blow-dry—yes, dry AND style at the same time! Just watch and learn this easy three-step waving technique from LA cutter Philip Wolff (@philipwolffhair), so you can elevate your blowouts and end every appointment with a custom style your clients will love. Get the steps and watch them in action below!
Products Used
Get The Steps
1. Starting on wet hair, apply WetBrush EPIC Professional Time Release Detangler and comb through. Then, apply your favorite volumizer and thermal protectant to prep the hair for the blowout.
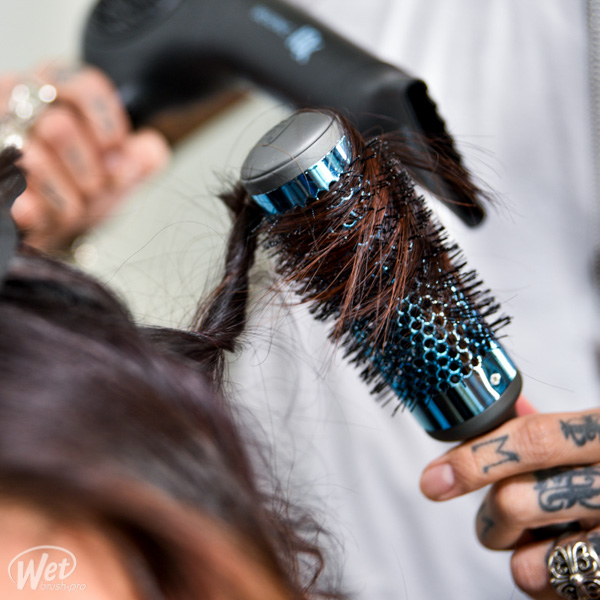
2. Take a section that’s the same width as the brush. Philip always uses the WetBrush EPIC Professional Heat Wave Blowout brush for blowout waves because its ThermaGraphene barrel gets up to 20 percent hotter than ceramic, and it evenly distributes heat across the barrel.
Pro Tip: Use the same sectioning pattern as if you were using a curling iron, but always start with the face frame—this is what the client is going to see!
3. Starting at the root, create the first bend by rotating the brush and applying heat. Continue working down the section and applying heat, then feed the ends through the brush. Repeat this wave technique and alternate directions as you work around the head, then finish with hairspray!
Watch the technique in action below, then make waves!
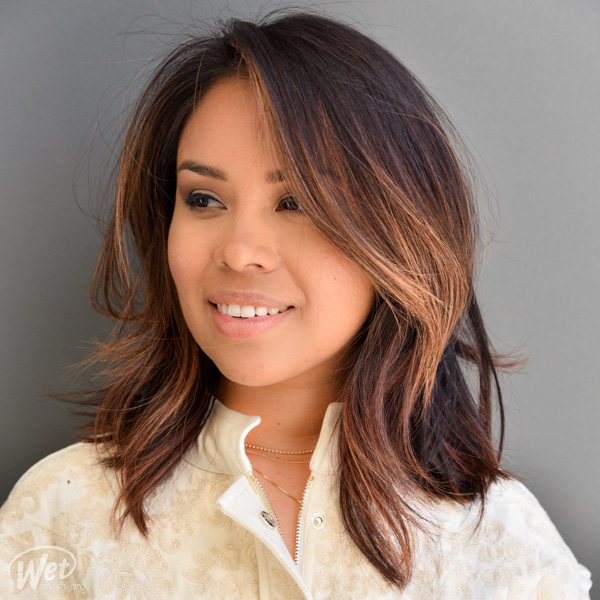
Finished Look
Stop hurting your clients! Here are three steps that make detangling easier.

More from
WetBrush EPIC Professional
-
Celebrity
All The Coolest Hair (And Headpiece, And Crown) Looks From The 2018 Met Gala
-
Celebrity
Anne Hathaway’s Minimal French Twist
-
Celebrity
Emma Stone’s Golden Copper Sideswept Style
-
Blowouts
Blowout Tips and Techniques For Showing Off A Haircut
-
Blowouts
EPIC Professional Heat Wave Blowout Brush
-
New Appointments
JD BEAUTY Appoints Francesca Raminella To EVP Of Global Professional & Prestige
-
Brushes/Combs
Quick Crown Twist
-
Blonde
Transformation: Ash-Toned Blonde Balayage
-
Manufacturer
JD Beauty Announces Acquisition of Bio Ionic®
-
Style Like You Mean It: 10 Styling Finds From CosmoProf 2017
-
Blowouts
WetBrush EPIC Professional Super Smooth Blowout Brush
-
New Appointments
WetBrush EPIC Professional Announces New CEO
-
News
BREAKING NEWS: Finalists Announced for the 2015 Stylist Choice Awards!

