
Pro Secrets: 4 Tips To Customize & Blend Extensions

The Secrets To Customizing Seamless Extensions For Every Client
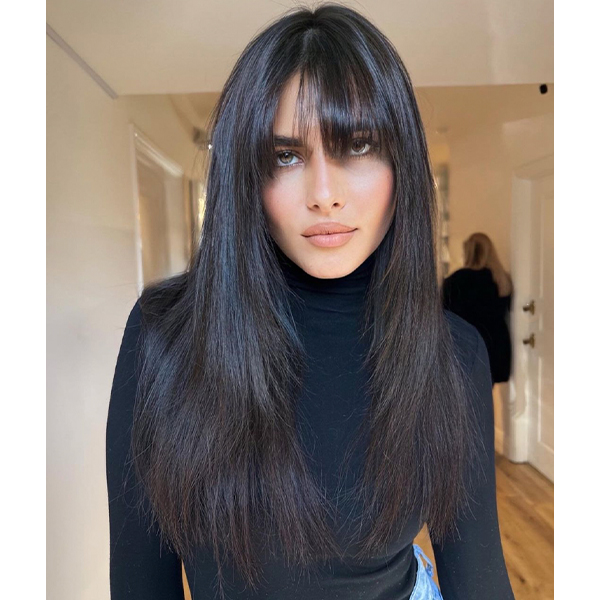
The difference between good extensions and amazing ones is a custom application technique. For customization tips that go beyond color selection, keep reading to learn which techniques to use for the most natural-looking (and IG explore page-worthy) extensions. Grab the ring light and snap those before and after pics—you’re going to want these transformations on your feed.
Take it from the pros, extension experts Drea Jaclyn (@andreahenty) and Isabelle McGuire (@isabelle_bomane) from BOMANE Salon (@bomanesalon) in Beverly Hills share the trade secrets they use on their star-studded clientele. You’ll want to take some notes (or screenshots) from these two—this is insider info you won’t want to miss.
Coverage Vs. Blending Application
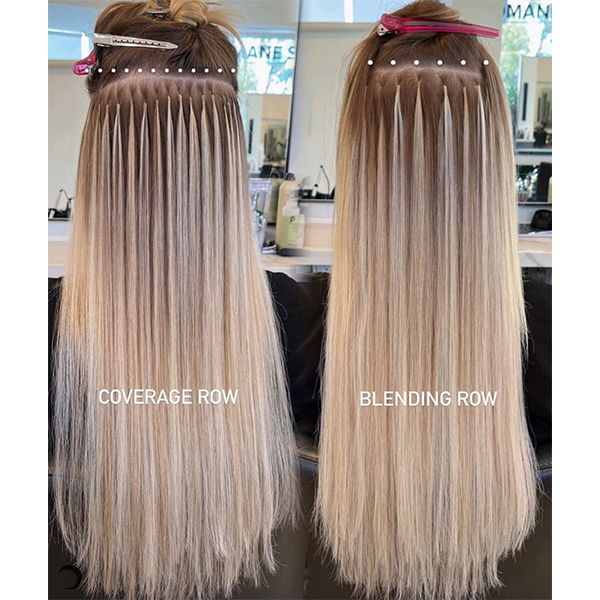
These application techniques are very different—for a reason! Applying extensions should never be one-size-fits-all. Both techniques are designed with specific placements to provide seamless coverage and natural volume.
Coverage Application: In this technique, extensions are applied close together in a unison line. This provides the most coverage from root to end, filling in sparse areas while creating realistic density against the hair.
Blending Application: For this placement, extensions are applied farther apart—only where needed. Each extension can be applied slightly staggered within the row, creating volume and natural texture without a bulky look.
.

Determine Which Application To Use
“I determine which placement to use based on my client’s desired end result,” says Line One Hair extension expert Isabelle. Choosing the right application technique is essential to enhance a client’s natural hair to create their perfect vision.
For Clients Who Want Length: Coverage applications are the way to go! “This will create the most hair coverage possible to blend in their short lengths into the longer ones,” says Isabelle.
For Clients Who Want Volume: Use a blending application to create airy volume for clients who don’t need length added to their hair. This technique is ideal due to the purposeful spacing between each extension to avoid heavy, unblended extensions.
Pro Tip: Clients should love their extensions BEFORE the hair is styled! Never rely on a curling iron for a perfect blend, the hair should be just as seamless when straight.
Learn more about Line One Hair & attend a Masterclass: Click here!
How To Blend Problem Areas
Isabelle says, “Sometimes, I love to use both applications on the same client to blend their natural hair into the extensions.” High traffic areas like the crown and nape of the head can benefit from both techniques to ensure your client’s extensions move with their natural hair without any rows showing.
Pro Tip: When adding length, use the coverage application as normal until you reach the last row in the topmost section. In this section, Isabelle recommends adding in a blending row to avoid any lines of demarcation. Then, at the nape of the head, use this same technique to blend the shorter pieces that sit around the shoulders.
Check out this length + volume transformation using Line One Hair Keratin Tip extensions in shades W1, W3 and C13:
Cutting Techniques To Finish Blending
“No matter what extension type or application I use, I always cut my extensions the same way,” Isabelle explains. “Extension cutting is a very visual process and I love to ensure each piece is perfectly blended to the eye regardless of how I apply them.”
The detailed work of an extension cut can make or break all the time you put into your application. Take these 3 cutting tips from Line One Hair founder Drea Jaclyn:
1. Watch Your Direction: Always slide or point cut extensions to ensure they will lay soft and have diffused texture like natural hair.
2. Connect Layers: Working in vertical sections, slide cut the hair in sections no greater than 1-inch. Be sure to hold the hair at a low elevation for seamless blends!
3. Use Proper Tools: To slide cut, point cut, or detail cut, Drea uses ARC Scissors Paragon II for maximum detail and control when cutting extensions.
View this post on Instagram
READ NEXT: How To Decide Which Type Of Hair Extension To Use On Your Client
More from
Line One
-
Monthly Product Launch List
New Year, New Hair Launches—See The Best Ones So Far!
-
News
The Hottest Hair Product Launches Of Summer 2023
-
BTC Hair Trend Report
Subtle Ombré is The New Balayage—5 Tips You Must Know!
-
Product Launches
The Last Product Launch Before Summer 2023
-
BTC Hair Trend Report
2023 Hairstyling: 11 Trends You Need To Know
-
BTC Hair Trend Report
2023’s Biggest Haircut Trends
-
This Year’s BIGGEST Products: 2022’s Most Talked About
-
Blonde
The Biggest Hair Color Trends Of Winter 2023
-
Bobs
The Biggest Winter Haircut Trends To Kick Off 2023
-
Blonde
Celebrity On-Camera Blonde
-
Accessories
15 Styling Trends That Will Be Everywhere in Winter 2023
-
Fine/ Thinning
Fine Hair: Do You Know How To Handle It?
-
Monthly Product Launch List
7 New Hair Products For Pro Stylists To Try This Season
-
Styling
The HOTTEST Styling Trends Of Fall 2022
-
Product Launches
Our Editors Picked THESE Must-Try Fall Hair Products
-
#ONESHOT HAIR AWARDS
The BTC Show 2022: 10 Things We Saw
-
#ONESHOT HAIR AWARDS
Breaking News: 2022 #ONESHOT Hair Awards Winners
-
Extension Application
Extensions Where? Here’s A Must-Try Tip For Invisible Roots
-
Barbering
5 Genius Blonding, Color + Cutting Cheats To Try Now
-
Celebrity
Is Red Hair Spring 2022’s Hottest Trend?
-
Extension Application
3 Common Mistakes When Color Matching Extensions
-
Extension Application
How To Begin Offering Extension Services
-
Accessories
2022 Styling Trends To Know: Blowouts, Money Piece Braids + Hair Rollers
-
Balayage
15 Hair Color Trends You Need To Know In 2022

