
@prettylittleombre’s 7 Golden Rules For Beautiful Balayage
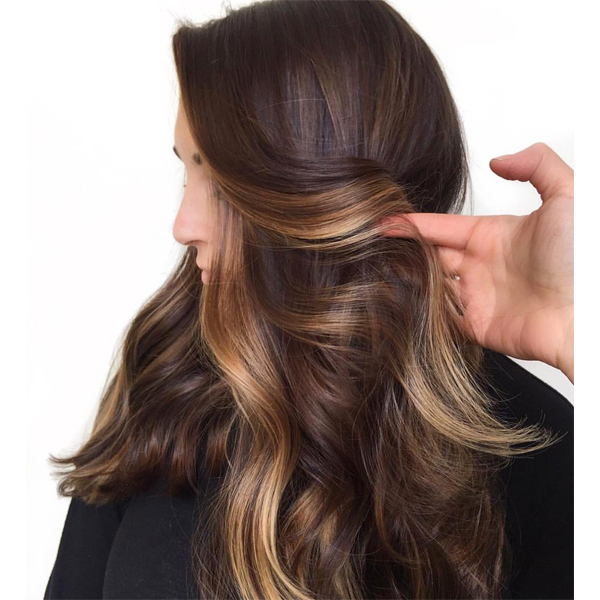

When Jamie Sea (@prettylittleombre) says she’s going live on Insta to talk all things balayage, you can bet we’re going to tune in to hear what our resident balayage expert has to say. Too busy behind the chair to watch? We’ve got you. Here are the seven balayage basics Jamie discussed that’ll help you better your balayage!

1. Avoid Chemical Reactions
Before you apply lightener to your client’s head, Jamie says it’s important to demineralize the hair first—especially if you’re using a clay lightener. Heat plus built up minerals equals a chemical reaction…yikes!
2. Open Air Vs. Insulation
Your starting canvas will determine which processing technique to use.
- If your client’s starting level is on the lighter side, opt for open air balayage to lighten her locks only three levels. And avoid using heat—it’ll dry out faster!
- If your client’s starting level is on the darker side, you’ll want to use a combo of heat, insulation and a strong developer (30- to 40-volume) to give a little more lift and create a brighter balayage. Jamie recommends using balayage film so you can keep an eye on your balayage.
Pro Tip: If she wants more of a subtle, sun-kissed look, use a lower developer.
3. Don’t Be A Heavy Loader
Let the brush do the work for you. Going in heavy-handed with lots of product on your brush will result in a splotchy balayage. Jamie recommends using the back of your hand to wipe of some of the excess lightener, which you can use later. Need some new balayage brushes? Get The Paint Pack today in the BTC Shop for $24.95!
Pro Tip: If you need a little tension as you paint, tilt your client’s head in the opposite direction. That way, any time she moves her head, you have time to readjust and keep the section taut.
4. It’s All In The C Motion
One common balayage mistake? Using a restricted motion (smaller strokes will take you longer to paint). Instead, use your arm instead of your wrist and paint in a C motion, using the body of the brush. When you open it up, you will speed up your application time while creating an instant blur.
5. Why Sectioning Matters
Sectioning is huge for creating dimension and brightness.
- Smaller sections/too much saturation will result in an ombré.
- The more built in lowlight you give will create more of a sun-kissed look.
- For the best dimension, alternate between thin, thick and medium-sized sections.
- Simplify your placement and take thicker sections for a brighter balayage.
- Keep your sections thinner around the hairline for brighter, face-framing sections.
6. How Placement Works
If you don’t know your fundamentals, placement will do nothing for you. Practice on friends and mannequins until you learn how to look at the hair and visualize where depth needs to live. The point of placement is to harmoniously use light and dark together. Become a balayage badass just like Jamie by checking out her 3-video series on BTC University!
7. Bye Bye Brass
Is the transition area too brassy? It means the ends are overly saturated, and your transition area is too thin. Paint the ends first, then lightly feather the product up into the transition area.
More from
Jamie Sea
-
#THEBTCSHOW 2018
5 Tips For Dimensional Haircolor From Redken
-
Balayage
4 Tips For Balayaging On Fine/Damaged Hair
-
Balayage
Brunette Balayage: 4 Common Mistakes + How To Avoid Making Them
-
Balayage
Say NO To Blorange Balayage—Here’s How
-
Balayage
3 Mistakes That Will Ruin Your Balayage
-
Balayage
6 Face-Framing “Money Piece” Formulas
-
Balayage
Updating Balayage for Fall: High-Contrast Dimension
-
Balayage
Face-Framing Balayage by @prettylittleombre
-
Balayage
@prettylittleombre’s Dimensional Balayage + Money Piece
-
Balayage
WATCH 2 Balayage Insta Stars Create High-Contrast Dimension
-
#thebtcshow Austin 2017
3 Balayage Bosses Share Their Tricks
-
#thebtcshow Austin 2017
The Behind The Chair Show 2017: Day 3
-
Balayage
Balayage Surface Painting: 3 Things To Know
-
Business
Start Taking Insta Pictures Like A Pro: 3 Tips From @prettylittleombre
-
Balayage
3 Tips To Slay The Blend
-
Balayage
3 Balayage Problems—Solved!
-
Balayage
@prettylittleombre Swears By These 5 Glossing Formulas
-
Balayage
5 Go-To Glossing Formulas From @prettylittleombre
-
News
The BTC #Squad Spills It All: Color Melts, Balayage & Going Platinum
-
Balayage
3 Bright & Bold Balayage Tips From @prettylittleombre
-
Balayage
Gorgeous Balayage + Stretched Root
-
Events
BTC “On Tour” Takes LA
-
Balayage
@prettylittleombre’s Pyramid of Fundamentals For Client Retention
-
Balayage
How-To: Heavy Balayage, Level 5 Base

