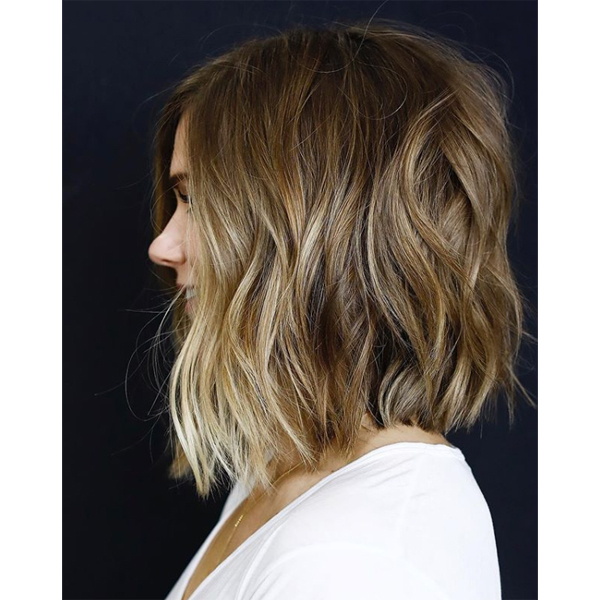
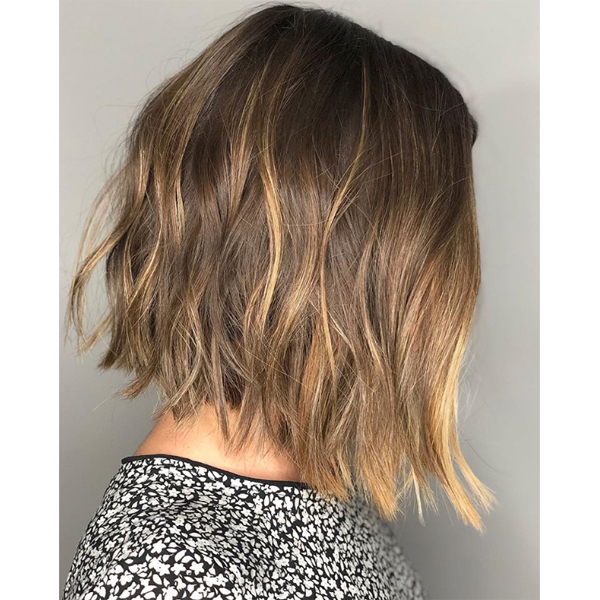
Lived-In Lob By Anh Co Tran: 6 Dry-Cutting Tips

These Tips From Anh Co Tran Will Help You Dry-Cut The Lived-In Lob
What’s THE cut your clients will ask for this fall? It is, and has been, and maybe always will be, the lived-in lob—and you can learn it from “The Lobfather” himself, Anh Co Tran, co-owner of Ramirez | Tran Salon and the creator and master of the most double-tapped lobs on Insta. Anh came to The BTC House in West Hollywood to share his full how-to! Get his dry-cutting lived-in lob tips below, then watch the entire tutorial on BTC University—click here to purchase the video and get unlimited access!
1. Why cut dry? Anh says it’s easier to customize texture to enhance the client’s haircolor—in dry hair, you can see dimension. In wet hair, it’s harder to see this dimension and work with it. For clients with rougher cuticles, Anh recommends blow-drying the hair before cutting, NOT flat ironing the hair. Blow-drying leaves some natural texture in the hair, which is crucial to “reading the hair.”
2. Anh keeps his scissors really loose. Why? It helps him cut more effortlessly and exerts less energy from his wrist. Anh does at least 15 haircuts a day behind the chair, so this tip is really important for him. “You can buy more scissors, but you can’t buy another wrist,” he said.
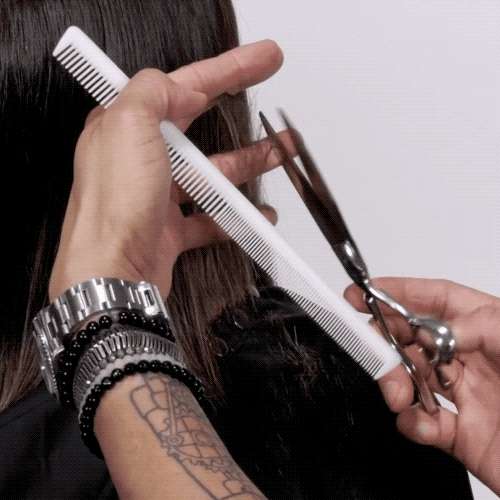
3. Glide through sections easily and keep your fingers safe with Anh’s technique (watch the gif below!): balance the blades of your shears on your ring finger.
4. Anh prefers to remove bulk and texturize with scissors, not texturizing shears, which he feels makes the hair fuzzier. Point-cutting and texturizing with scissors makes the hair lay more uniform and in points, rather than fuzzy and bulky.
5. For super bulky hair, Anh slide-cuts from the mids and ends beginning just below the occipital to keep the hair from popping up. Watch the gif below to see how it’s done.

6. For the most natural-looking texture, point-cut completely vertically while chipping and don’t angle the blades of your scissors.

Ready for more education? Learn how to create a foilayaged money piece HERE!