
Hybrid Hair Extensions: Installation Tips

Hybrid Extensions Pro Tips: Wefts + K-Tips
Are you offering hybrid extensions services? Have you ever HEARD of hybrid extension services? Here’s what you should know: Hybrid hair extension services—combining two or more hair extension application techniques on one client—is a genius way to boost client tickets and offer incredibly customizable extensions solutions to every guest that sits in your chair. Learn WHY hybrid extensions are great for your business and how to do them!
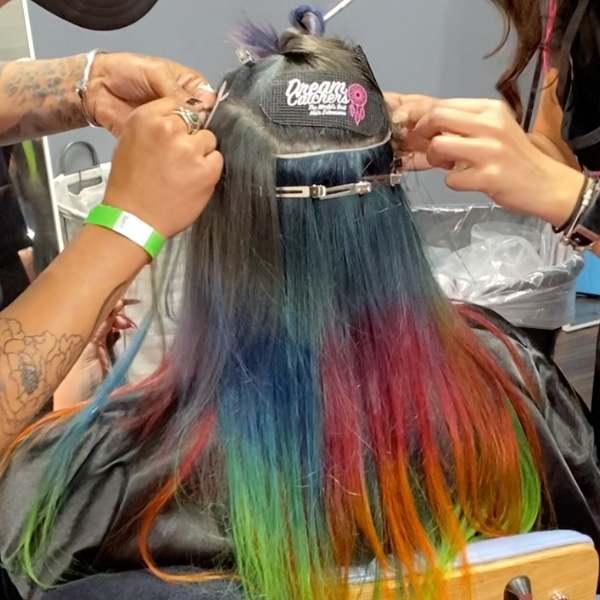
We spotted these tips at the DreamCatchers Hair Extensions Battle of the Strands, where 33 artists competed on 11 teams during a two-day event to create the best looks using DreamCatcher’s NEW K-Tip and Weft extensions. Each team of influencers and DreamCatchers educators had to use both K-tips and wefts on their model, and we got close-up looks at all of their best techniques!
Ready to get certified in Weft + K-Tip extensions? Click here!
Why Are Hybrid Techniques So Great?
Using two types of extensions applications creates a bespoke service for each guest that only YOU can provide, meaning your client isn’t going elsewhere. Here’s what you need to know:
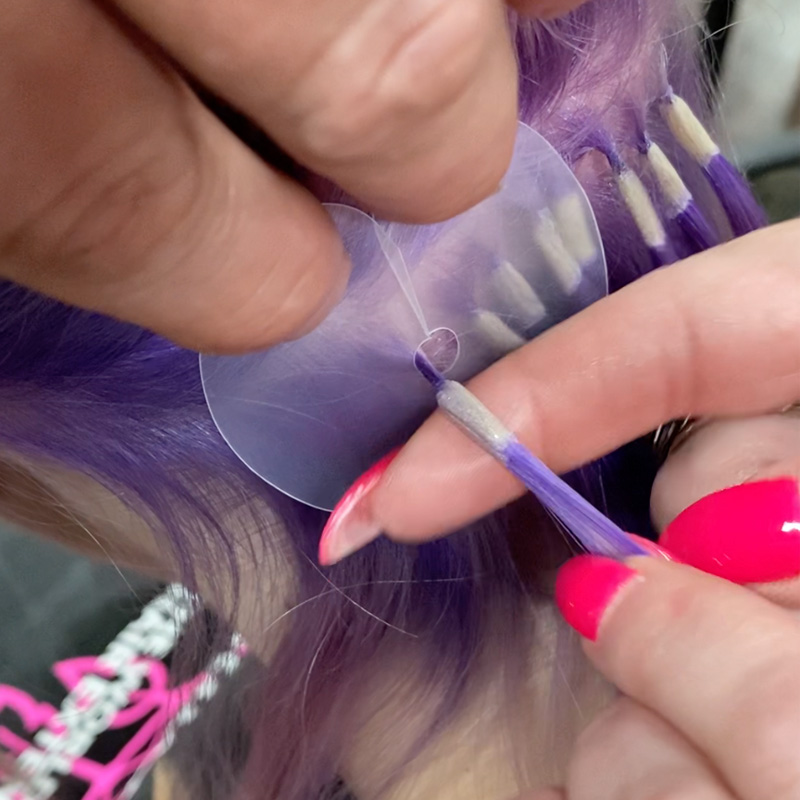
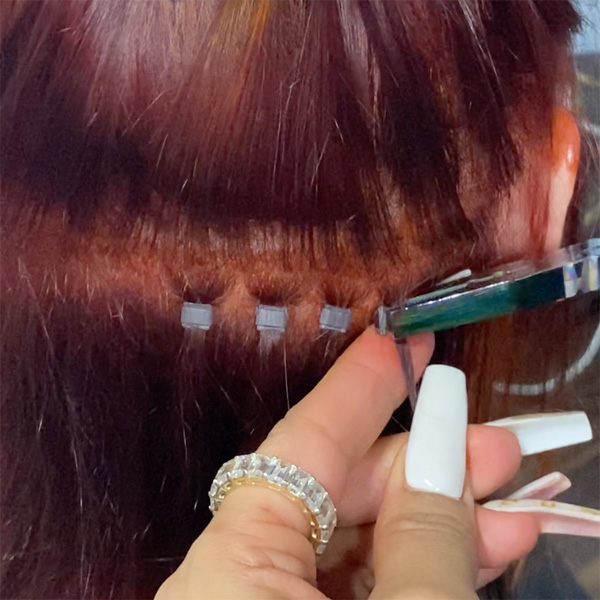
K-Tip Extensions: Individual extensions applied using a hot fusion technique. A heating tool safely melts the keratin tip of the extension onto the client’s hair, then you roll the keratin tip around the hair to encapsulate it. These are great for more visible areas or more delicate areas (such as the temple or nape) because they move more freely. K-tips last 4 to 6 months and do not need salon maintenance—you simply remove them after the allotted time and install fresh hair.
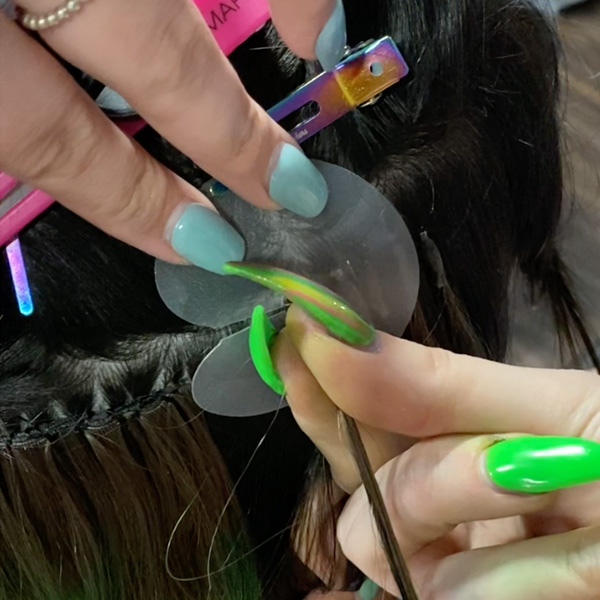
Weft Extensions: A weft is a horizontal strip with hair sewn onto it. These are applied by placing beads onto the client’s head, then sewing the weft around the beads. Weft extensions allow you to install more hair at once, making it ideal for the back of the head. The DreamCatchers Wefts do not have the hair “return” or “beard,” aka the strip of shorter hairs that can poke out on the weft, and they are ultra-thin, so there is no bulk on the head. Weft clients must return to the salon every 4 to 6 weeks to have the beads opened and the wefts moved up.
“These are really what’s going to happen now because we’ll be able to get a lot of volume, density and length really quickly with a few wefts, then fill in everything that needs to be delicate with K-Tips,” said Michael Lowenstein (@rossmichaelssalon).
“Clients with hybrid applications will return to your chair for weft maintenance, cutting down time on the overall service because the K-tips can be left alone,” said DreamCatchers Master Educator Patricia Manriquez (@hairlengthsbypatty). “Just check up on the K-tips, brush them out and make sure everything looks good!”
K-Tip Installation Tips
No Elevation: Keep the section tight to the scalp with zero elevation so you don’t get a bubble in the hair, said Morgan Brack, DreamCatchers Educator (@themorganbrackhair).
Work With Clean Sections: Baby hairs or sloppy sections will cause problems for you AND your client later, said extensions specialist Ashley Blanton (@ashley_bee_bee). “If you are haphazardly putting stuff in, it’s not going to grow out well, you’re going to get mats in the hair and make a lot of work for yourself later,” she said.
Roll The Tip: After you’ve heated up the keratin tip, roll it really well so the keratin encapsulates the entire section of hair you are working on, said Amanda Parrack, DreamCatchers Master Educator (@xamandalpx).
Weft Installation Tips
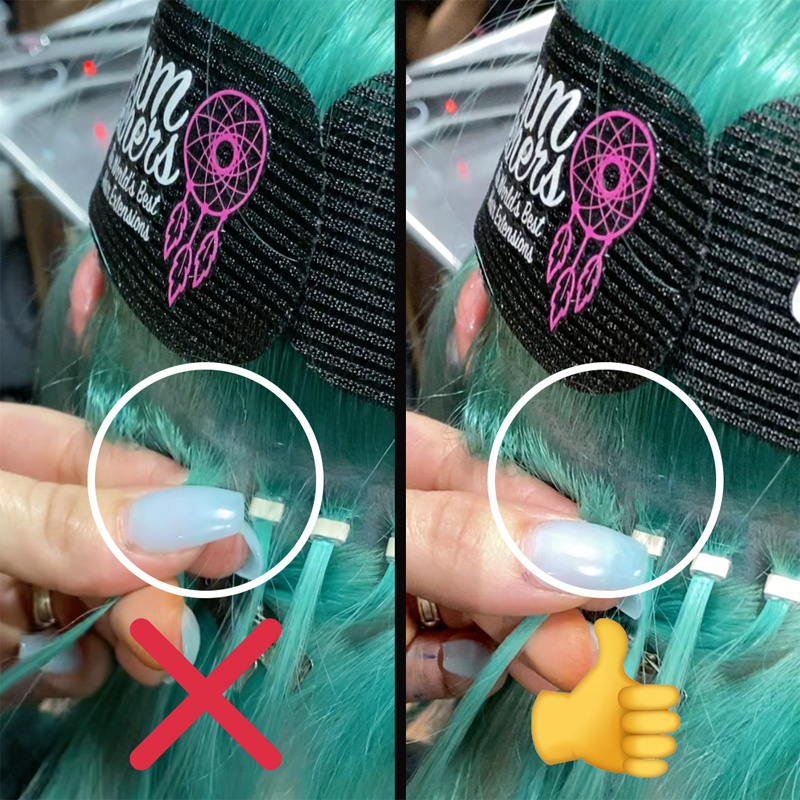
Don’t Pull Too Tight: When isolating a section of hair for to install a bead, don’t tug TOO hard, said Katlin Green, DreamCatchers Educator (@hairbykatlin). If the scalp skin is white, you’re pulling too tight and cutting off blood circulation. Let go of the section, let the scalp be pink, then install the bead.
Sew Carefully: Don’t sew underneath the bead when attaching the weft to the head, said Faith Smoak, DreamCatchers Master Educator (@braidedbalayage). Sewing beneath the bead will raise the weft up and it won’t be flat. Instead, sew on both sides of the bead in a X pattern, so the thread hugs the bead and keeps the weft flat.
Keep Them Undetectable: Remember to evaluate your client’s hairline and avoid getting too close. The general rule of thumb is to work two fingers, or 1 inch, away from the hairline, so when she pulls her hair back, the face-framing hair covers the weft, said @hairlengthsbypatty.
More from
DreamCatchers
-
Color Melt
4 Tips For Coloring Hair Extensions
-
Braids
6 Game Of Thrones-Inspired Braids
-
Brushes/Combs
19 Products We Can’t Stop Obsessing Over
-
Braids
How-To: Dutch Braid Updo
-
Hair Color
How-To: Coloring Extensions
-
Hair
How-To: Party-Ready Faux Hawk
-
News
BREAKING NEWS: Finalists Announced for the 2016 Stylist Choice Awards!
-
Business
Extension Certification Just Got Easier
-
Hair Extensions
Temporary Bangs
-
News
BREAKING NEWS: Finalists Announced for the 2015 Stylist Choice Awards!
-
Hair
4 Tips and Tricks For Creating Upstyles with Extensions
-
Hair
Long, Luscious Hair

