
How-To: Long-Layered Cut and a Seamless Balayage

Everyone loves a long-layered cut! We stopped by the beautiful Anthony Cristiano Salon and got the how-to for long, gorgeous layers—perfect for fall. Here’s how the PHYTO Global Artistic Director creates the cut!

The goal of this haircut is to strengthen the base line
and minimize layers to create a thicker, fuller-looking head of hair.
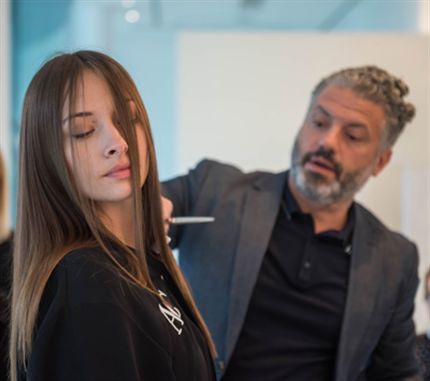
1. First, create the base line and cut the hair at a square, one-length line, turning the head to both sides to maintain the corners as you cut.
2. Moving into the layers, use the density of the hair to determine how many layers the haircut can handle. Working in a concave layering pattern, elevate the hair to above 90 degrees. This helps maintain the weight in the front corners.
3. Then, blend the hair in the front with the back layers by overdirecting the hair back to a stable guideline.
4. Refine the front by having your client lean their head forward so you can carve out the desired shape, working shorter to longer.
5. For final refinement carry out a bit of texture with the head still tipped forward to maintain as much weight as possible.
Pro Tip: When working with hair that falls at the shoulder or collar bone, Anthony suggests turning your client’s head to the side and then having them lean back. This keeps the shoulder out of the way of the cut and allows you to continue cutting evenly.
How-To: Seamless Balayage
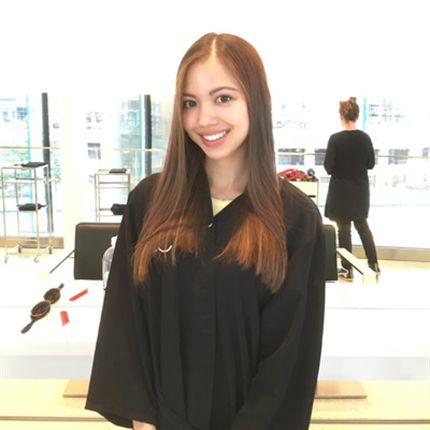
You’ve all had that client, you know the one—she wants a little bit of color but nothing too visible. It has to be seamless and it has to be low-maintenance. Becky Janopoulos, Lead Colorist at Anthony Cristiano Salon had a client come in who hadn’t colored her hair in 10 years, and wanted some subtle balayage. So, she gave us the simple and subtle how-to to make it happen!
PHYTO Color Formulas
Formula A: SUBTIL CRÈME ICE 7IC + 20-volume developer
Formula B: SUBTIL BLOND Lightener powder + 20-volume developer
Pro Tip: Some clients don’t want anything too dramatic and you have to be respectful of that. Becky only used 20-volumer developer because her client made it very clear she didn’t want too much color. So, Becky opted for 20-volume to avoid overlifting.
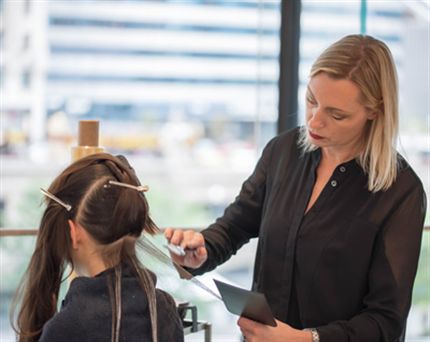
How-To
1. Work up the back of the head in a horizontal pattern. Using V-shaped sections, balayage using Formula A and B.
2. Lock in the color using sheets of cellophane and continue moving up the head.
3. Becky glossed her client with the Level 7 jelly after letting the color process for about 30 minutes.
Pro Tip: Becky balayaged finer pieces at the top. She didn’t do V-shaped sections near the hairline, instead she just focused on painting really delicate strands.
More from
Anthony Cristiano
-
Conditioners
Hydrate + Add Bounce To Dry, Natural Curls
-
Blowouts
Blowout: Dry and Dull to Healthy and Volumized
-
Blowouts
Thicker-Looking Locks For Her
-
Fine/ Thinning
Thicker-Looking Locks For Him
-
Balayage
Ultimate Blonde
-
Hair Color
Rich Red
-
Hair Color
Meche Highlights
-
Brunette
Countoured Curly Color
-
Haircuts
10 Cuts For Every Client In Your Chair
-
Brunette
From Blonde To Brunette In Minutes
-
Styling
From Thinning Strands, To Thicker, Denser Hair
-
Haircuts
5 Tips For Creating Your Best Layers
-
Curly
Curly Cut and Contoured Color
-
Hair
Color Cool Curls Collection by PHYTO
-
Balayage
Ultimate Blonde, ’60s Inspired Chop
-
Curly
Curly Cut and Rich Red
-
News
BREAKING NEWS: 16th Annual Stylist Choice Award WINNERS ANNOUNCED
-
Hair
Long Layers and Meche Highlighting
-
Blowouts
The Supermodel Blowout from PHYTO
-
Balayage
Balayage and Ombré: How Much Should You Charge?

