
Criss-Cross Color Melt


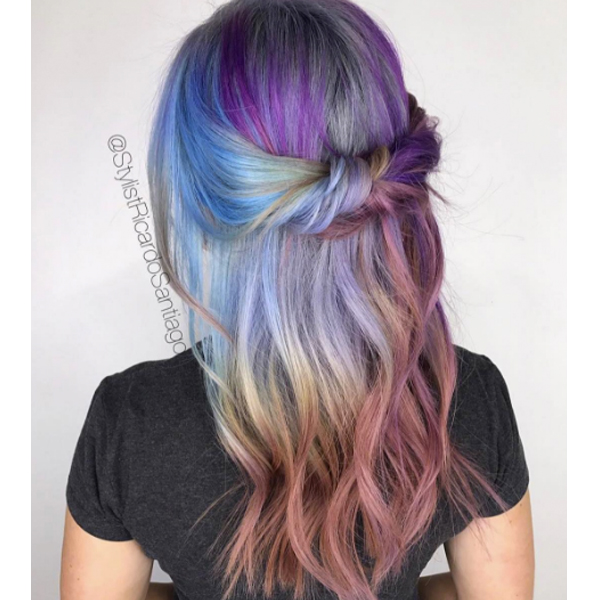
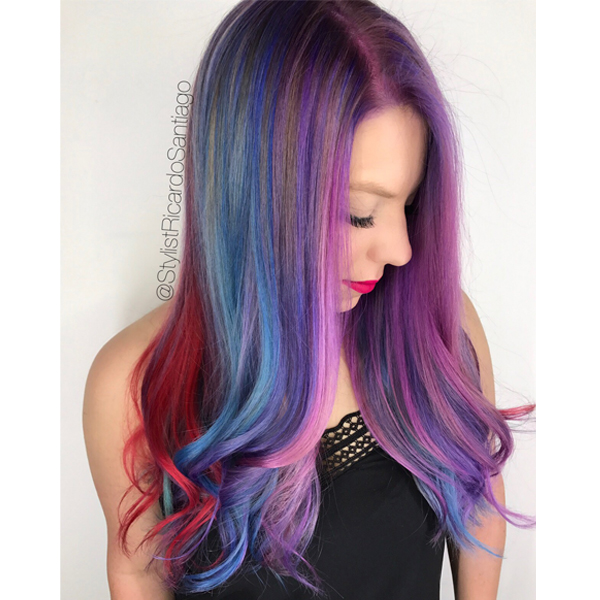
If you’ve ever been to Joico Global Artist and #ONESHOT nominee Ricardo Santiago’s (@stylistricardosantiago) Instagram page, you might have seen looks like this…
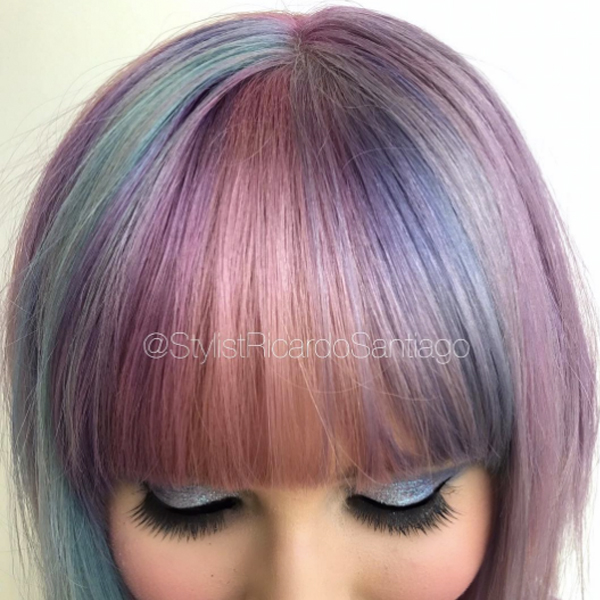
And this…
And THIS….
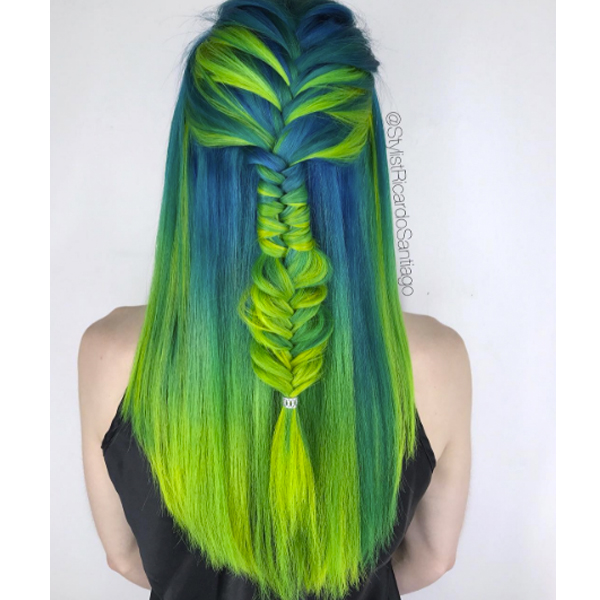
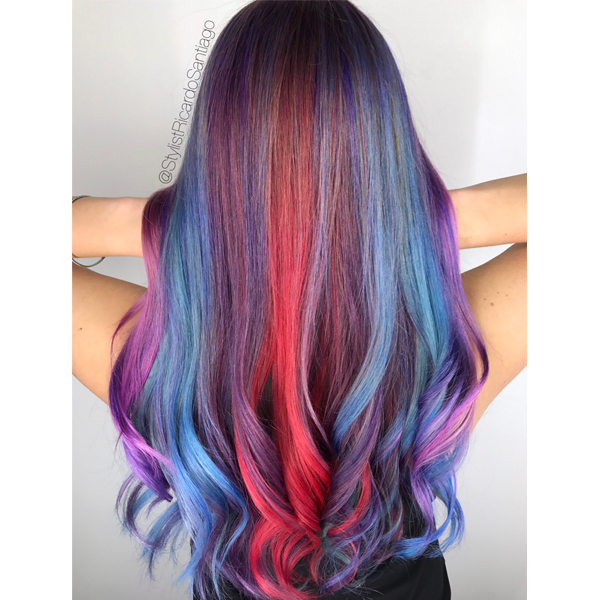
Ricardo’s secret for gorgeous, dimensional color? He uses his signature color melting technique that not only creates a blend down the length of the hair, but around the hair, too. It’s called the Criss-Cross Color Melt—and it looks beautiful with natural or fashion colors.
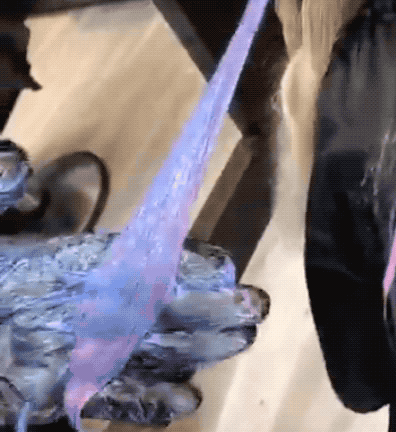
We hosted a Facebook Live with Ricardo, during which he shared his tips for the perfect color melt. To create this specific look, Ricardo used Joico’s NEW Color Butters in Purple, Pink, Blue and Red, diluted with Color Endure Conditioner. Neither a semi nor a demi, these pigmented deep conditioning masks are a happy medium between InstaTint and Color Intensity—lasting about 10 shampoos.
They also:
- fade beautifully and true to tone
- process for just five minutes
- don’t bleed when rinsed
- are a great way to maintain or refresh a pre-existing color
Ricardo’s client wanted to maintain her pre-existing (slightly outgrown) balayage, and this technique is great for a fade out that will return her to her previously invested-in balayage!
Ready to see Ricardo’s technique? Watch the Facebook Live below for the step-by-step.
1. On damp hair, apply a shadow root using the Purple. “I prefer damp hair because it makes it easier to color melt,” says Ricardo.

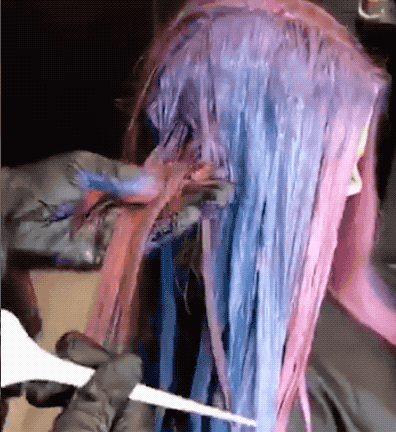
2. Using the ear as a pivot point, create three 1 to 1½-inch sections that fan out from the ear. This will allow the color to better follow the curve of the head. Create a fourth, slightly wider section fanning back, continuing to follow the curve of the head and a fifth, narrower section off the apex.

3. In the first three sections, melt the Pink into the Purple, applying with a brush in a side-to-side motion and using your fingers to blend.

4. Apply the Blue directly over the top of the pink to blend and create a light purple color.
Pro tip: Ricardo likes to subdivide the sections and apply more blue to the first section and less in the next section for a more fluid gradient.
5. Apply Purple to the midlengths of the fourth and fifth sections, continuing to brush using a side-to-side motion and making sure to fully saturate, then apply Blue over the top, melting to the ends.
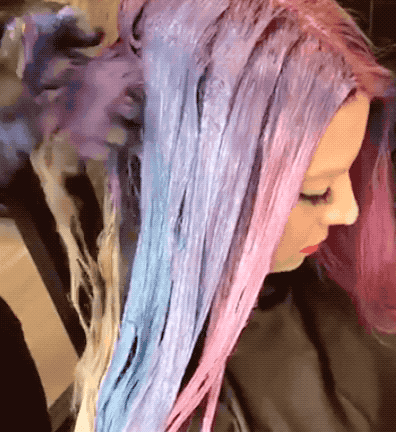
6. In the fourth section, apply Red lightly over the top of the Blue, which will create a more purple/blue. In the fifth section, apply Red to the same area, but use slightly more saturation, which will create more of a red/violet tone.
7. Process for about five minutes, and rinse. Then repeat on the other side of the head.
Watch the whole process!
More from
Joico
-
Balayage
One Step, Three-Layer Multidimensional Balayage
-
Balayage
Sunset Copper Balayage
-
Monthly Product Launch List
The Best Hair Launches Of March 2024
-
Hair Color
Blonde Life® SilverLight™ Lightening Powder
-
Bond Building
Defy Damage® IN A FLASH™
-
Da’Vine Joy Randolph’s Glamour Waves
-
Celebrity
Zendaya’s Classic Volume Bob
-
Celebrity
The Best Beauty Looks At The 2024 Oscars
-
Blonde
Building The Perfect “Summer Blonde”
-
Gray
Make Gray Hair Look & Feel Younger: 3 Tips Every Stylist Should Try
-
Haircare
KBOND20 Defy Damage Power Masque
-
BTC Events
BTC “On Tour” Nashville Recap: Everything You Missed
-
Monthly Product Launch List
The Best Hair & Beauty Launches Of November 2023
-
Haircare
Inner Joi™ Strengthen Shampoo
-
Conditioners
Inner Joi™ Strengthen Conditioner
-
Haircare
Inner Joi™ Strengthen Masque
-
Haircare
Joico Launches Vegan, Naturally-Derived Haircare Line, Inner Joi™
-
Blonde
How To Create A Natural Shadow Root Through Teasing
-
Blonde
“Fake” A Full Foil In 3 Steps: Here’s How
-
BTC Hair Trend Report
Your Guide To Fall & Winter 2023’s Hair Color Trends
-
Blonde
Honey Blonde Curls: 3 Strategic Placement Tips To Create Brightness
-
Hair Color
Bold Color Trends You Need To Know For 2024
-
BTC Events
AI, Mental Health & Social Media: 7 Business Tips You Can’t Live Without
-
Manufacturer
Joico Announces Jeannetta Walker-Rodgers as Global Technical Director

