
How-To: Contour Dusting
How-To: Contour Dusting
Your brunette client wants a fresh summer color that makes her hair look healthy and her bronzed features pop. Here’s what you do—bust out this contour dusting technique to highlight her cheekbones and give her effortless, I-woke-up-like-this hair. Contour dusting is a play off balayage using a light feathering technique that allows you to slowly build color. With strategically-placed highlights, you can sculpt her face without makeup and give her the perfectly effortless summer look she’s craving! Here’s the how-to from Joico Celebrity Colorist Denis de Souza.
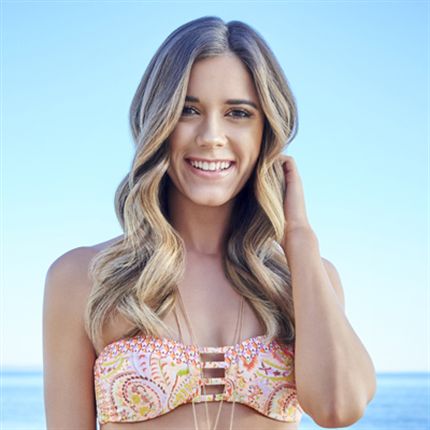
Joico Celebrity Colorist Denis de Souza uses his client’s face shape
to determine the perfect placement of her contouring highlights!
Joico Color Formulas
Formula A: Vero K-PAK Crème Lightener + LumiShine 20-volume developer
Formula B: LumiShine Demi-Permanent Liquid Color ¾ Clear + ¼ 10NG
How-To
1. Determine the client’s natural part. Create three sections of hair—one on either side of her head, and one in the back. Then create a horizontal part at the occipital bone.
Pro Tip: This technique is like balayage, so the ideal viscosity of your color formula will be like cake batter.
2. Starting in the back, pick up a 2-inch section and feather dust Formula A from midshafts to ends, making sure the ends are completely saturated.
Pro Tip: Completely saturating the ends creates brightness and lightness on the underside of the hair.
3. Drop down 2-inch sections at a time and work your way up the head in a bricklay pattern.
4. When working up toward the crown, take smaller sections to help blend the look.
5. Determine where you want to help contour the face and place the highlights to accentuate her cheekbones and jawline. Do a combination of horizontal and diagonal partings to achieve a customized look.
Pro Tip: When working close to the face and hairline, take smaller sections to customize the look. Make sure to use a very light touch with a feathering motion and build the product until you have the desired amount. Use a bigger brush on the bottom sections and a narrower brush on the top sections for maximum control.
6. When working on the front hairline, take a vertical section and feather in a specific amount of brightness around the hairline using light strokes. Repeat the same process on the other side.
7. Let color process until you reach desired lightness level. Rinse and shampoo with K-PAK Color Therapy.
8. Apply Formula B to create the desired tone and add shine and sparkle.
9. Send your client home with Color Balance Blue Shampoo and Conditioner to help prevent brassiness and to keep the tone looking fresh.
See the full how-to!

