
French Balayage Technique: Tips and Tricks

French Balayage Technique: Tips and Tricks
Search #balayage on Instagram and you’ll get 16.5 million results. It’s among the most-requested salon services and is undeniably a money-maker if you can master techniques that achieve balayage-like results. So we went to the inventors of balayage—L’Oréal Professionnel—to bring you everything you need to consider before giving a client balayage-like results. Keep reading for a 360-degree view of how to get effortless-looking dimension!
First, a little history lesson: The word “balayage” means “sweeping” in French, and refers to the motion of sweeping lightener onto hair to achieve results that look naturally lightened by the sun. A Parisian L’Oréal Professionnel salon invented the technique in 1974, so when we were invited to L’Oréal Professionnel’s 110th anniversary event in Paris, we knew we could find the best balayage tips and tricks. More than 1,700 hairdressers came to L’Oréal Professionnel’s founding city to learn and celebrate, and we left with so much knowledge—get everything you need to know below!
Products Used
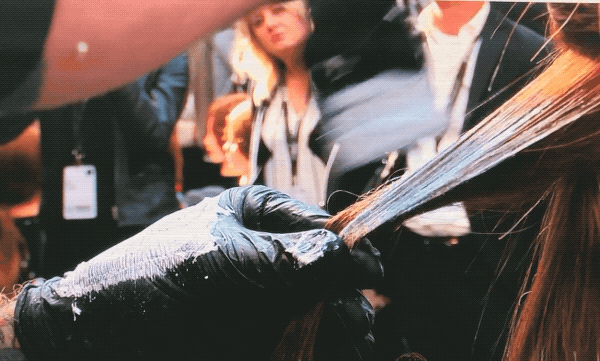
1. Lightener Consistency for Balayage
There are three things to keep in mind when mixing lightener for balayage applications:
- Mix lightener so it has glide to it, but isn’t drippy. L’Oréal Professionnel Artist Sebastian Langman-Kirtley (@sebastiancolorist) prefers a cake frosting consistency—this texture remains easy to work with, but stays where you paint it, so it isn’t seeping through sections and creating spots.
- On finer textures, mix for a slightly looser consistency, Min Kim (@minkimcolorist), L’Oréal Professionnel Artist, recommends. If it’s too thick, you might try to push the lightener around too much, which can cause spotting.
- Regardless of whether you use L’Oréal Professionnel Blond Studio Multi-Techniques, Platinium Plus Freehand Techniques or other lighteners, make sure to keep mixing the product as you work, says L’Oréal Professionnel Artist Sacha de Carteret (@mysacha). This keeps it smooth, wet and easy to work with.
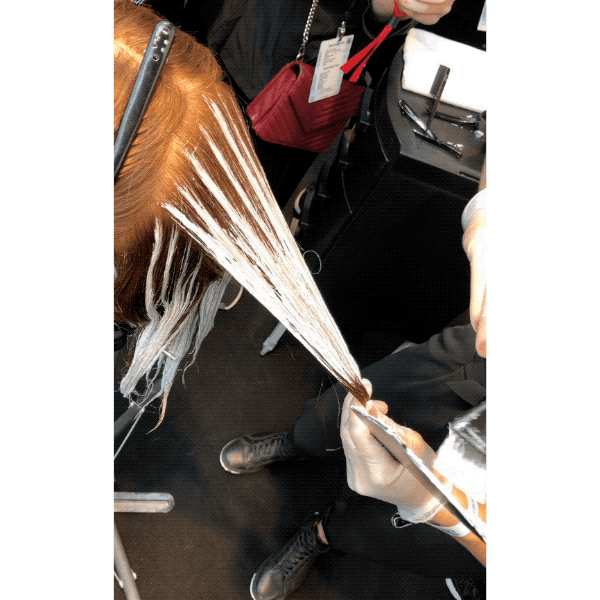
2. How To Hold The Brush To Balayage
Balayage technique depends heavily on how the colorist holds the brush. Here are some tips:
- Hold the brush at a 45-degree angle near the roots and top of the mid-section. This angle deposits less product, which is what gives the transition more blur.
- As you work down the mids and into the ends, hold the brush flat. This allows you to apply more product in these areas, which is what gives the brighter pops of lightness.
- Work clean. Start with less product than you think you need on just the edge of the brush’s bristles. Working clean helps you maintain control.

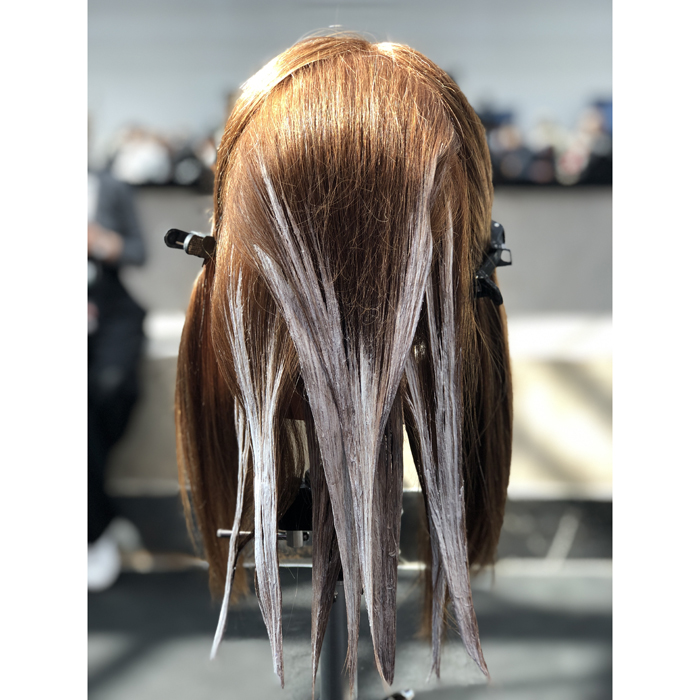
3. Balayage Placement For Different Results
The goal of balayage is contrast—whether it’s soft and sun-kissed or more bold and bright is up to you and depends on section size and placement. A few things to remember as you work:
- “Negative space” (or areas that are not painted) are crucial to achieving the balayage look. Without areas of darkness, the lightness doesn’t look as bright, says L’Oréal Professionnel Artist Peter Thomsen (@chelseahaircutters). Building in negative space is important for the grow-out to look natural and for the finished result to look dimensional.
- Factors that create less light and more shadow: Larger sections, surface painting only.
- Factors that create more light and less shadow: Smaller sections, saturating the underside of the mids and ends.
- Is your client a ponytail lover? Make sure to paint the underside of the section at the nape, even if you’ll be leaving the undersides untouched throughout the rest of the head.
- For more subtle lightness around the face, work in diagonal sections. For super bright blonde, take horizontal sections.
Scroll through the slideshow to see placement for three different balayage results!
4. Choosing A Balayage Technique
Originally, the word “balayage” referred to a specific technique—sweeping product onto the hair and open-air processing. Today, the word is more synonymous with a specific look—sun-kissed, natural and diffused color. So while L’Oreal Professionnel’s roots are in traditional French balayage, that doesn’t mean there aren’t many techniques that can achieve a similar look.
Depending on your client’s hair type, texture, desired finished result and time allotted for the appointment, you may use foils, teasing or other methods to achieve what she wants. Let’s break it down.
- Traditional French balayage: You can achieve brightness with this technique on clients with natural Level 7 or higher hair. For darker-haired clients, traditional French balayage results in warmth. Discuss tones such as gold, caramel and copper with these clients—it’s a technique that offers sbule, sun-kissed dimension.
- Teased balayage: This technique can be used to ensure the ultimate diffusion. Peter explains that he teases lightly and backbrushes to blur. To get closer to the root, create a more compact tease.
- Foil balayage (“foilayage”): Use foils combined with balayage techniques or teasing to get the most lift. This is great for clients who want a lot of contrast and don’t desire super-warm tones.
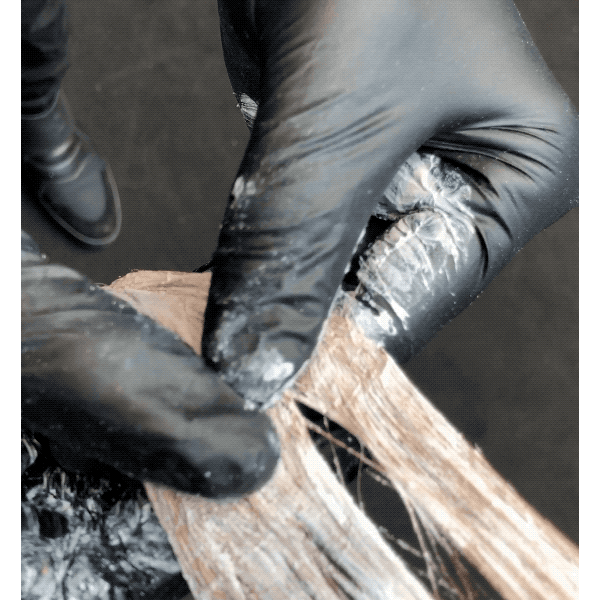
5. Avoid Spots + Achieve Blend
Remember, where you place product is where you’ll get lightness, so work intentionally and cleanly. Here are some tips for achieving balayage without dreaded spots.
- Dry Brush: Keep a dry brush on hand to blend and remove product. “It’s less lift than a more wet application, but offers a lot of tonality and movement,” Sebastian says.
- Planchette: Use the planchette to your advantage. It’s perfect for ensuring full saturation on the mids and ends because you can place product onto the planchette, lay the hair on top of it, and then place more product onto the hair.
- Don’t Drop ‘Til You’re Done: Step back and look at the section you’re painting, and don’t drop it until you feel like you’re finished, Sebastian says.
Watch a French Balayage class from the L’Oréal Professionnel event!
More from
L'Oréal Professionnel
-
Manufacturer
L’Oréal’s Professional Products Division Announces The Texture Of Change Movement & Petition
-
Copper
Dark Auburn
-
BTC Events
AI, Mental Health & Social Media: 7 Business Tips You Can’t Live Without
-
Balayage
Your Official Guide To Barbie Blonde
-
Industry News
L’Oréal Professionnel Launches Head Up for Mental Health Awareness
-
Brunette
Trend Breakdown: Hailey Bieber’s Glazed Brunette
-
Balayage
HONEY BLONDE CURL FORMULA
-
Color Depositing
How To Formulate Coppers Without Lightener
-
Blonde
Curly Copper Color Block
-
Balayage
Wet Balayage: 4 Tips To Pick Up The Pace
-
#ONESHOT HAIR AWARDS
The BTC Show 2022: 10 Things We Saw
-
The BTC Show
#THEBTCSHOW 2022
-
Balayage
Are You Using Mesh Panels For Curly Balayage? Here’s Why You Should Be!
-
Elevate Brunettes With “Glow” Highlights—Here’s How!
-
New Appointments
L’Oréal USA Announces New Executive Changes
-
Product Launches
Monthly Launch List: EARTH MONTH 2022
-
Celebrity
The Best Hair & Beauty Looks From The Oscars 2022
-
Celebrity
Julianne Hough’s Twisted Chignon at the Oscars
-
Alana Haim’s ’70s Inspired Oscars Waves
-
Awards Shows
Maude Apatow’s Loose Waves On Short Hair
-
Curling Irons/Rods
Steampod
-
Awards Shows
2022 SAG Awards: The Best Celebrity Hair + Beauty Looks
-
Industry News
David Greenberg Appointed As CEO of L’Oréal USA
-
Celebrity
Win A Year Of Professional Training + A Photoshoot In NYC

