
5 Tips & Tricks for Dry Cutting Extensions

5 Tips & Tricks for Dry Cutting Hair Extensions
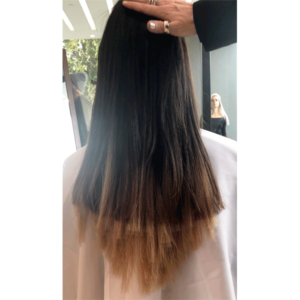
Client looking for volume or longer locks? Hair extensions are the perfect solution for body and length. Once application is finished, blending the client’s natural hair with her newly placed extensions is the definition of a flawless finish. We know that dry cutting extensions can be a little intimidating, so we had Great Lengths National Educator Nanci Lee (@nancileehair) stop by the BTC house in Los Angeles to share some tips and tricks to help when dry-cutting hair extensions to achieve a beautiful blend.
Products Used
How much do hair extensions cost? And how much should you charge? Click here!
1.Create a Visual Guide as You Work
Dry cutting extensions is a visual process, not technical cutting. Your goal is to create a beautiful blend between the extensions and the natural ends of the client’s hair and to remove weight, Nancy explains. Sectioning the hair before dry-cutting could lead to removing more hair than needed. Begin on the top layer and focus on a small section at a time. Cut and remove the weight from each small section and take a step back to look before moving on to more dry cutting.
2.Shears v. A Razor: Choose What Works for You
“Dry cutting and blending with shears can offer more control when texturizing a client’s ends,” Nancy explains, “while a razor can sometimes take off too much weight quickly.” It is always better to be light-handed when dry cutting because it is easier to remove hair then add hair if too much has been removed too quickly. Razors are good to remove a lot of bulk at one time, such as excess length on the bottom, while shears allow for more movement and control with smaller sections of hair.
3.Try and Keep a Light Hand
Make small adjustments to your technique to avoid being too heavy-handed (and scaring your client for cutting off all the hair you just installed!) “Don’t drag your shears down through the hair,” Nancy begins. “Instead, take the hair, small section by small section, and work from the middle to ends. This helps preserve the length at the top.” Blending shears that have a lot of teeth minimize the amount of hair that is removed, so you can gently open and close the shears to remove any bulk instead of dragging them through the hair.

4.Use This Technique To See What You’re Doing
How do you get more control and a better view of how much hair you are removing? Use Nanci’s technique: For each fresh section you are blending, comb to smooth it out and rotate your hand so the section lays horizontally instead of vertically.
5.Be Patient
“Patience is key,” Nanci state. “Clients always appreciate when we take our time behind the chair so don’t rush the service.” Nanci also suggests finishing the initial cut, style the hair how the client would wear it every day, then go back to cross-check. Even after a few days once the extensions have been washed, have the client pop back in for a recheck since washing could change the way the extensions blend and lay with the client’s natural hair.

