
Transitioning From Foils To Balayage [VIDEO + FORMULA]

Your foil-devoted client comes in and says she’s ready for a root smudge and balayage. How do you handle a client transitioning from foils to balayage? Jamie Sea, aka @prettylittleombre, has some tips you have to try.
The Consultation: Turning Highlights Into Balayage
First thing’s first when doing a foil conversion: there are many ways to do it, but the end result will always depend by your client’s hair goals, their existing color and their hair integrity. That means that the consultation is crucial. “Consult first, see if the end goal is appropriate for the guest, and talk about realistic expectations.” Jamie says.
You’ve also got to know your guest. Some clients love being very blonde. “In this case, bringing in a darker root might be tricky,” Jamie says. “I would suggest smudging the root down in a teardrop section and keeping the brightest blonde right around their face.”
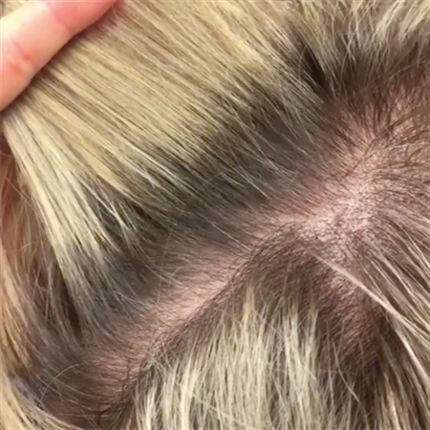
Transitioning From Foils To Balayage
Watch Jamie knock out this heavy foil conversion. She started with a Level 7 and took her to a Level 9/10.
Color Formulas
- Formula A (color melt): Joico LumiShine 7BA + 10-volume developer
- Formula B (paint): Scruples POWER BLONDE Balayage Clay Lightener + 10-volume developer + b3 Brazilian Bond Builder
Balayage Application
- Apply Formula A and comb through the line of demarcation left by the foils.
- After painting with Formula B, blur the two formulas together. End result: no lines!
Remember, oversaturation may be a factor. Take into consideration what level you are working with. Level 1-4 = red— level 5-7 orange— level 8-10 yellow.
Don’t stop here! Discover how to eliminate lines of demarcation and create the perfect balayage blend:
More from
Jamie Sea
-
#THEBTCSHOW 2018
5 Tips For Dimensional Haircolor From Redken
-
Balayage
4 Tips For Balayaging On Fine/Damaged Hair
-
Balayage
Brunette Balayage: 4 Common Mistakes + How To Avoid Making Them
-
Balayage
@prettylittleombre’s 7 Golden Rules For Beautiful Balayage
-
Balayage
Say NO To Blorange Balayage—Here’s How
-
Balayage
3 Mistakes That Will Ruin Your Balayage
-
Balayage
6 Face-Framing “Money Piece” Formulas
-
Balayage
Updating Balayage for Fall: High-Contrast Dimension
-
Balayage
Face-Framing Balayage by @prettylittleombre
-
Balayage
@prettylittleombre’s Dimensional Balayage + Money Piece
-
Balayage
WATCH 2 Balayage Insta Stars Create High-Contrast Dimension
-
#thebtcshow Austin 2017
3 Balayage Bosses Share Their Tricks
-
#thebtcshow Austin 2017
The Behind The Chair Show 2017: Day 3
-
Balayage
Balayage Surface Painting: 3 Things To Know
-
Business
Start Taking Insta Pictures Like A Pro: 3 Tips From @prettylittleombre
-
Balayage
3 Tips To Slay The Blend
-
Balayage
3 Balayage Problems—Solved!
-
Balayage
@prettylittleombre Swears By These 5 Glossing Formulas
-
Balayage
5 Go-To Glossing Formulas From @prettylittleombre
-
News
The BTC #Squad Spills It All: Color Melts, Balayage & Going Platinum
-
Balayage
3 Bright & Bold Balayage Tips From @prettylittleombre
-
Balayage
Gorgeous Balayage + Stretched Root
-
Events
BTC “On Tour” Takes LA
-
Balayage
@prettylittleombre’s Pyramid of Fundamentals For Client Retention

