
BTC Exclusive! @Jesstheebesttcolor’s Secrets to Beach Balayage Perfection
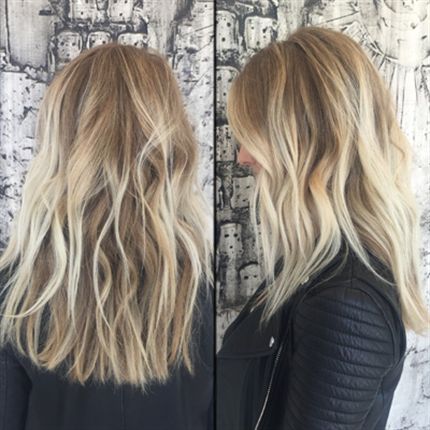

When PRAVANA’s Caisa Airmet decided to spend the summer as a balayaged beach babe, she knew there was just one colorist for the job. So she headed to Sally Hershberger L.A. in West Hollywood for a rendezvous with Jess Gonzalez, aka @jesstheebesttcolor, for Jess’ signature summery blonde. Jess churns out sun-kissed locks all day from her bright perch in Sally’s salon—for models, DJs and other assorted it girls like Kylie Jenner’s bff Pia Mia and designer Sami Miró.
As PRAVANA’s Digital Director, Caisa’s always up for a new hue, and at any given moment she might snap a selfie sporting an orchid, pink or mint shade. When she visited Jess, she was close to her natural Level 6/7, with some remaining strands of mint in the mix.
Jess accomplished the bright and beachy look in three steps:
1. She did a roots-to-mids base bump with PRAVANA’s Ultra Hi-Lift Ash + Zero Lift Developer, then processed for 15 minutes.
2. She balayaged with two different bowls of PRAVANA Pure Light Balayage Lightener—one with Pure Light Balayage Activator High and one with Pure Light Balayage Activator Medium, alternating the two and concentrating the Medium on the ends.
3. She glazed with PRAVANA ChromaSilk Express Tones ½ Clear + ½ Ash roots to mids and ¾ Clear + ¼ Pearl on the ends.
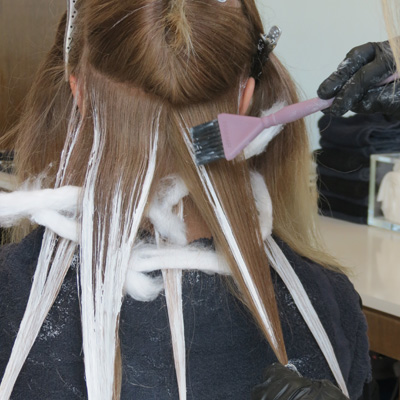
Jess worked up the head in horseshoe sections and used a bricklay pattern for control. She left plenty of space in-between sections for dimension. She employs a freehand application, except on the ends, where she uses a board. She separates sections with cotton and self-adhesive PRAVANA Meché sheets.
Here are more of Jess’s beach balayage secrets:

1. Create three heavily balayaged sections below the occipital, lifted with Pure Light Balayage Activator Medium, to anchor the color.
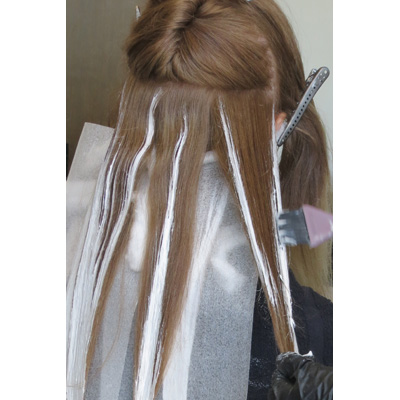
2. While balayaging, pinch the end of the section and hold it taut as you brush on the color.
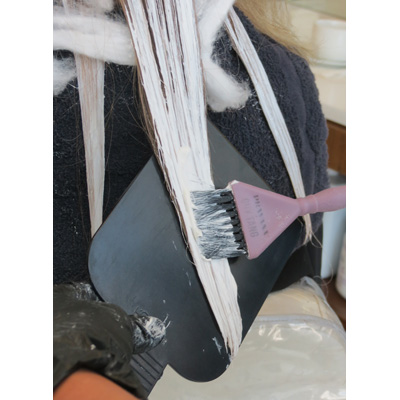
3. Place the ends on a board for a more saturated color, and use a lower level of developer on the ends, since they’re already lighter than the scalp and midlength sections.
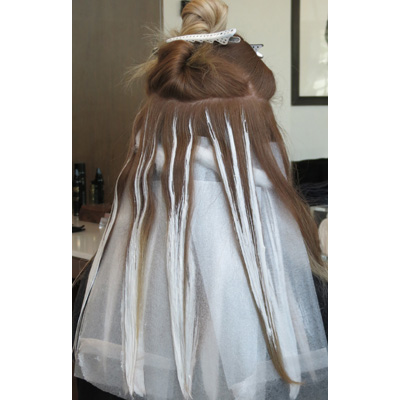
4. Change up the application pattern from section to section—some Y-shapes, some “forks.”

5. Extend the bleach all the way to the scalp on the hairline sections so the client sees highlights when she puts her hair up. These sections should be fine and delicate.
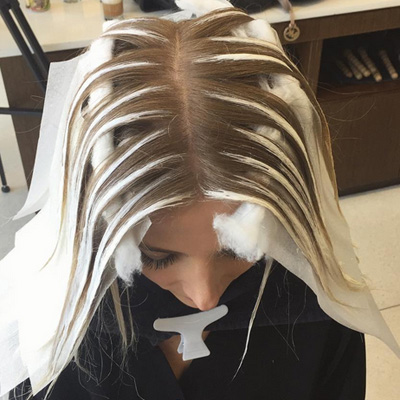
6. On the top sections, feather the bleach into the root for subtle gradation.
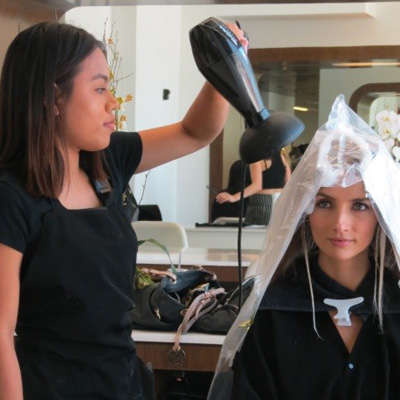
7. To speed up processing, cover the hair with plastic and apply heat with a diffuser.

8. Keep your brushes as clean as possible while you work—wipe them off after each stroke.

