
Braid Parade: Your Big, Fat, Fabulous Resource for Everything on Your “Plait” – Part 1


Merging a fishtail with a three-strand gives this edgy side braid a fresh twist. (Image courtesy of Jenny Strebe.)
Once the hairstyle of choice for Swiss milkmaids and mischievous Swedish schoolgirls, braids have evolved and emerged as the epitome of cool. Why? In a word—versatility! They come in all shapes and sizes; they’re equally at home at a riotous music festival or a black tie gala; they can contain, anchor or embellish any style and they play nice with other go-to hairstyles like ponytails and chignons. Right now? Think soft, loose, free-spirited and Bohemian.
So warm up those fingers and get ready to do the twist! Here is a complete guide to just about every type of plait on the planet!
“I usually save the braids until the end when doing updos, so they don’t get lost in the hair.” —Stephanie Brinkerhoff. (Image courtesy of Stephanie Brinkerhoff.)
12 Tips for Braiding Like a Boss
1. Section As if Your Life Depends On It! Cause it kinda does. “Section, and clip away the hair you are not working with,” advises Jennifer MacDougal, L’Oreal Professionnel Artist, “so you only grab the hair that will be incorporated into your braid.” Sarah Potempa, Celebrity Stylist and Owner of Sarah Potempa, adds “Sectioning with my Darby Clips keeps me organized. If you are sloppy, one bad section can expose the scalp and ruin the whole look.”
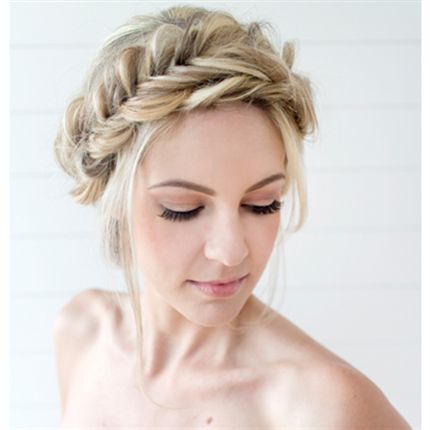
2. Save the Best for Last. “I usually save the braids until the end when doing updos, so they don’t get lost in the hair,” notes BTC’s Resident Bridal Expert, Stephanie Brinkerhoff.
3. Find Your Rhythm. Establish a rhythm, shares Sam Villa, Redken International Artistic Director. “Rhythm for me is very simple,” he explains. “For example, when I teach knot-tying, I tell stylists, ‘Palms, Knuckles, Value (create a value sign with your index and middle finger), Anchor, 90 (lift to 90 degrees), Thumb (cross the hair over the thumb), X (make an x) and tie.’ If they keep repeating those words as they work, they fall into the rhythm.”
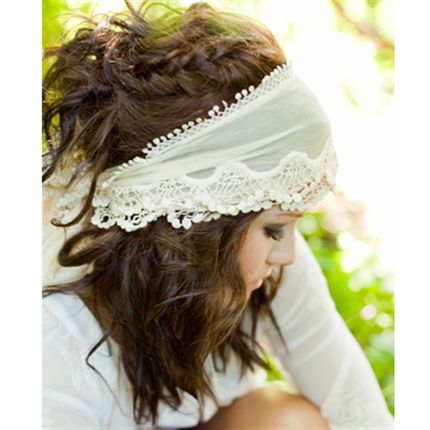
Braids are a staple of festival fashion, often featuring accessories such as scarves and flowers. (Photo courtesy of Stephanie Brinkerhoff.)
4. Brush Up. If the braid looks too perfect, gently rub it with a clean toothbrush to untidy the style, suggests Jim Markham, ColorProof Evolved Color Care Founder and CEO.
5. Use your Comb! Using a comb to create solid, clean partings will be more effective than using your fingers, shares Steph.
6. The Directional Blow-Dry. Root direction will determine how your braid sits on the head, says Sam. So if you’re braiding front to back, for example, direct the hair back when drying.
7. Smooth Moves. “If you smooth each section of the braid as you go, you’ll prevent it from looking like a frizzy mess when you’re finished,” says Steph.
8. Curl Cue. Use a 1- or 1½-inch curling iron to add a slight bend, advises Jenny Strebe, @theconfessionsofahairstylist and BTC Brand Ambassador. “This is ideal if there are lots of layers,” she notes. “The bend allows the hair to fold easily into the braid shape.”

During Fashion Week, braids are the bomb because they allow stylists to change hair quickly and radically. (Image courtesy of UNITE.)
9. Seal the Deal. “I always blowout the hair before braiding to seal the cuticle,” says Joseph DiMaggio, North America Master Session Ambassador for Davines. “I start 90 percent of my styles with a smooth blowout with a round or flat brush. If I want to create a messier texture, I do it later with product or my hands.”
10. Box Your Fishtail. Upgrade your fishtail braid with a box fishtail. “Divide the hair into two sections like you would with a fishtail braid,” explains Sarah, “but instead of grabbing a piece from the left and crossing it over, separate the piece on the left, then cross one strand over to the right and the other one under to the right. In essence, you’re fishtailing the top and the bottom. Repeat on the right and continue. The effect will be a three-dimensional fishtail.”
11. “Pressed” for Time. “Use a flat iron on the ends of the hair to give braids a beachy, wavy look,” suggests Tammy Mixon, Farouk Systems Global Board Artist. “You can also press the braid with the iron to create a quick set, rather than spending a lot of time curling the hair.”
12. True Grit. Braids need texture, says Jenny. If the hair is too silky or limp, it’s difficult to pull strands apart or create heft. “Apply mousse or salt spray, such as label.m Sea Salt Spray, to damp hair before blow-drying,” she advises, “and you’ll create the gritty texture you need.” Other options? ColorProof Evolved Color Care’s TextureCharge™ Color Protect Texture + Finishing Spray to add volume and a bit of grip, or a texturizing crème such as ColorProof FiberBlast® Texture Crème to provide texture and hold while minimizing flyaways.
Learn more from the best in braiding by subscribing to Behind The Chair On Paper—now available for download on our free magazine app!!
More from
Stephanie Brinkerhoff
-
Bridal
4 Bridal Styling Mistakes & How To Solve Them
-
BTC University
Bridal Client Struggles? How To Book, Schedule and Handle Brides
-
Beachwaves
Boho Bridal Crown Braid
-
Bridal
8 Bridal Styles You Can Learn Right Now
-
Bridal
Bridal Stylists: 5 Tips For Working During A Pandemic
-
Beachwaves
7 Articles That’ll Take Your Styling Game To The Next Level In 2019
-
Bridal
5 Photography Tips That’ll Elevate Your Bridal Styles
-
Bridal
7 Tips For Perfectly Imperfect Bridal Styles
-
Bridal
Bridal Stylists: This Chart Will Make Consultations So Much Easier
-
Braids
@hairandmakeupbysteph’s Crown Braid
-
#thebtcshow Austin 2017
Want To Keep Your Blondes Blonde and Your Upstyles Solid? Read This…
-
#thebtcshow Austin 2017
The Behind The Chair Show 2017: Day 3
-
#thebtcshow Austin 2017
TRUMATCH by Daniel Alain at #thebtcshow
-
#thebtcshow Austin 2017
The Behind The Chair Show 2017: Day 2
-
#thebtcshow Austin 2017
Kenra Professional at #thebtcshow
-
Bridal
3 Bridal Style Issues: Solved
-
Bridal
5 Bridal Styling Tricks You Should Be Using
-
Bridal
Every Upstyle Should Start With This…
-
Braids
Beachy, Five-Strand Braid
-
News
The BTC #Squad Spills It All: Color Melts, Balayage & Going Platinum
-
BTC COLOR, Cut & Style Show
COLOR, Cut & Style 2016
-
Hair Extensions
BTC Exclusive! TRUMATCH Hair Extensions
-
BTC "On Tour"
BTC “On Tour” LA 2017
-
Bridal
How-To: 4 Upstyles For Wedding Season

