
Barbers: How To Fade Out Dents
Watch & Learn How To Fade Clients With Natural Indentations
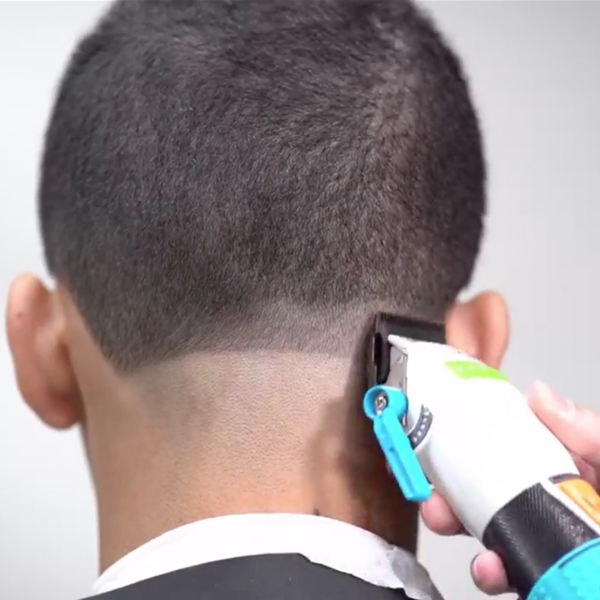
Can’t seem to get the blend right on clients with natural dents when fading? No problem! BaByliss Pro Artist Sophie Pok (@staygold31) walked us through her entire process, plus we grabbed tips on how she starts her fading guideline off, why she prefers to fade with the blades open and her go-to guard to blend out dents. Watch the full tutorial above, keep scrolling for the tips and the finished result!
CLICK HERE To Purchase & Customize Your Own BaByliss Pro Custom FX Clipper & Trimmer!
Create A Higher Guide Line
When dealing with clients with dents or grooves in the back of the head, create the starting fade guideline higher than normal so the fade starts around where the client’s natural indentations are for an easier blend. There are a few things to keep in mind when determining the start of the fade line:
- the client’s natural growth pattern
- the client’s neck length
- the distance from ear to ear
- and the lowest patch of hair density when creating a low fade
Pro Tip: Sophie recommends anyone new to fading start by creating wider guidelines—about an inch in thickness. They’re easier to blend out for beginners.
Check Out The Before & After!

Start Fading With The Blades Open
It’s easier to start fading with the blades open, and then tighten up the section with them closed. The more open the blades, the less hair will be removed. It’s better to take more hair off, than to mistakenly take off too much.
Do This To Blend Out Dents
After going over a section, if Sophie notices a darker patch of hair that’s usually where the indentation is. To remove, she switches to a .5 guard or lower to help blend out the dents in the head.
Watch The Entire 50-Minute Fading Tutorial Here!
Products Used
More from
BaByliss Pro Barberology
-
Blowouts
Bob Styling Guide: 5 Ways To Style Short Hair
-
Fades
Line Ups: Dos & Don’ts Every Barber Should Know
-
Barbering
Clipper & Trimmer Blade Guide: When To Use Each One
-
Barbering
2023’s Top 9 Hair Trends For Men
-
Barbering
4 Pro Barbering Tips You’ll Want In The Shop
-
#ONESHOT HAIR AWARDS
The BTC Show 2022: 10 Things We Saw
-
The BTC Show
#THEBTCSHOW 2022
-
Barbering
5 Genius Blonding, Color + Cutting Cheats To Try Now
-
Blow Dryers
ROSEFX Dryer
-
Barbering
Barbers: How To Create Custom Clipper-Cut Designs
-
Barbering
Men’s Cutting: 3 Techniques For Better Blends
-
Barbering
Watch: How To Seamlessly Blend Tapered Fades

