
Balayage “Singles”—The Technique For Natural Ash Summer Blondes

Balayage “Singles”—The Technique For Natural Ash Summer Blondes
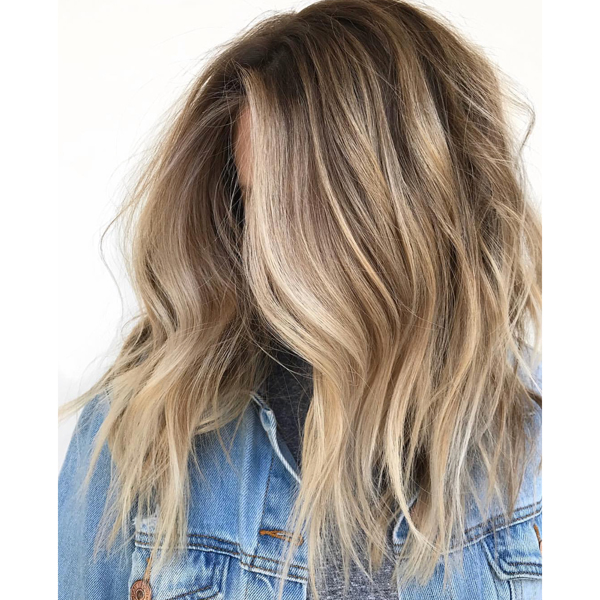
Real talk, even though balayage is popular all year long, you have more clients than ever coming in right now requesting the technique—and they want to be lighter, brighter and blonder. But, how do you eliminate warmth at the root? How do you reach the ash blonde level? And, how do minimize that dreaded line of demarcation?
We talked with BTC team member Jamie Sea (aka @prettylittleombre) and Redken artist + balayage expert Lori Zabel (@lorizabel) for their take on creating bright, natural-looking summer blondes. Their answer? A balayage technique that includes even saturation and doesn’t have a specific direction of brightness. Scroll down for the details!
Products Used
OK, so you’re seeing warmth at the root. Here’s why:
- You’re using a V, W, or slanted placement pattern (aka painting for an intentional direction of brightness). This results in warmer, diffused roots, and isn’t ideal for a client who wants to go bright all over.
- You’re blending the lightener too much at the root, and when you blend the product, you remove some of the lightener.
Here’s How To Fix It:
If the desired end result is to be blonde from roots to ends, the same amount of product needs to be applied over the entire section of hair.
- Jamie breaks it down like this:
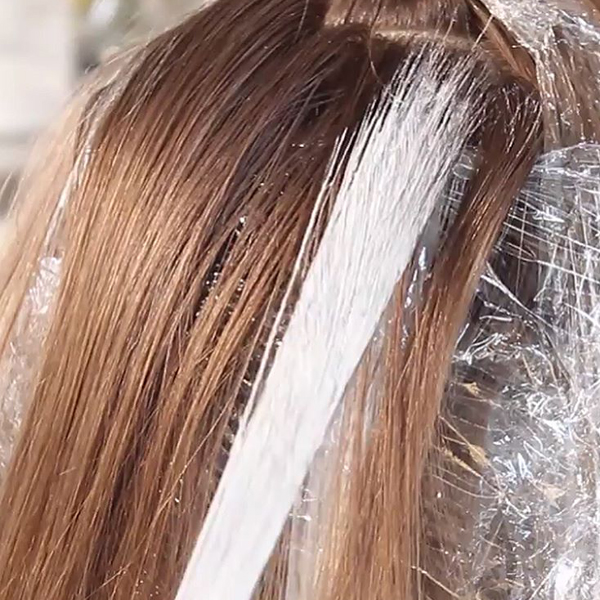
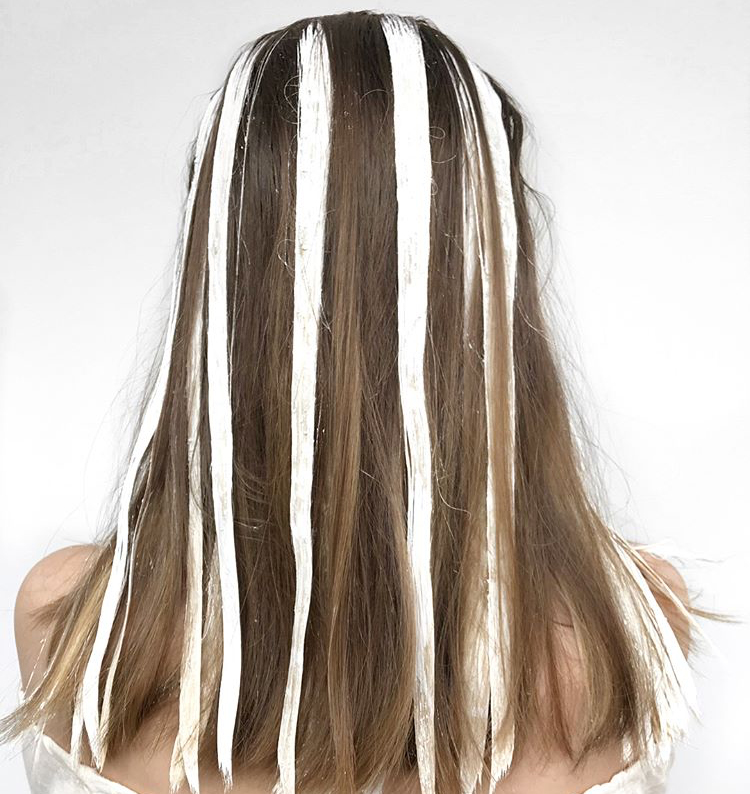
- Use a single balayage placement technique that applies even coverage/saturation from roots to ends.
- This creates a highlight effect that looks much more natural than a traditional foil highlight, and it will eliminate hard lines of demarcation when growing out.
- Lori balayages the same way and uses this analogy when teaching:
- Think about icing a cake. When it’s complete, you don’t want to see any of the cake, only the icing—so make the “icing” (lightener) thick enough all over.
- The same goes for painting single sections of hair—the lightener needs to be thick enough from the very top of the section to the very bottom. This ensures even lightening.
Choosing Your Products + Maintaining Blondes
- Consider timing and the end result when choosing a lightener, says Lori. Redken’s Free Hand Blonde Idol is a good option for balayage because it offers six levels of lift, a smooth consistent texture and stays put after it’s applied—perfect for the open-air technique above!
- Set clients up for success by teaching them how to maintain their blonde at home. Lori uses Redken pH-Bonder in her formulas to protect strands during the process, then she sends them home with pH-Bonder Step 3. Instruct them to apply the product to lightened strands, leave on for 10 minutes, then jump in the shower and shampoo it out.
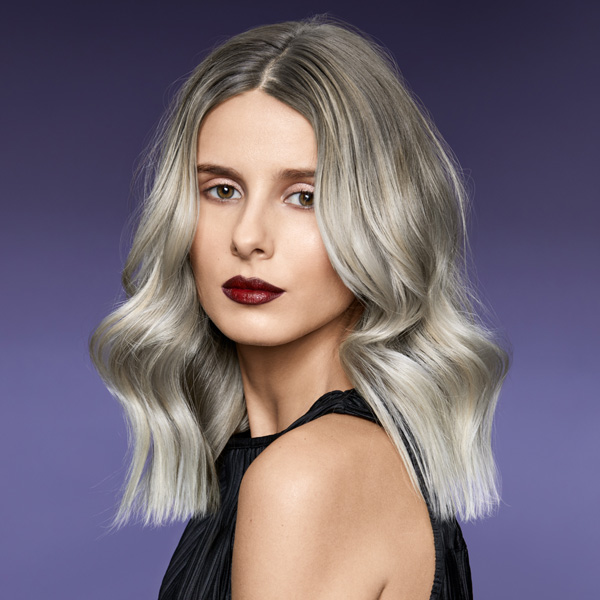
- Give your client a cool-toned look with the new Shades EQ Natural Ash range, which have black to gray backgrounds with blue/violet reflect. Use the range to correct yellow undertones and keep her soft and balanced.
More blonding techniques! Check out these formulas and steps!
More from
Redken
-
Celebrity
11 Questions With Celebrity Colorist Tracey Cunningham
-
Blonde
Lived-In Blonde With Warm Vivid Pops
-
Glossing/ Toning
How To Achieve “Glass Hair”: Smart Hacks From Hairdressers
-
Monthly Product Launch List
The Best Hair Launches Of March 2024
-
Blonde
The Biggest Hair Color Trends of 2024
-
Brunette
Caramel Chocolate Brunette With Gray Coverage
-
Awards Shows
The Best Celebrity Hair Colors & Formulas From The 2024 Golden Globes
-
Blonde
Guide To Gray: 5 Tips To Blend or Cover Stubborn Grays
-
News
How Maui Hairdressers Are Rebuilding Post-Lahaina Fires
-
Blonde
Blonde Ribboned Root Smudge
-
Balayage
Warm Glow Lived-In Blonde Balayage
-
BTC Hair Trend Report
Quiet Luxury Blonde: The “Old Money” Trend Explained
-
Blonde
Dear Colorists, Do You Enforce A Healthy Hair Policy?
-
BTC Hair Trend Report
Your Guide To Fall & Winter 2023’s Hair Color Trends
-
Blonde
Muted Honey Blonde
-
Industry News
Redken’s Safe Space Course Creates A More Inclusive Salon Experience
-
Haircare
ACIDIC BONDING CONCENTRATE 5-MINUTE LIQUID MASK
-
BTC Events
AI, Mental Health & Social Media: 7 Business Tips You Can’t Live Without
-
Copper
What Is The “Cowboy Copper” Hair Trend? Here’s What It Really Means…
-
Celebrity
Margot Robbie’s ’60s-Inspired Ponytail at the “Barbie” Premiere
-
Additive
4 Tricky Hair Color Scenarios & What You Should Do!
-
Gray Coverage
These 8 Steps Will Soften & Cover Grays In Just A Few Minutes
-
Hair Color
WWYD: How To Stop Your 6N From Turning Orange
-
Glossing/ Toning
Coral Crush

