
8 Barbering Tips to Master Your Outline

Let’s face it—men’s cutting is some tricky business. Sometimes you’ve got him looking hot! But sometimes…well, let’s just say he’s feelin’ the burn in that rogue razor kinda way. Oops. Don’t panic! We’ve got you covered. Last March, BTC got to hang out with barbering babe Matty Conrad at our first BTC “On Tour” show, and he gave us the low-down on men’s cutting done right! Here’s how it went down.

Barbering 101: Cut A Killer Outline
“The outline isn’t the last 10 percent of the haircut—it’s 50 percent of the haircut,” says Matty. “So take your time. Make it perfect.” And while you can do so many different things in terms of styling, it’s crazy important to remember that what you do on your outline is going to affect how your whole haircut looks!
3 Ways to Outline
1. Rounded, soft lines with no corners.
2. Angular, straight lines with really clean corners.
3. Fading, no lines at all.

Here’s How You Get Started
1. The name of the game: clean, crisp and level. Make sure you’ve got your shoulders lined up with your client’s shoulders, so you’re not skewed—you’re right in the middle. Next, make sure you have a nice view of the countertop in front of your client as a reference for what’s level.
2. The outline of your cut starts with a straight line at the nape. “Punch a line right through the middle, making sure you work with as much of the natural fabric as you can,” says Matty. Then create that line from the center, extending out on both sides. After you’ve got that line, lean back and make sure it’s level.
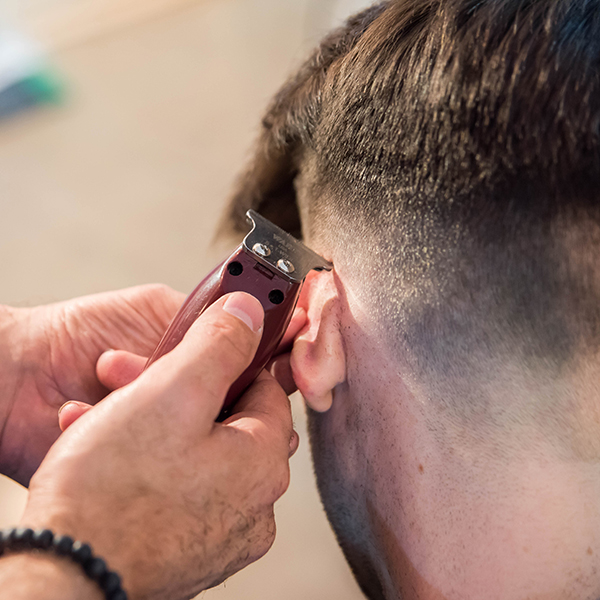
5. Cast your anchor! When you start on the sidewalls, begin at the bump at the back of the ear, what Matty calls “the anchor point.” Make that nice and clean—as straight of a line as possible. Invert your trimmer, and make a line down to your laid corner, then turn your razor into the cutting position and clean it up.
Pro Tip: If you’re using a straight razor, apply tension to the skin with your fingers, pulling slightly to make an easier glide.

6. When you get to the ears, work with their natural structure. Push the ear forward, and use the trimmers behind the ear in a nice, rounded shape to the center. For the front, pull the ear all the way back, start from the front and work back with the same motion, patching back to the center.
“Does that feel weird, Garrett? Does it kind of feel like I’m
flirting with you in a weird way?”
8. Sides burns are NOT an afterthought. “They’re the hairline for the side of the face,” says Matty. “If you want a classic look, they need to be level and even on both sides.” To do this, start by creating a nice little square line at the bottom, punching it into the hair like you did in the back.
9. Clean up that hairline, but don’t work within it! When you push his hair back and expose that skin, you’re gonna see some strays, so clean up that shape a little. Punch just a tiny line, taking out the finer hairs, but do not go up into the hairline. “This accentuates the architecture of the face and gives it a really clean look,” adds Matty.
Watch Matty master the outline!
More from
Matty Conrad
-
BTC ON TOUR
BTC “On Tour” Dallas 2023
-
Barbering
2023’s Top 9 Hair Trends For Men
-
How To Keep Up With The Influx Of Male Clients In The Salon
-
Barbering
How To Fade Hair The Easy Way
-
BTC Events
Victory Barber & Brand At #THEBTCSHOW 2021
-
Barbering
8 Beard Mistakes You (And Your Clients) Are Making
-
Barbering
Grooming Glossary: Simple Terms For Teaching Male Clients To Style At-Home
-
Best of 2020
10 Salon Business Tips To Read Before 2021
-
Business
A Holiday Gift Guide To Shopping For Hairdressers
-
Men's
4 Blow Drying Tips To Teach Male Clients
-
Barbering
Skin Fades: 3 Things To Definitely Do
-
Barbering
Men’s Cutting: 3 Techniques For Better Blends
-
Manufacturer
4 Tips For Taking Better Photos
-
Business
4 Merchandising Tips For Boosting Retail Revenue
-
Business
How To Implement Safety Guidelines & Maintain The Client Experience
-
Business
Coronavirus Barbershop Precautions: Matty Conrad Shares His Shop Guidelines
-
Barbering
Clients Growing A Quarantine Beard? Here’s What They Need To Know!
-
Business
10 Tips For Growing Your Instagram
-
Barbering
Men’s Grooming: 4 Service Tips To Increase Client Loyalty
-
BTC Events
BTC “On Tour” New York City 2020
-
Barbering
Men’s Textured Cut
-
Men's
3 Classic Men’s Styles and The Products You Need To Create Them
-
BTC Events
BTC “On Tour” Nashville—Here’s How We Closed Out Our 2019 Tour
-
BTC Events
BTC “On Tour” Nashville

