
5 Tips For Balayage + Gray Coverage

Ask A BTC Expert: Gray Coverage + Balayage In 45 Minutes
Don’t think gray coverage clients are Instagram-able?! Think again. Chrissy Danielle (@hairbychrissydanielle), the creator of The Blonde Roadmap, is sharing how she covers gray hair and creates bold balayage blends in ONE MINUTE SERVICE. We featured Chrissy on “Ask A BTC Expert” to get answers to all of your biggest questions on gray coverage strategies, root shadows and blonding!
Keep scrolling for five pro tips, watch the IGTV video below and sign up to take Chrissy’s class on BTC University this MONDAY!
Register to watch The Blonde Roadmap: Gray Coverage Melt + Ribbon Balayage THIS MONDAY for only$19.95!
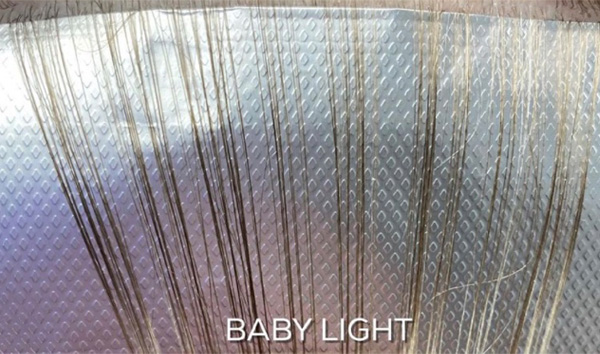
#1: How can you blend gray with foils & balayage for clients who don’t want any root color?
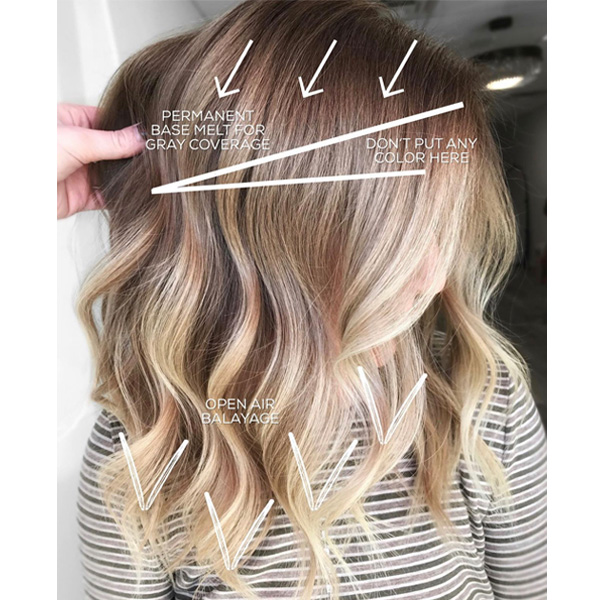
Start by asking this: How much gray does the client have with their natural color mixed in? Chrissy’s fast solution is a full-head of babylights that mimic the natural gray to blend it out. Then, pair it with hand-painted balayage through the ends.
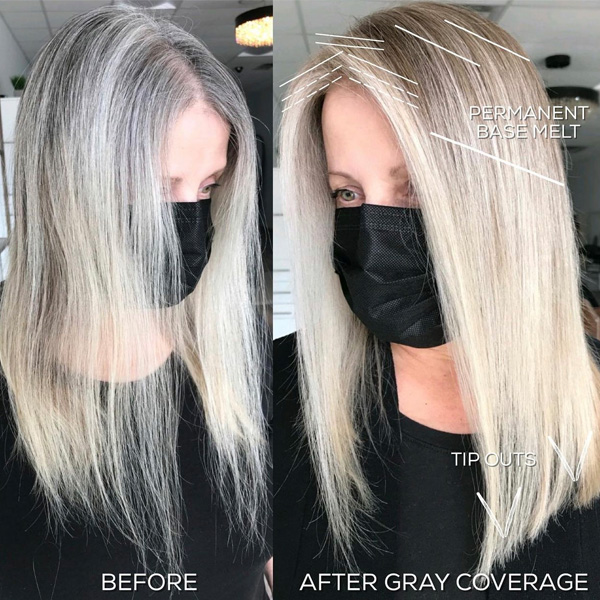
To soften out the gray at the root and blend the foils, do a root shadow so there are no lines of demarcation during the grow-out. This is different than Chrissy’s gray coverage root melt and balayage application, that will leave a darker base color (more on this below!).
#2: Do you tackle gray coverage or balayage first? Or should you do both at the same time?
Chrissy always does the base color first. Most base colors should process for 30 minutes, so it’s easier to apply the base color to the roots, and then do the painted balayage. If you did it the other way, it can get tricky to apply the root color without messing up the balayaged ends.
#3: How do you prevent harsh lines of demarcation or overlapping?
Chrissy’s general rule is: Clients must come in for a gray coverage base service every 4 to 5 weeks. Waiting any longer can cause bands and uneven coverage, and applying the base too soon will cause overlap.
During this service, apply the base only to the regrowth and use a comb to blend it down like a root melt. This will ensure no lines or overlapping!

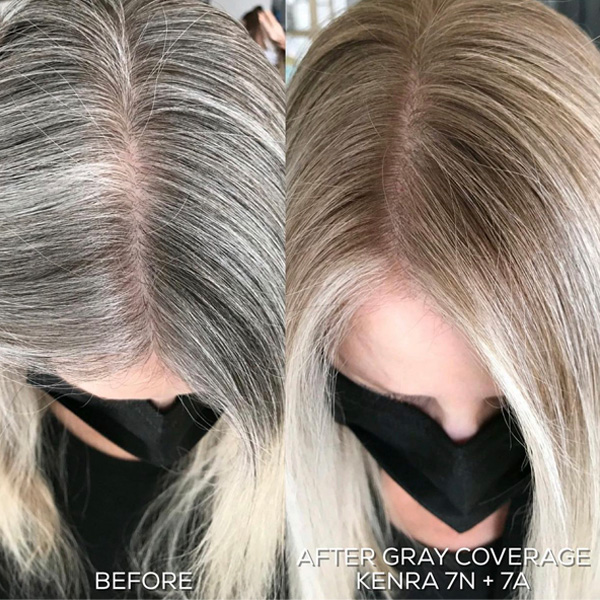
#4: SOS! Warm roots! How do you cover gray at a Level 6 without too much warmth?
The secret is FORMULATION. Make the formula only 50 percent N (natural). If the client has a lot of their natural color, overdoing it with N will cause warmth. Also, Chrissy never uses more than 20-volume on gray coverage clients to avoid warm results.
- 100% Gray: Formulate with 50% Natural + 50% Ash.
- 50% Gray: Adjust the formula and add more ash if needed.
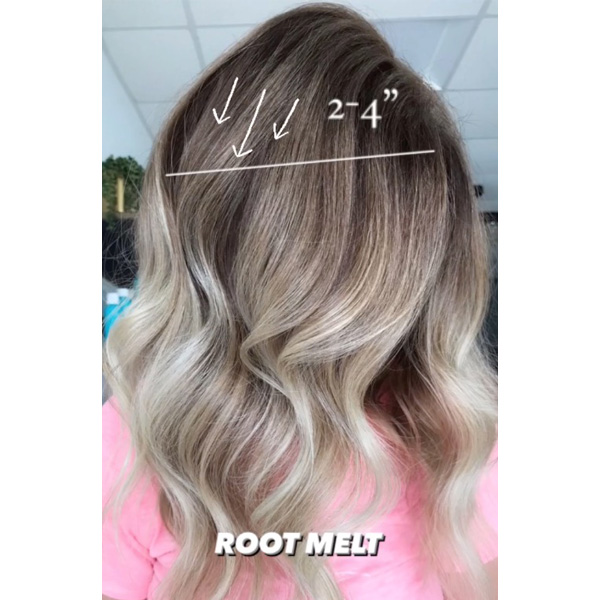
#5: How can you bring a balayage lower if you went too high when lightening?
The solution is simple. Do a root melt on damp hair and drag it down! This will help blend gray or simply just bring the line of balayage down further if you went too high in the first application.
Ask A BTC Expert: Watch The Full IGTV Below!
View this post on Instagram

