
5 Tape-In Extension Application Tips From @realericvaughn

@realericvaughn’s Top 5 Tape-In Extension Application Tips
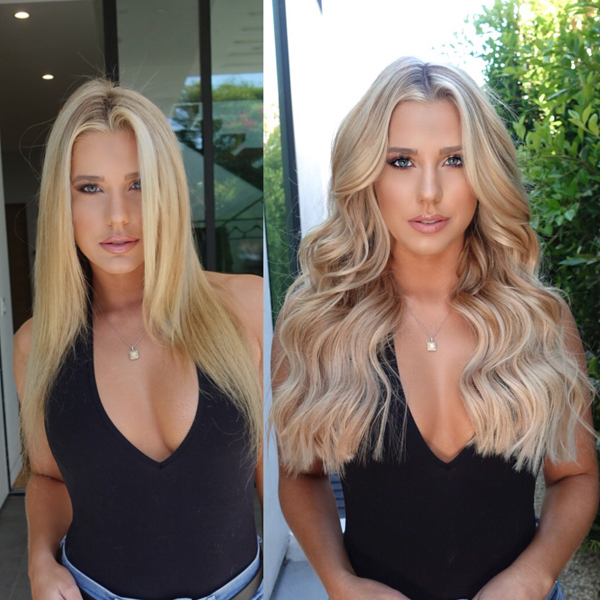
BTC Team Member @realericvaughn is Insta famous for his OMG-worthy transformations that leave his clients’ hair pretty, polished and pumped up with undetectable extensions. We had him over to the BTC House in West Hollywood to show us his tricks for applying and blending extensions, and now you can get all his tips!
Purchase Eric’s 90-minute how-to video now and get lifetime access!
Products Used
How much do hair extensions cost? And how much should you charge? Click here!
1. Where To Start Extension Application
How low can you go when beginning application? On finer hair or blondes, be cautious about placement—otherwise, when she pulls her hair up, the tapes may show. To avoid this, section out the entire hairline so you don’t even touch it. You can also clip an extension in to where you want to begin application, then pull the hair up to check that you can’t see anything. As you work, keep pulling the hair up to make sure you don’t see anything weird.

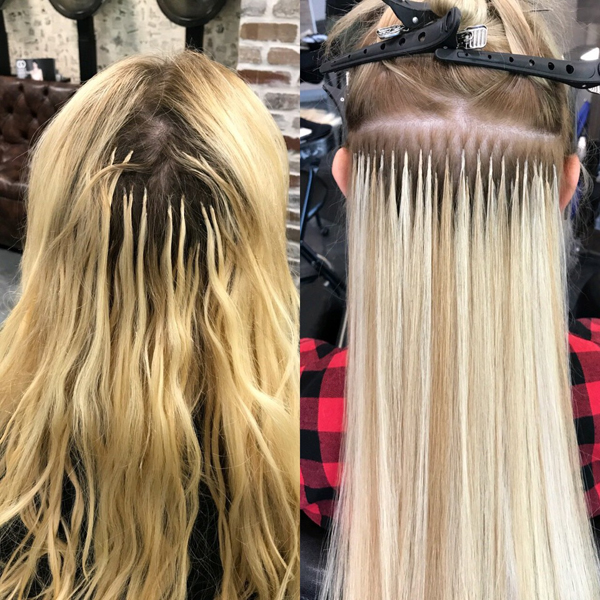
2. Extension Application Pattern
Apply in a bricklay pattern to ensure the hair moves naturally. If you apply a row identical to the one below it, the hair won’t move naturally—it will be obvious that she’s got extensions.
3. Adding Dimension With Extensions
Using only one shade of extension on the entire head screams “this hair is not really mine!” Use at least two, and for each sandwich, apply the darker shade on the bottom of the sandwich and the lighter shade on top. In this example, Eric’s model is blonde—as he works closer to her face, he uses less and less of the darker color, because blondes want to look blonde when they see themselves in the mirror. GL Tapes from Great Lengths Extensions come in more than 60 colors, including accent, ombré, bronde and rooted, so color-matching is easy.
4. Ensuring Extension Longevity
Three secrets to getting the most long-lasting tape-in extensions:
- Clean sections: if hair from other sections get caught in a tape it shouldn’t be in, it will be easier for the client to mistakenly tear the extension out (and also, it’s uncomfortable).
- Slice thickness: Eric says to take a slice that is thick enough for the extension to stay put as the client’s hair sheds, but not so thick that the tapes don’t make complete contact.
- Making a good connection: use the Great Lengths Connection Tool and squeeze with moderate pressure 3-4 times. This provides even pressure to the tape to make sure there are no air bubbles or areas that did not get properly secured to the adhesive.
5. Cutting and Blending Extensions
The cutting and blending step is where a look goes from “Oh, she got extensions,” to “OMG, she looks amazing,” so you have to nail it. Eric uses 75% notching shears to give the perimeter a diffused look before slide-cutting with regular shears to blend. And remember, your client just paid you a lot of money to install all that hair—so less is more when it comes to cutting.
Purchase Eric’s 90-minute how-to video now and get lifetime access!
Click here to see how to fix this extensions makeover gone wrong!
More from
Eric Vaughn
-
Blowouts
Blowout Guide: Pro Tips For Rollers, Round Brushes + Pin Curl Sets
-
Balayage
These Are 2021’s Biggest Hair Trend Predictions
-
Industry News
Eric Vaughn Joins WetBrush & Bio Ionic
-
BTC Events
6 Genius Cheats For Cut + Color Services
-
#thebtcshow 2019
#THEBTCSHOW 2019: DAY 2
-
THE BTC SHOW 2019
Matrix At #THEBTCSHOW 2019
-
Blowouts
9 Blowout Tips You Need In The New Year
-
Best of 2018
Our Top 10 Platinum Formulas of 2018
-
Balayage
The Top 10 Formulas We Shared In 2018
-
Beachwaves
7 Articles That’ll Take Your Styling Game To The Next Level In 2019
-
Best of 2018
The Extension Education You Need Before 2018 Ends
-
Hair Extensions
Video How-To: Tape-In Extension Application & Ponytail How-To
-
Curls
Waves: 3 Techniques To Try
-
Hair Extensions
Tape-In Extensions: 5 Things You Can’t Forget
-
#THEBTCSHOW 2018
3 Volumizing Blowout Tips From @realericvaughn
-
#THEBTCSHOW 2018
6 Tips For Longer-Lasting Styles From Insta-Famous Hairstylists
-
#THEBTCSHOW 2018
Co-Lab Styling at #thebtcshow 2018
-
Blonde
4 Icy Blonde Formulas (That Won’t Damage Her Hair)
-
Brushes/Combs
5 Super Satisfying Brush Out Videos
-
Brunette
Lightening & Toning Techniques: Add Dimension To All-Over Brunettes
-
Beachwaves
WATCH: 4 Waving Techniques From Miss USA 2018
-
Beachwaves
WATCH: Create It-Girl Waves
-
Ponytails
Mid-Level, Popped Pony
-
Color Protecting
2 Tips For Shadow Root Success

