4 Tips To Perfect Pink Balayage
How-To: Pink Balayage + Root Smudge
Pink is the gateway color for those blonde regulars who want to experiment with funkier shades. Are you ready to make their pastel color dreams happen? Prelightening with balayage, color bleeding and fighting the fade-out—we break it all down in this tutorial from Wella colorcharm top artist Luis Rodriguez (@luisfernando_hair)!
Watch the full video above to watch the how-to from start to finish, and keep scrollin’ for four must-know tips to get started!
Achieve the perfect pastel pink with Wella colorcharm PAINTS™. Click here to shop now!
#1: Prelighten with balayage.
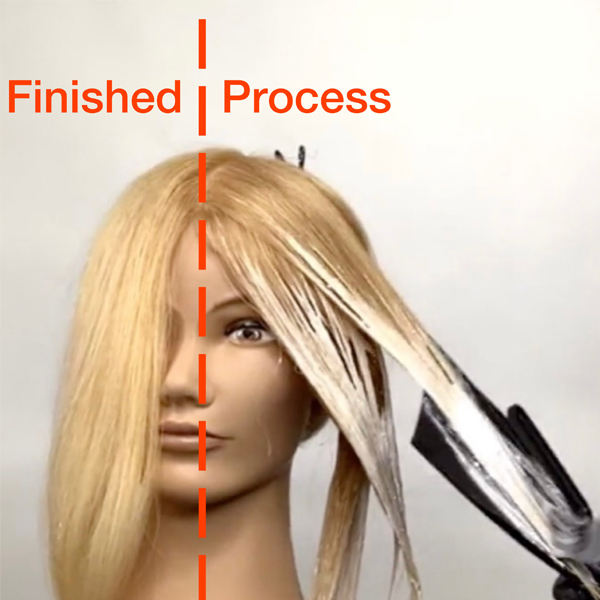
For lighter pastel shades, a bright Level 10 canvas is a must. Luis starts his balayage sections 1 to 2 inches away from the root (to prep for a root smudge later in the application.) Working in quadrants, he takes ½-inch subsections for max impact and applies Wella colorcharm Painting Balayage Lightener and Developer that provides up to 6 levels of lift.

Starting on naturally darker levels? Try this!
If the hair is darker—think Level 1 or 2—Luis suggests doing a foilayage technique with Wella colorcharm Powder Lightener, using the same freehand painting technique and isolating each section with foils or meche for extra lift.
Pro Tip: Luis works with a brush that has a 45-degree angle to make precise applications and creative placement easier.
#2: Root smudge for the perfect pastel blend.
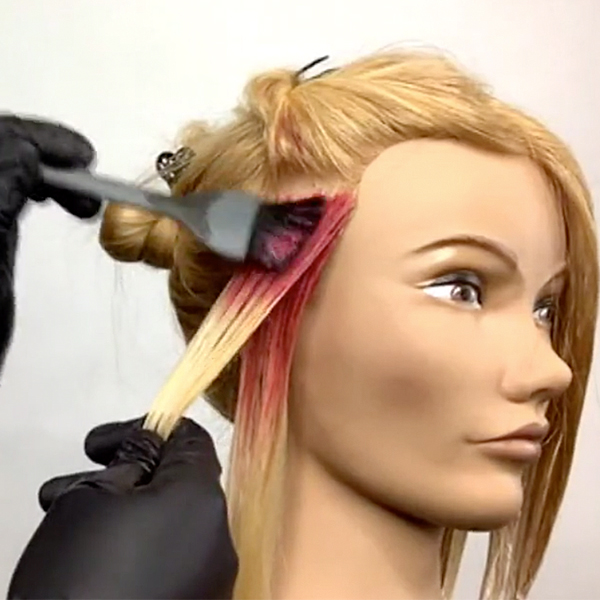
Let’s talk formulation. Luis creates a darker pink root smudge that transitions into a lighter color formula from mids to ends with Wella colorcharm PAINTS™ semi-permanent colors. PAINTS™ has 22 intermixable shades with a clear pastelizer to customize pink tones.
- Root Smudge: Wella colorcharm PAINTS™ Fuchsia
- Mids To Ends: equal parts Wella colorcharm PAINTS™ Light Pink + Coral
Start with the fuchsia root smudge, brushing downward to blur out any lines of demarcation. Then, take fine sections and apply the lighter formula from mids to ends, blending the transition area.
Pro Tip: Luis uses meche (with his hand underneath) as a palette to push the color through the sections to fully saturate.

#3: Worried about colors bleeding? Read this!
There’s nothing worse than going to rinse out dimensional pink colors and getting muddy results. That’s why Luis loves working with PAINTS™ that won’t bleed if the color is overlapped—no barriers between sections necessary! Always remember to rinse with cold water for extra protection against bleeding and fading.
#4: Keep pastel pinks bright throughout the fading process.
Let’s face it—more translucent colors like pastels will fade more quickly. Wella colorcharm PAINTS™ last up to 20 washes, but here are a few tips to make bright pink tones last.
- Make sure clients use sulfate-free, paraben-free shampoo.
- Educate clients to rinse with cold water at home.
- Luis uses a darker color at the root for more longevity.
- Add PAINTS to conditioner for bespoke maintenance care.
- Have clients come in for touch-ups regularly!
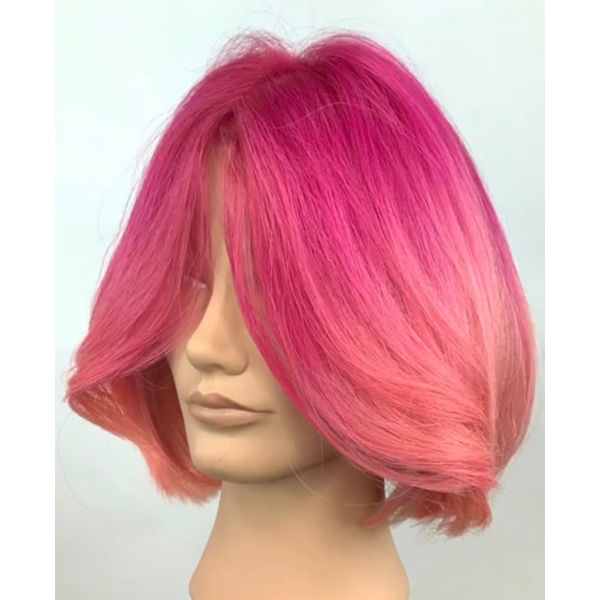
Check Out The Finished Look Below!


Products Used
More from
Wella Professionals
-
Monthly Product Launch List
11 New Game-Changing Hair Launches To Add To Your Arsenal
-
Industry News
Wella Professionals Announces the “PROject the Now” Challenge Winners
-
Manufacturer Events
“The He(ART) of Hair”: Wella Company Names & Celebrates Beauty Envision Award Winners
-
Hair Color
Bold Color Trends You Need To Know For 2024
-
Glossing/ Toning
Clear Gloss Guide: 5 Ways To Build Your Ticket
-
Glossing/ Toning
Coral Crush
-
Blonde
6 Blonding Techniques To Save Your Client’s Hair
-
Bobs
The Biggest Haircut Trends of Summer 2023
-
Balayage
Your Official Guide To Barbie Blonde
-
Business
15 FREE Classes To Take For Hairstylist Appreciation Week
-
BTC Hair Trend Report
Your Complete Guide To Color Blocking
-
BTC Hair Trend Report
Chocolate Copper
-
Blonde
Warm Honey Bronde
-
Blonde
How To Formulate Toners For Honey Blonde
-
BTC Hair Trend Report
2023 Hairstyling: 11 Trends You Need To Know
-
Balayage
HONEY BLONDE CURL FORMULA
-
Best Of 2022
10 Toning Tips You’ll Need in 2023
-
Industry Events
Wella Company Celebrates Women Leaders In Founders’ Forum Panel
-
Clarifying
3 Steps To Properly Cleanse Curls & Coils
-
Clarifying
Aqua Pure Purifying Shampoo
-
Conditioners
NUTRICURLS Deep Conditioning Treatment
-
Celebrity
Juno Temple’s Grunge Blowout
-
#ONESHOT HAIR AWARDS
Libertas
-
#ONESHOT HAIR AWARDS
The BTC Show 2022: 10 Things We Saw


