
3 Tips To Take The Fear Out Of Cutting A Shag


Learn How To Cut A Perfect Shag Every Time
Shags might have originated in the ‘70s, but this retro layered cut has proven itself timeless. That’s why ARC™ Scissors Hair Architect Rachel Williams (@rachelwstylist) hopped on BTC University to share her signature cutting techniques for designing a shag for today’s cool girl.
Scroll down to learn everything from how to create a symmetrical face frame to avoiding frizzy bangs, then click here to purchase Rachel’s course on BTC-U and receive unlimited access!
What We Learned:
You can learn Rachel’s full technique in her 90-minute course, but we’re teasing these tips you need to know now!
Tip #1: Avoid An Uneven Face Frame With This Trick
When cutting on your non-dominant side, things can get a little tricky—especially in the face frame. To avoid cutting one side shorter than the other, Rachel suggests keeping your body position in front of the client.
Here’s how she approaches her non-dominant side: First, she crosses her arms so her dominant hand is on top. Then, she holds the section with her bottom hand, maintaining tight tension. Resting her top wrist down for stability, Rachel can cut the section comfortably with a clear view of the entire face frame.

Tip #2: Create Disconnected Layers By Switching Up The Guide
“The shag is all about the layers. They are disconnected, but cohesive,” Rachel explains. To marry the layers together, Rachel switches between a stationary guide and a traveling guide.
- Everything below the occipital bone is cut with a stationary guide, creating concave layers while maintaining length.
- Working above the occipital bone, Rachel uses a traveling guide to create those signature, free-flowing shag layers throughout the crown.
- At the parietal ridge, Rachel switches back to a stationary guide, bringing everything to the center and elevating up to 90 degrees. “By bringing everything to the center, I am still creating layers but I’m keeping the volume. If I went straight out from the head, the layers would be too feathered and create holes.”
Pro Tip: As she moves toward the fringe, Rachel connects the top layers to the face frame by overdirecting the sections 45 degrees forward.

Tip #3: Texturize Half Of The Fringe To Avoid Frizz
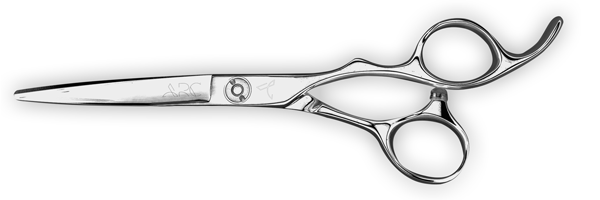
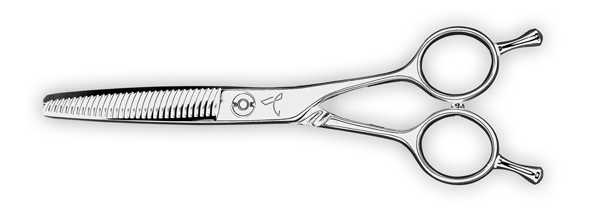
To soften up the fringe, Rachel grabs the SYMMETRY 30/2 Reversible Blender from ARC™ Scissors to remove any bulk. To avoid creating frizz, Rachel slides the texturizers beginning in the middle of the section through to the ends. “Only texturizing the last inch will result in the ends being too wispy and you will lose that strong curtain bang look,” she explains.
Ready To Try Rachel’s Technique? Click Here To Purchase The SYMMETRY 30/2 From ARC™!
Slide For The Before & After!
Products Used
Have Questions? Rachel Has Answers!
One of the benefits of watching a course on BTC University? Artists are able to answer your questions in REAL TIME! Here are some technical questions viewers had for Rachel during her livestream:
Question: When would you use a deep point cut to create a shag?
Answer: “You could definitely use point cutting to detail this look as you go. I personally prefer to create the foundation when the hair is wet and then go back and detail on dry hair. If my client had super thick, dense hair I would 100 percent point cut to alleviate some of that density before detailing.”
Q: What kind of tips do you give clients for styling their bangs at home?
A: “If the client prefers to air dry, it’s really important that they comb their bangs how they want them to lay. So, I advise them to comb their bangs forward and manipulate them to a desired style for air drying. If the client has a heavy cowlick, then they NEED to use a blowdryer. Even if they like to air dry the rest of their hair, they have to blow dry their bangs to train that cowlick on how to lay correctly.”
More from
ARC™ Scissors
-
Blowouts
Bob Styling Guide: 5 Ways To Style Short Hair
-
BTC Hair Trend Report
The Biggest Haircut Trends of 2024
-
Dry-Cutting
Bang Breakdown: How To Cut 2024’s Top Fringe Trends
-
Dry-Cutting
2024 Fringe Guide: How To Consult, Cut & Style Trendy Bangs
-
BTC University
10 Gifts & Stocking Stuffers on Every Hairdresser’s List This Year
-
BTC Events
BTC “On Tour” Nashville Recap: Everything You Missed
-
BTC Hair Trend Report
The Biggest Haircut Trends of Fall & Winter 2023
-
BTC Hair Trend Report
Layering Guide: How To Cut & Style With Confidence
-
Bobs
The ’90s Bob: How To Cut & Style This Trending Haircut
-
Facebook Lives
Volume Guaranteed: Try This Layering Technique For Fine Hair
-
Barbering
How To Style The Biggest Men’s Summer Trends
-
Bobs
The Biggest Haircut Trends of Summer 2023
-
Bobs
The French Bob: How to Cut it
-
Bobs
The Bixie: 3 Cutting Techniques to Master the Look
-
Brunette
Trend Breakdown: Hailey Bieber’s Glazed Brunette
-
Barbering
2023’s Top 9 Hair Trends For Men
-
BTC Hair Trend Report
2023 Fringe Guide: How To Cut This Year’s Biggest Trends
-
BTC Hair Trend Report
2023 Hairstyling: 11 Trends You Need To Know
-
BTC Hair Trend Report
Invisible Layers: What This Haircut Trend Really Means
-
BTC Hair Trend Report
2023’s Biggest Haircut Trends
-
Bobs
Hailey Bieber’s “Preppy, Contoured Bob” Trend: What You Should Know
-
BTC University
4 Styling Secrets For Butterfly Layers
-
This Year’s BIGGEST Products: 2022’s Most Talked About
-
Bobs
The Biggest Winter Haircut Trends To Kick Off 2023

