
3 Tips For Painting The Hairline Near The Nape

@hellobalayage’s Tips For Painting The Hairline Near The Nape
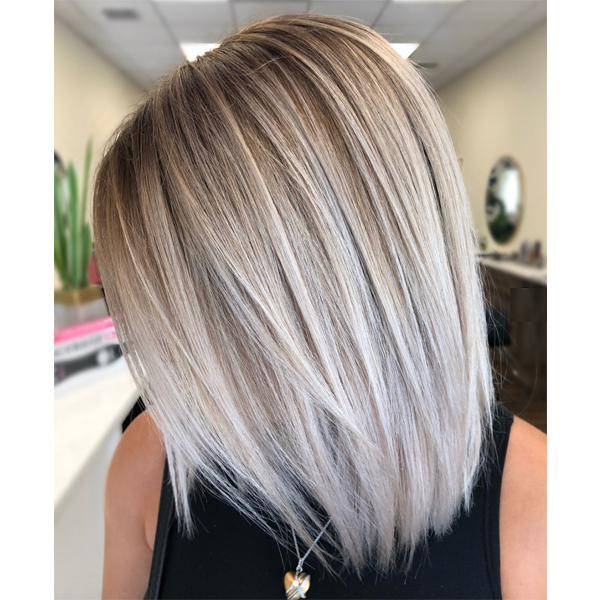
It’s inevitable that your client will wear her hair up in a ponytail or topknot, which is why you can’t forget about the hairline near the nape when painting pops of sun-kissed dimension. BTC Team Member Mallery Share (@hellobalayage) consistently shares pics of what her balayage looks like pulled up in a bun, so below, we’re sharing three of her best tips that you need to know when painting the “hidden” sections underneath.

Products Used
1. Mallery’s Technique
Start by taking a V-shaped section from behind the ears that meets at the nape, then have the client look down to help with tension. Keeping the section taut, hold it straight up and out at a 180 degree angle. Then, using the area of the brush where the flat part and tip meet, gently swipe up using wispy strokes and swipe all the way up to the end of the section. Watch the video below to see how it’s done:
View this post on Instagram
2. Stay Away From The Root
One of the biggest mistakes colorists make when painting near the nape is getting too close to the scalp. Doing so could result in bleeding, splotching or hotspots, aka when the warmth of the scalp causes spots of brassy discoloration. To avoid this, Mallery says to stay ½ to 1 cm away from the scalp.
3. Sectioning, Saturation and Formulating
Sections will vary because painting the nape is extremely customizable, but Mallery says she’ll paint anywhere from two to four V-shaped sections total. The key is good saturation, which can be achieved by painting with a light hand and building layers on layers of lightener. As for her lightening formula, Mallery has two faves that she lets process for 30 to 55 minutes, depending on how long it takes the hair to lift:
- GKhair Miami Beach Bombshell Clay Lightening Powder + 40-volume developer (1:1.5)
- GKhair Juvexin Lightening Powder+ + 30-volume developer + GKhair Shield Additive+ (1:1.5)
Pro Tip: To avoid having to hold the section up while it processes, simply use film to create a barrier between the painted V-shaped section and your client’s neck.
Click through the slideshow below to see some of the dimensional balayage buns Mallery shared to her Insta!
Click here to get Mallery’s tips for painting brass-free, bright blonde hair!
More from
GKhair
-
Balayage
3 Brunette Blending Hacks To Try On Any Level Client
-
The Best COCO And AÇAÍ Hair Treatment
-
Curls
Vegan Smoothing Treatment For Curly Clients
-
Blonde
SILVER PLATINUM HOW-TO
-
Coronavirus
GKhair Announces Two Free Online Courses—Here’s The Deets!
-
Brunette
Watch: Lift & Deposit Level 4 Hair In A Single Process!
-
Balayage
10 Of The Best Foiling Tricks We Shared In 2019
-
Blonde
4 Tips for a Blended, Blonder Foilayage
-
Balayage
Watch: Bright Blonde Balayage How-To
-
Hair Color
Cream Developer
-
Balayage
11 Money Piece Formulas That Will Bring In the Dough 💰
-
Balayage
5 Tips For Brass-Free, Bright Blonde Hair
-
Blonde
Leave-In Bombshell Cream
-
Flat Irons
Digital Touch Flat Iron
-
Blow Dryers
Ion Pro
-
Balayage
Brunette Balayage With A Pearl Blonde Money Piece
-
Color Melt
Silver-Red Platinum Shadow Root
-
Blonde
Silver Lavender Melt
-
Color Protecting
Silver Bombshell Shampoo
-
Blonde
Ultra Blonde Bombshell Masque
-
Color Depositing
Lavender Bombshell Masque
-
Color Depositing
Red Red Bombshell Masque
-
Blonde
Face-Framing Ash Blonde
-
Balayage
Neutral Blonde Balayage

