
3 Steps To Building A Brunette Balayage

How To Balayage Brunette Hair Without Muddy Tones
Since dark tones seem to be reigning supreme this year, a brunette balayage might be your client’s next request, so make sure you’re able to build it to last—without damage! Follow along with these three steps from the salon pros to get the hang of balayaging with a dark twist.
What Is Brunette Balayage?
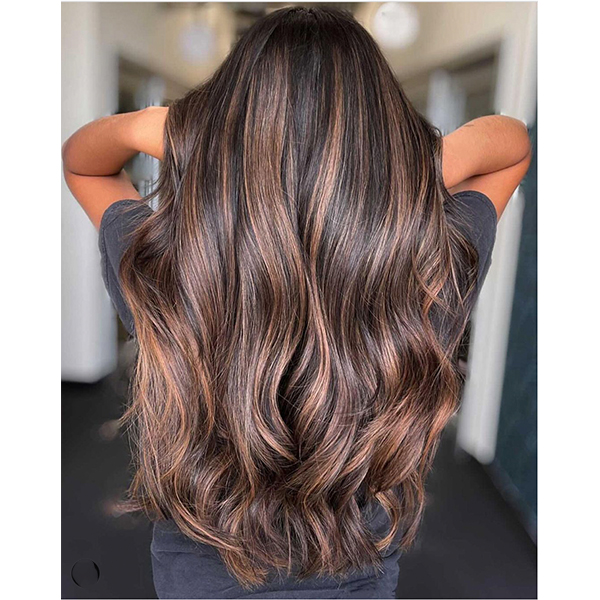
Think any flavors of chocolate melted and swirled together—yeah, it’s that good. Brunette balayage is a perfect blend of dark tones that pop against each other for a super dimensional look. The goal is to create the seamless contrast of a balayage without the bright, platinum tones.
3 Steps To Get The Look
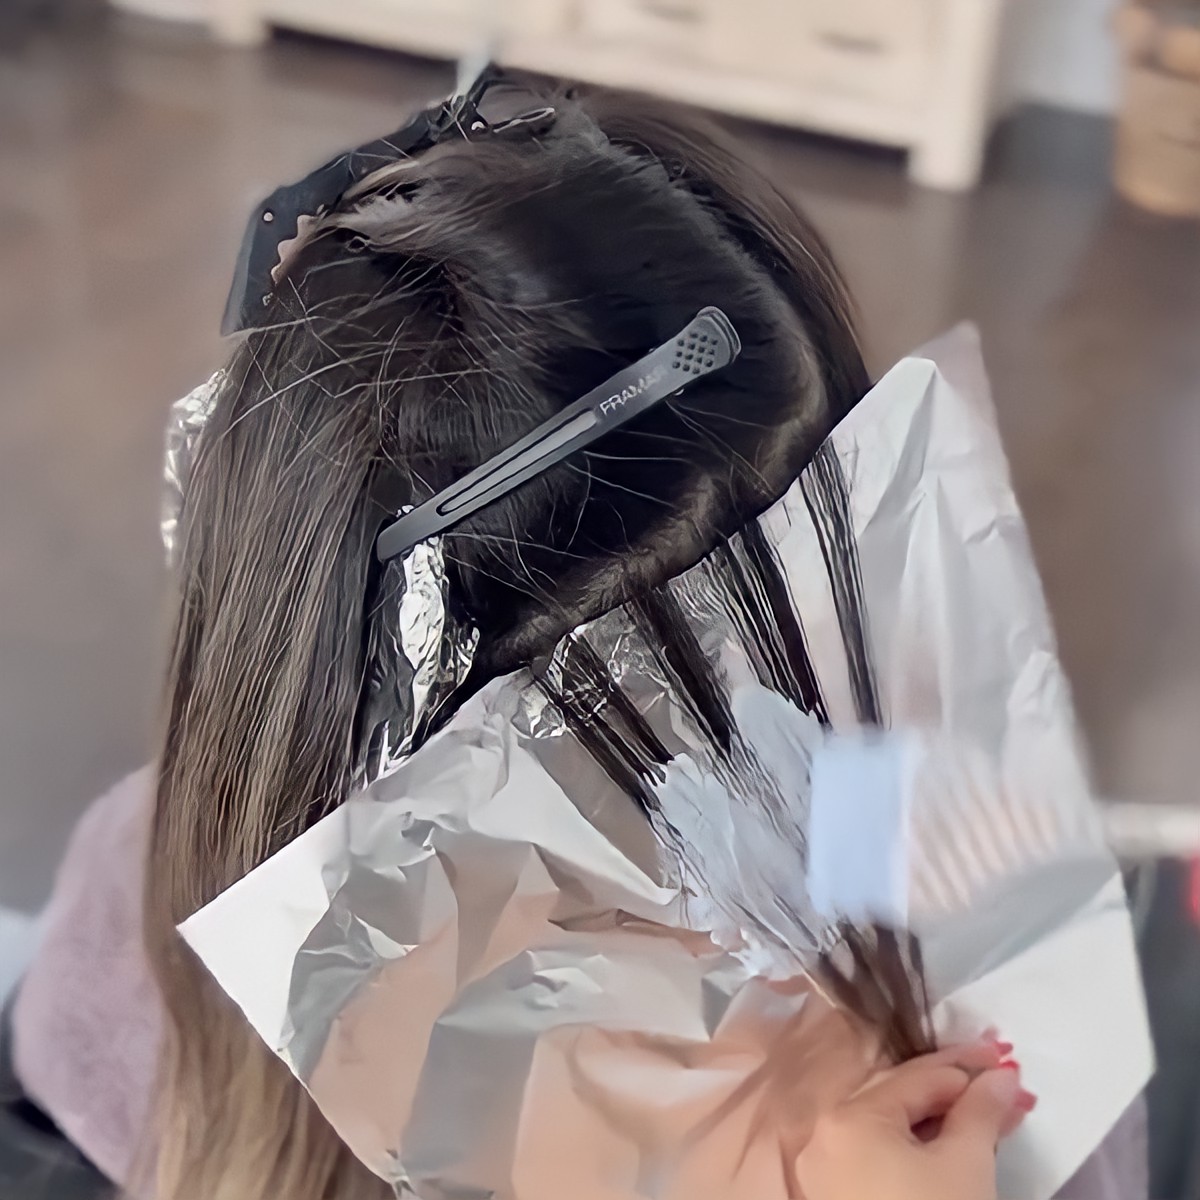
1. Add The Right Amount Of Contrast
Struggling to create blended contrast without banding or harsh lines?
Try these tips:
- Use zigzag partings in large sections before weaving out foils—this creates movement before adding foils for dimension.
- When clients want a subtle balayage, backcomb the root of each section before applying lightener. This lessens the amount of hair that will be painted, creating a soft look.
- To prevent banding, feather lightener upwards to the scalp. You want to be sure the strokes are even and fully saturated so the dark tones lift properly without splotches.
Pro Tip: The key to perfect contrast on brunette tones is not lifting the hair past a level 7 or 8. You want just enough lightness to be able to add the right tones back into your client’s hair to create a gradient.
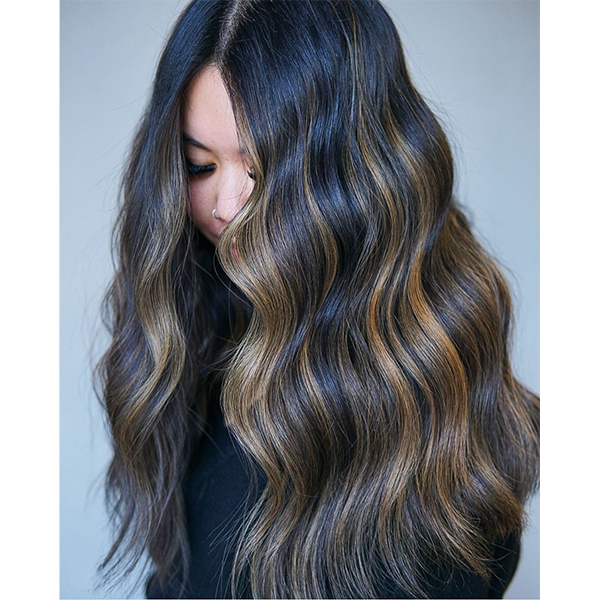
Check out this dark-toned balayage demo from @suparkhair!
Formula: Joico LUMI10 7NA + 7N
View this post on Instagram
Find the perfect brunette shade for your clients—check out LUMI10 color swatches!
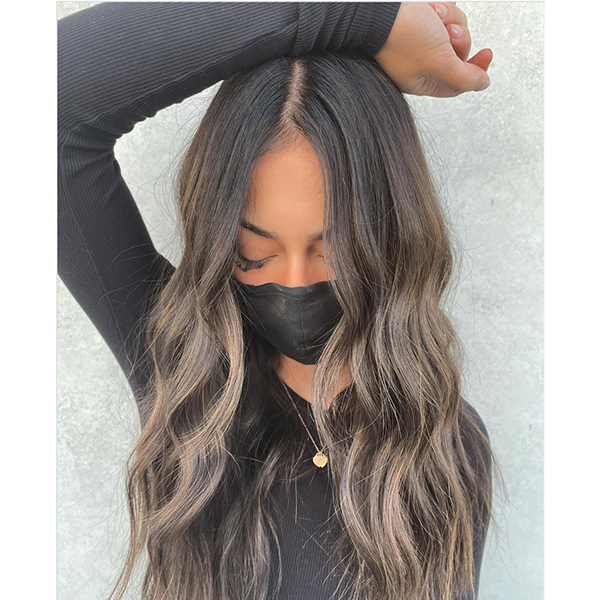
2. Cover Grays While Toning
Gray regrowth can make dark hair look dull (even if color is just a couple of weeks old!) Keep things looking fresh by throwing a root touch-up on your clients while their toner is processing.
To shadow root and tone clients at the same time, Jessalin Ferrer (@hairtingz) uses Joico LUMI10 for quick gray coverage during her client’s balayage touch-up appointments. “It eliminates the mess of applying color in between the foils and it processes in just 10 minutes,” says Jessalin.
Pro Tip: An even color deposit on dark hair is super important to avoid muddy tones. Jessalin uses a few sprays of Joico Defy Damage 1 before coloring to prep the hair for a brunette balayage. PS—you can easily offer this as an add-on to make more money at every appointment!
View this post on Instagram
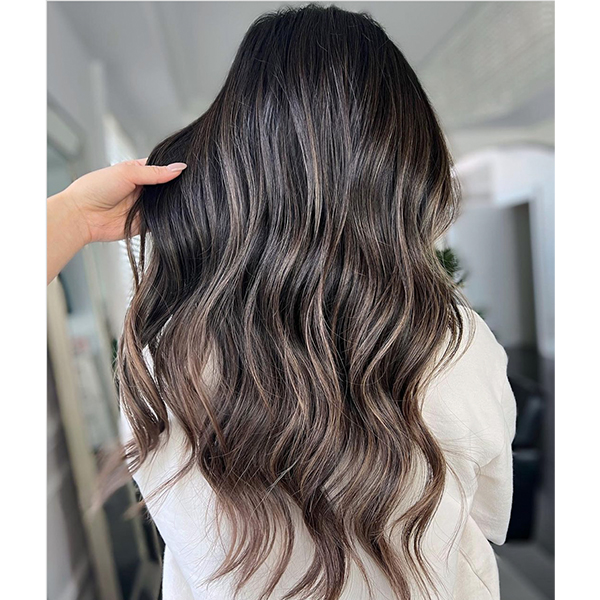
3. Finish Your Balayage With A Topcoat
Using a topcoat for your client’s brunette balayage will not only neutralize unwanted tones but increase the longevity of client’s color!
Ever struggle with your dark clients fading in-between appointments? Foilayage specialist Su Park (@suparkhair) recommends trying a permanent color like Joico LUMI10 on wet hair. The low ammonia content in the color won’t penetrate the hair but instead, deposit pigment. This will help color gradually fade—ensuring your hard work won’t disappear after a few shampoos.
Formula: Equal parts Joico LUMI10 8NA + 8N + 7NA
View this post on Instagram

UP NEXT: Find out how to transition from balayage to brunette for 2022’s Expensive Brunette craze:
Products Used
This content is sponsored.
More from
Joico
-
Balayage
One Step, Three-Layer Multidimensional Balayage
-
Balayage
Sunset Copper Balayage
-
Monthly Product Launch List
The Best Hair Launches Of March 2024
-
Hair Color
Blonde Life® SilverLight™ Lightening Powder
-
Bond Building
Defy Damage® IN A FLASH™
-
Da’Vine Joy Randolph’s Glamour Waves
-
Celebrity
Zendaya’s Classic Volume Bob
-
Celebrity
The Best Beauty Looks At The 2024 Oscars
-
Blonde
Building The Perfect “Summer Blonde”
-
Gray
Make Gray Hair Look & Feel Younger: 3 Tips Every Stylist Should Try
-
Haircare
KBOND20 Defy Damage Power Masque
-
BTC Events
BTC “On Tour” Nashville Recap: Everything You Missed
-
Monthly Product Launch List
The Best Hair & Beauty Launches Of November 2023
-
Haircare
Inner Joi™ Strengthen Shampoo
-
Conditioners
Inner Joi™ Strengthen Conditioner
-
Haircare
Inner Joi™ Strengthen Masque
-
Haircare
Joico Launches Vegan, Naturally-Derived Haircare Line, Inner Joi™
-
Blonde
How To Create A Natural Shadow Root Through Teasing
-
Blonde
“Fake” A Full Foil In 3 Steps: Here’s How
-
BTC Hair Trend Report
Your Guide To Fall & Winter 2023’s Hair Color Trends
-
Blonde
Honey Blonde Curls: 3 Strategic Placement Tips To Create Brightness
-
Hair Color
Bold Color Trends You Need To Know For 2024
-
BTC Events
AI, Mental Health & Social Media: 7 Business Tips You Can’t Live Without
-
Manufacturer
Joico Announces Jeannetta Walker-Rodgers as Global Technical Director

