10 Of The Best Foiling Tricks We Shared In 2019

The Top 10 Foiling Tips & Tricks We Shared In 2019
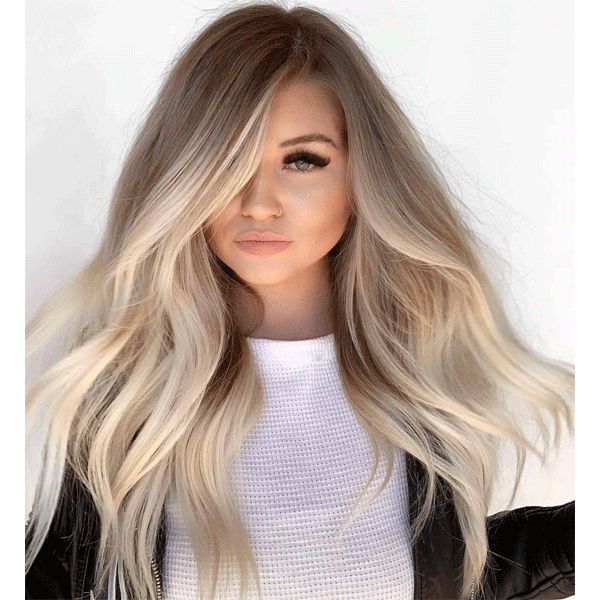
From subtle sun-kissed strands to bold balayage blends, every year a slew of clients ask to go blonder in some way. That’s why we’re not surprised that foilayage and other foil techniques had a major moment in 2019. So if one of your goals for 2020 is to become a pro at working with foils, we got you. Keep reading because we’re sharing how to prevent lines of demarcation, how to foil the hairline for face-framing brightness, where to place foils for maximum coverage and SO much more!
Products Used
1. A Simple Trick For Preventing Lines Of Demarcation
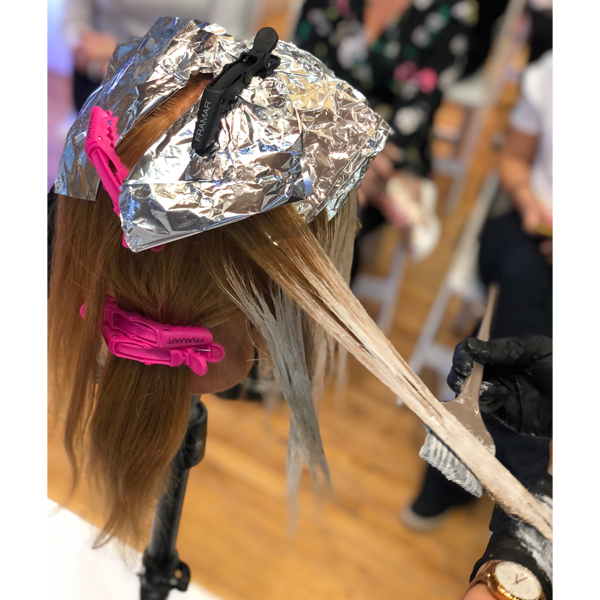
If you spot harsh demarcation lines when rinsing out foiled blondes, it’s probably because your foils are slipping. But don’t stress! Jessica Scott Santo (@jessicascotthair) has a genius trick that she calls her fold and lock technique. Not only does it secure the foils so they don’t move but it’s also great for applying root touch-ups in between foils. Here’s how it works:
- Using a long tail comb (this will prevent piercing the foils), fold the top part of the foil over with the comb pointing away from you.
- Start painting the section with your go-to lightening formula, using a brush to apply it.
- Fold the bottom part of the foil halfway up the section, then fold the rest up and a little bit over the foil line.
- Stick the tail comb underneath the foil (where the lip is) and push forward to the where the top and bottom will meet, then fold the sides in.
Pro Tip: For the foil pattern, Jessica works with a slanted Mohawk section to prevent the top of the head from having a stripey color effect—aka the throwback Kelly Clarkson highlights!
Watch Jessica’s Fold & Lock Technique In The Below Video!
View this post on Instagram
2. When To Process In Foils Vs. Open Air
How do you know when to process in foils and when to process in open air? What helps Philip Foresto (@philipforesto) decide is this simple rule of thumb:
-
When lifting Levels 5 and lower, foils will help produce more lift which is ideal if guests don’t want to see warmth.
-
For Levels 6 to 10, open air will most likely provide a natural lift with little to no warmth.
Note: Philip’s go-to lightener formula? TRUSS Professional Air Libre Bleaching Powder (which he’ll mix with 10-, 15-, 25-, or 35-volume developer) and TRUSS Professional 8X Powder!

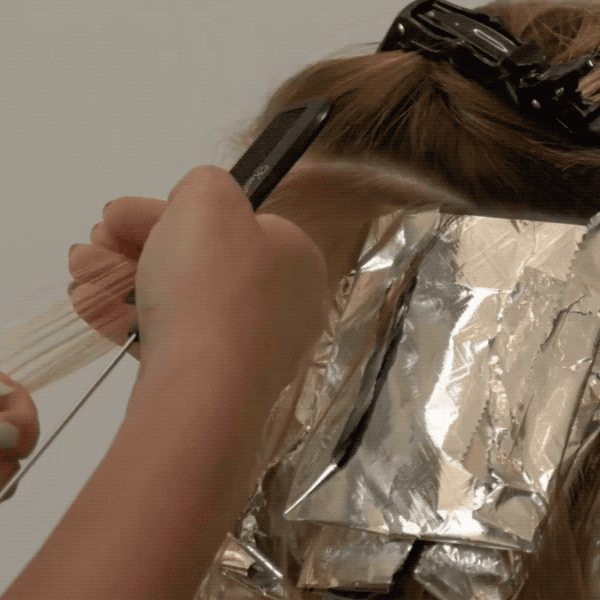
3. How To Safely Brush Out Teasy Lights
Can we all agree that the worst part about teasy lights is having to brush out all the backcombing? The last thing you want to do is brush everything out at once. Not only will it cause damage but it’ll be painful for the client. Instead, Liz Haven O’Neill (@lizhaven) suggests towel drying the hair and then starting with the first section you teased. From there, deconstruct section by section and carefully brush everything out.
Pro Tip: Liz likes to save time by pre-toning while she brushes. Before she takes a brush to the hair, she’ll towel-dry first and then apply Schwarzkopf Professional BLONDME® Tone Enhancing Bonding Mask for Cool Blondes.
Watch Liz’s Brush Out Process In The Below Video!
View this post on Instagram
4. Remember: Outside For Blend, Inside For Lift
To ensure her foilayage is seamlessly blended, Mallery Share (@hellobalayage) remembers these words: outside for blend, inside for lift. So first she’ll lightly surface paint each section with GKhair Juvexin Lightening Powder+ before placing it in a foil. “I use a traditional balayage technique starting just above the midlengths and gently pull the product up to create a natural gradient,” Mallery explains. “Then, I place my entire section in the foil and fully saturate from mids to ends for a bright lift.” (Want more of Mallery’s foil tips? CLICK HERE to watch her Rooted Icy Blonde Balayage course on BTCU!)
5. Where To Place Foils For Highlights
When determining placement for foil highlights, Gina Bianca (@iamginabianca) alternates between three different partings based on the desired end result:
- Horizontal Partings = A wall of color // This is the boldest way to paint and can be customized depending on what look the client wants, so the type of weave you take matters here.
- Vertical Partings = Stripes of color // If a client has layers, vertical partings will allow the foil to reach the perimeter of each. If you’re unsure of which partings to take, letting the hair fall naturally will give you an idea of where to start painting.
- Diagonal Partings = A curtain of color // If a client wants a lot of coverage, diagonal partings will cover the most surface area and the end result will be softer than the chunkier weaves done with a horizontal parting.

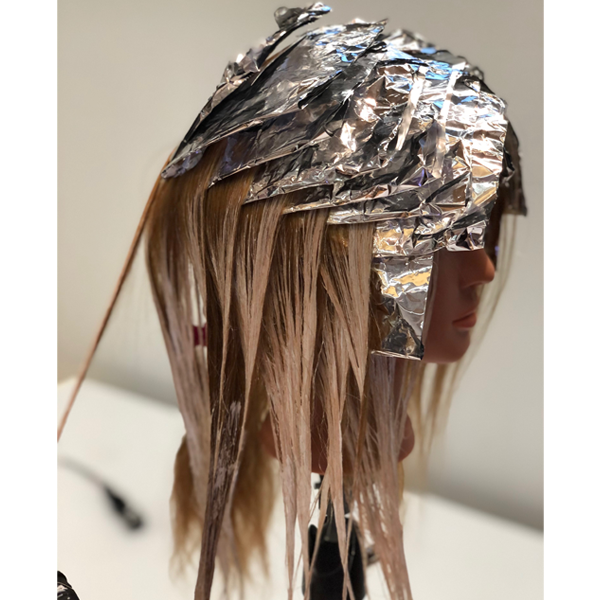
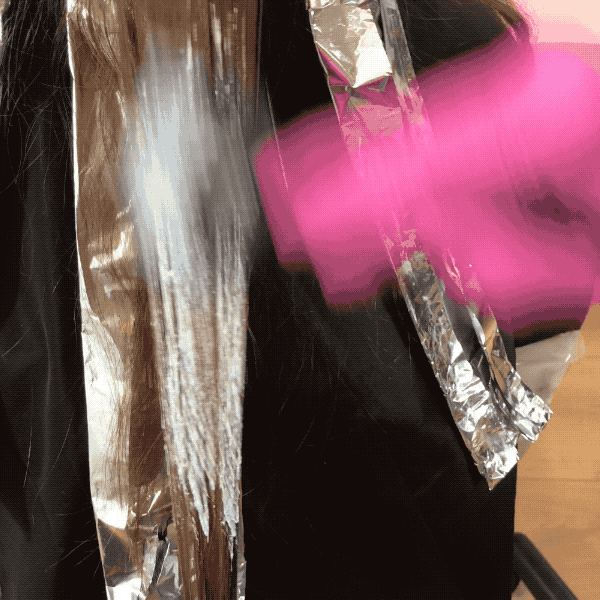
6. Where To Place Foils For Maximum Coverage
Wondering which foil patterns are best for maximizing impact? “The direction of your foils determines how much coverage you will get,” shares Caitlin Ford (@caitlinfordhair). “Horizontal placement provides the heaviest coverage and vertical provides the lightest.” But know this: the darker and more dense your client’s hair is, the more foils they’ll require. That’s why Caitlin’s go-to for lightening deep brunettes and black hair is Redken Flash Lift Bonder Inside. It’s a powder lightener with built-in bond protection so she can safely lift without damage.
Watch Caitlin’s High Impact Foil Technique In The Below Video!
View this post on Instagram
7. Do Partial Foils More Often
If a client is really concerned about damage, alternate between partial, half foil and full foil appointments for minimal damage. “I only fully blonde-out my clients once or twice a year and the rest of the time I leave out the ‘dead zone’—behind their ears, under the occipital bone and going around the back of the head,” shares Christina Kreitel (@christinakreitel). “This area can go untouched for 4 to 7 months before it becomes a black hole.”
Watch Christina’s Partial Sectioning Pattern In The Below Video!
View this post on Instagram
When lightening the hairline, the goal is to create dimension that is natural-looking yet bright. In the video below, Jessica shows her foil placement along the hairline in order to brighten up the face-frame, get those little details for when her client pulls her hair back AND to give the highlighted hair that overall WOW factor.
Pro Tip: Lightener consistency matters! While a thicker consistency means more power and a quicker lift, it can be difficult to spread. That’s why Jessica likes to mix Revlon Professional™ Blonderful™ Blonde Up 8 Levels Powder so it’s somewhere between not too runny but not too thick.
View this post on Instagram
9. Work With The Client’s Natural Fall
Speaking of the hairline, if a client has any peaks or recession at theirs, Jessica VanDerWouden (@jleighwebdoeshair) suggests placing that section in its own foil to avoid dark holes. Just isolate the section, use tension to pull the hair where it would naturally fall and then apply the lightener (She chooses to lighten her clients with Alfaparf Milano BB Bleach because it has a non-volatile formulation that will prevent swelling and damage.). Jessica says this technique also works if clients have a small peak at their front hairline!

10. Gray Coverage: Root Touch-Up & Foils
Your balayage client wants a low-maintenance shadow blonde but needs gray coverage too…now what? Try this fast, wet-on-wet application from Melissa Duguay (@melzduguay) to help pick up the pace:
- Apply Joico’s new plumping LumiShine YouthLock to the roots FIRST (it’s collagen-infused to help stubborn grays feel softer and shinier).
- Then, apply the foils on wet hair while the roots process.
- Here’s the KEY: If you want a shadow effect, don’t apply the lightener all the way up to the root. Foil lower to leave some regrowth.
Want the deets behind this shadow blonde foilayage? CLICK HERE!