
10 MUST-SEE CUTTING TIPS FROM 2020

The 10 Best Cutting Tips We Learned This Year
2020 may have been the year of the DIY haircut (via virtual consultation, of course), but it was also full of new haircut trends. From blunt perimeters and shaggy layers to curtain bangs, we rounded up the best tips from the best cutters to help you execute these techniques flawlessly in 2021. Scroll through to see what made the cut!
1. Body position is important. Always.
When cutting on your non-dominant side, things can get a little tricky—especially in the face frame. To avoid cutting one side shorter than the other, ARC™ Scissors Team Member Rachel Williams (@rachelwstylist) suggests keeping your body position in front of the client.
Here’s how she approaches cutting on her non-dominant side: First, she crosses her arms so her dominant hand is on top. Then, she holds the section with her bottom hand, maintaining tight tension. Resting her top wrist down for stability, Rachel can cut the section comfortably with a clear view of the entire face frame.

2. Always start longer and work your way up.
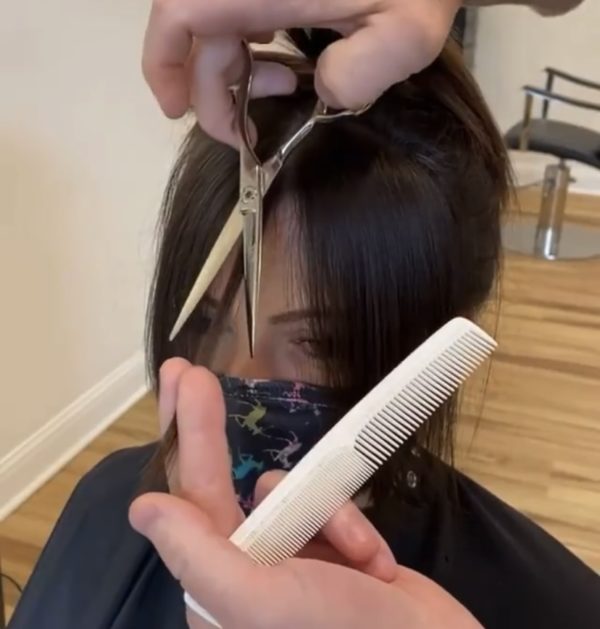
Getting fringe for the first time can be scary for a client, so it’s best to start longer and work your way up. This gives you the opportunity to check in with your client along the way while ensuring you don’t go too short.
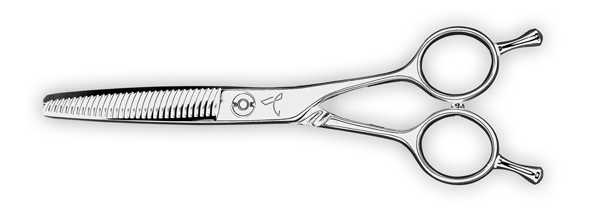
“One of the biggest mistakes you can make is cutting at the ‘perfect length’ right away. It’ll get shorter once it dries. Start at the middle of the nose first and go shorter from there. Another tip I like to do is start in the middle and then go outwards so everything stays even,” explains Eunice Kim (@eunicekimhair). Eunice uses the 6-inch ARC™ Scissors PHANTOM II for detail work and for getting into small spaces.

Want to put Eunice’s tips to the test? Click here to purchase the ARC™ Scissors PHANTOM II.
3. For fringe, face shape matters.
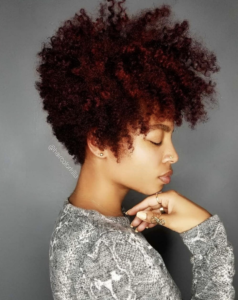
Curtain bangs are currently everywhere and EVERYONE wants them. The good thing is pretty much anyone can wear them as long as they are tailored to the client. The first step to creating a curtain bang is to consider your client’s face shape. While pretty much anyone can wear a curtain bang, how you tailor them to your client’s face shape is the most important.
Rule of thumb: The eye is drawn to where the shortest piece lies on the face. Ask your client what length they are comfortable with, then look at their face to see which features you want to highlight.
“It’s about balancing the weight,” explains Megan McKee (@megmdoeshairs). “When you have a curly bang, it creates a heavy weight line. You want to make sure you balance the weight from the bang and face frame with the weight from the overall shape of the haircut.”
Want More Curtain Bang Cutting Tips? Read The Full Article Here!
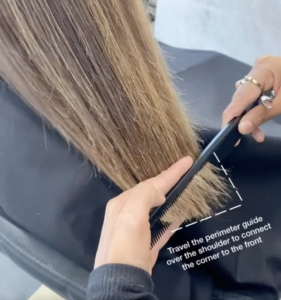
4. Point cut for insurance.
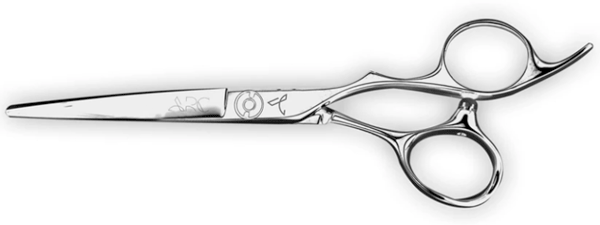
When connecting the back corner to the front, it is important to take that corner out softly. “The goal of the haircut is to bring strength through the ends while getting rid of the U-shape. You want to soften the perimeter but not cut into the shape to maintain the weight and strength,” explains Farhana Premji (@xo.farhana.balayage).
To create this soft finish, Farhana likes to use her ARC™ Scissors PHANTOM II. “They’re amazing for cutting wet and dry so I can clean up the perimeter but still soften my line with a shallow point cut,” she explains. A shallow point cut still creates strength, just with a softer edge.
Ready To Try Out Farhana’s Technique? Click Here To Purchase The ARC™ Scissors PHANTOM II Scissor!
For More On Transitioning To A One-Length Haircut, Click Here!
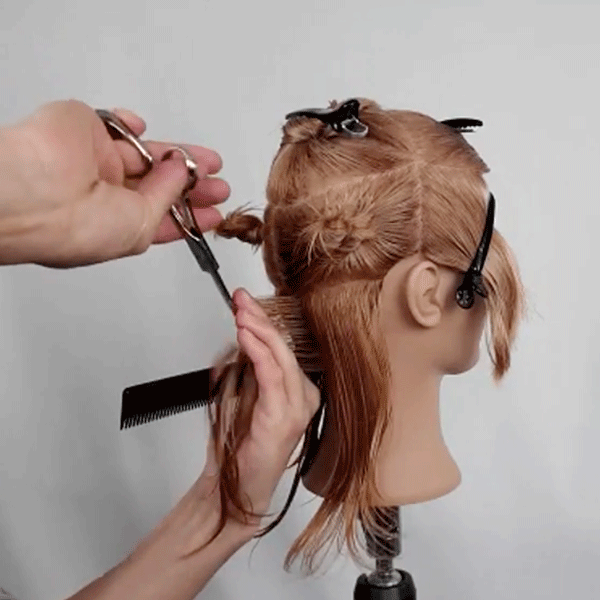
5. Detail shags dry.
“Always detail a shag haircut when the hair is dry because the way the hair lays changes from wet to dry,” recommends Rachel. “It’s always important to detail hair when it’s in its natural state to truly take only the necessary weight out. I like to use my ARC™ Scissors™ SYMMETRY 30/2 Reversible Blender on the hair when it is dry to remove weight and texturize the bangs and face-framing layers.” Press play to watch Rachel’s dry detailing techniques in action in the video below!
View this post on Instagram
Ready To Try Rachel’s Texturizing Tricks? Click Here To Purchase The SYMMETRY 30/2 Reversible Blender From ARC™ Scissors!
Want More Shag Cutting Tips? Click Here.
6. Tap around the ear for an even perimeter.


7. Minimal tension is key.
“When approaching the nape of the neck, I find it important to use the wide teeth of the comb,” says ARC™ Team Member Matt Swinney (@matt.swinney). The goal is to control the hair just enough to keep it in place. Matt loves to use the ARC™ Scissors PHANTOM II to create sharp necklines. “Too much tension is one of the biggest mistakes in my opinion. Also, holding the hair in your fingers can create unwanted elevation. Both of these actions will graduate the nape when you really are looking for that to be blunt for strength,” says Matt.
Ready To Put Matt’s Tips To The Test? Click Here To Purchase The PHANTOM II From ARC™ Scissors!
8. Be aware of head position.
In order to get a super clean neckline, Kara Williams (@haircolorkilla) has her clients tilt their head forward. “This gives me the ability to cut a zero elevation line,” she shares. “This allows me to get all the hiding nape baby hairs and give it a really clean finish when they sit up straight.” For this technique, Kara likes to go in with her 6.5 inch ARC™ Scissors PARAGON II.
Pro Tip: Be sure to take super fine sections when working with thick curly hair. “The smaller the section, the cleaner the line will be,” says Kara.
Want To Try Kara’s Genius Neckline Technique? Click Here To Purchase The PARAGON II From ARC™ Scissors!
9. Don’t fight a cowlick. You won’t win.
ARC™ Team Member Carolynn Judd (@styled_by_carolynn) LOVES using texturizing shears when working in the nape of the neck. “If a client has a really heavy cowlick that’s pushing the hair in a weird way, take the ARC™ Scissors SYMMETRY 30/2 Reversible Blender and go in right at the root and soften the cowlick,” says Carolynn. Trying to apply too much tension on a cowlick can lead to jumps and uneven perimeters and most likely cause you to have to cut the hair shorter to even it out. “Leave an extra ¼ inch as a buffer,” she adds. This will give you some leeway if you have to do any tweaking at the end of your cut.
Ready To Try Carolynn’s Texturizing Techniques? Click Here To Purchase The SYMMETRY 30/2 Reversible Blender From ARC™ Scissors!
10. Build the shape from the back.
Nothing is worse or more unflattering than a flat silhouette, especially on a short haircut. By starting the pixie at the nape, Gilad Goldstein (@myguiltycrown) builds the shape from the bottom up, allowing him to control where the weight will live while avoiding any flat holes or spots.
Gilad likes to cut hair wet, so he uses the ARC™ Scissors HARMONY II because the blade is sharp from pivot to tip and the scissors don’t bend or push the hair. “They’re also really comfortable in my hand. I don’t have to hold my hands in a strange position all day and they are super comfortable,” he explains.
Pro Tip: Keep your body position directly behind each section to avoid any additional overdirection.
Want a pair of HARMONY II scissors from ARC™ Scissors? Click here to purchase!
Want More ARC™ Scissors Education? Click Here To Visit Their Education Page!
More from
ARC™ Scissors
-
Blowouts
Bob Styling Guide: 5 Ways To Style Short Hair
-
BTC Hair Trend Report
The Biggest Haircut Trends of 2024
-
Dry-Cutting
Bang Breakdown: How To Cut 2024’s Top Fringe Trends
-
Dry-Cutting
2024 Fringe Guide: How To Consult, Cut & Style Trendy Bangs
-
BTC University
10 Gifts & Stocking Stuffers on Every Hairdresser’s List This Year
-
BTC Events
BTC “On Tour” Nashville Recap: Everything You Missed
-
BTC Hair Trend Report
The Biggest Haircut Trends of Fall & Winter 2023
-
BTC Hair Trend Report
Layering Guide: How To Cut & Style With Confidence
-
Bobs
The ’90s Bob: How To Cut & Style This Trending Haircut
-
Facebook Lives
Volume Guaranteed: Try This Layering Technique For Fine Hair
-
Barbering
How To Style The Biggest Men’s Summer Trends
-
Bobs
The Biggest Haircut Trends of Summer 2023
-
Bobs
The French Bob: How to Cut it
-
Bobs
The Bixie: 3 Cutting Techniques to Master the Look
-
Brunette
Trend Breakdown: Hailey Bieber’s Glazed Brunette
-
Barbering
2023’s Top 9 Hair Trends For Men
-
BTC Hair Trend Report
2023 Fringe Guide: How To Cut This Year’s Biggest Trends
-
BTC Hair Trend Report
2023 Hairstyling: 11 Trends You Need To Know
-
BTC Hair Trend Report
Invisible Layers: What This Haircut Trend Really Means
-
BTC Hair Trend Report
2023’s Biggest Haircut Trends
-
Bobs
Hailey Bieber’s “Preppy, Contoured Bob” Trend: What You Should Know
-
BTC University
4 Styling Secrets For Butterfly Layers
-
This Year’s BIGGEST Products: 2022’s Most Talked About
-
Bobs
The Biggest Winter Haircut Trends To Kick Off 2023

