
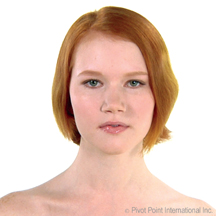
Face-Framing Sculpted Cut and Color Formula

Advertisement
Advertisement
Advertisement
Face-Framing Sculpted Cut and Color Formula
HOW-TO STEPS 
-
 1
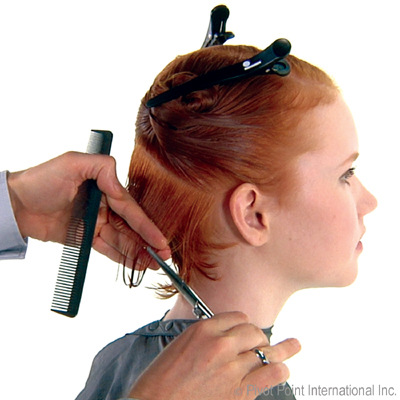
1 -
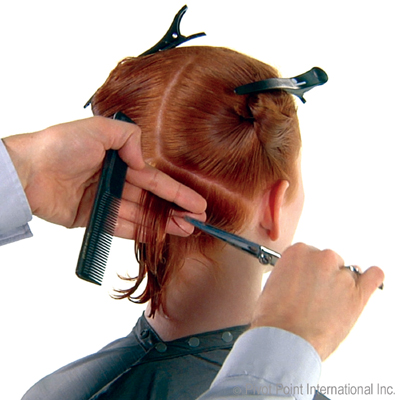
 2
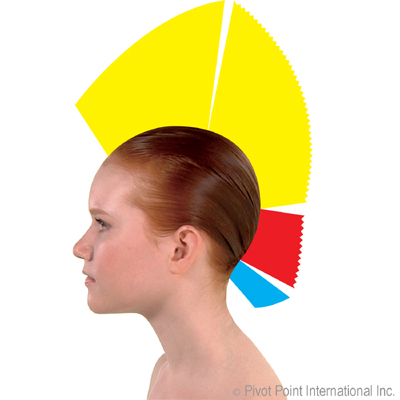
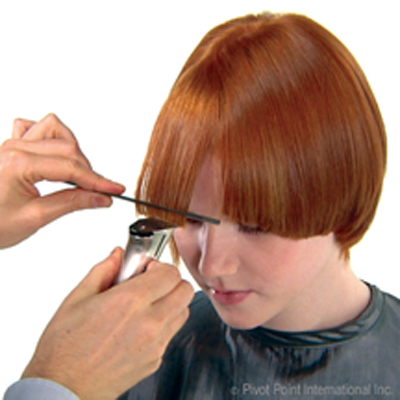
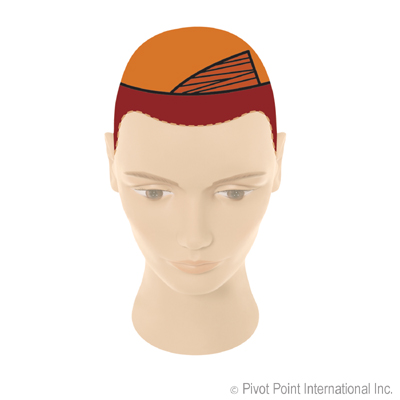
2Structure Graphics – The structure graphics show asymmetric graduated lengths over increase layers and solid lengths in the nape.
-
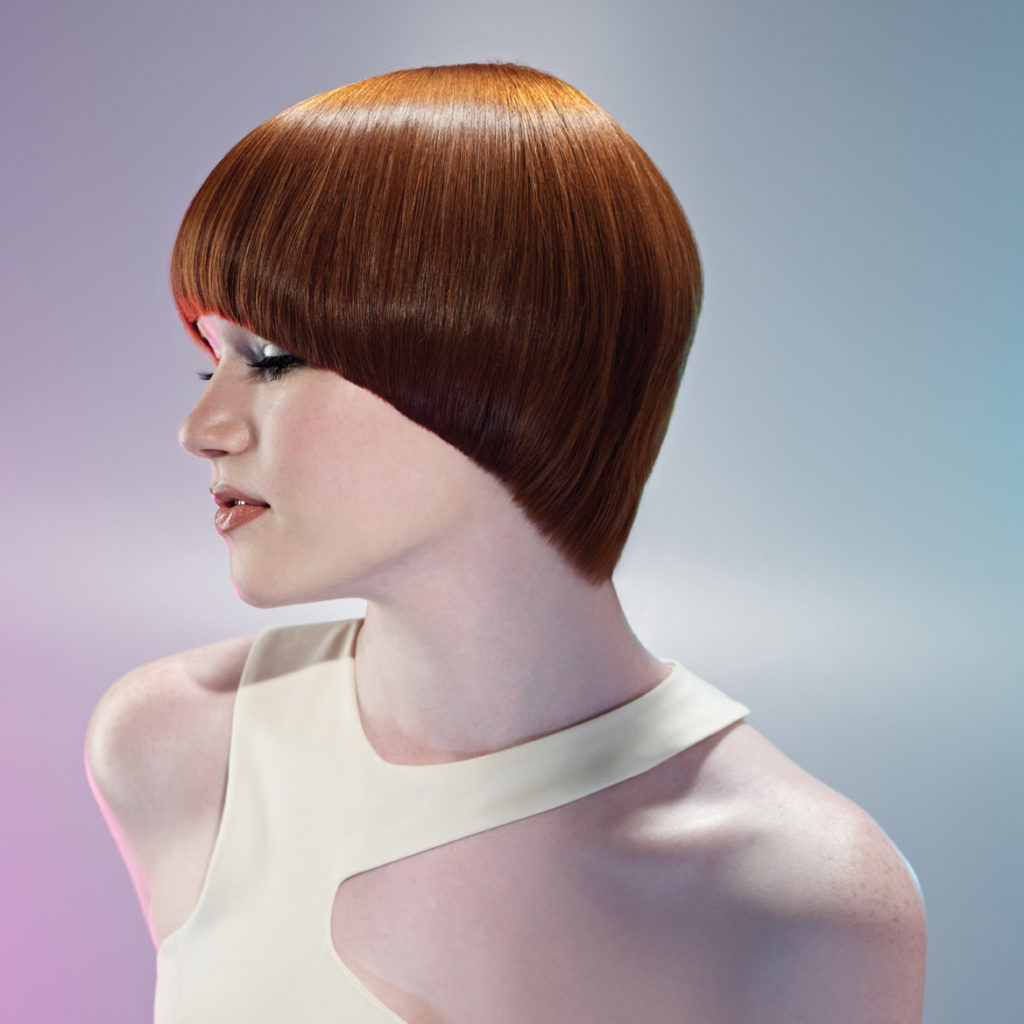
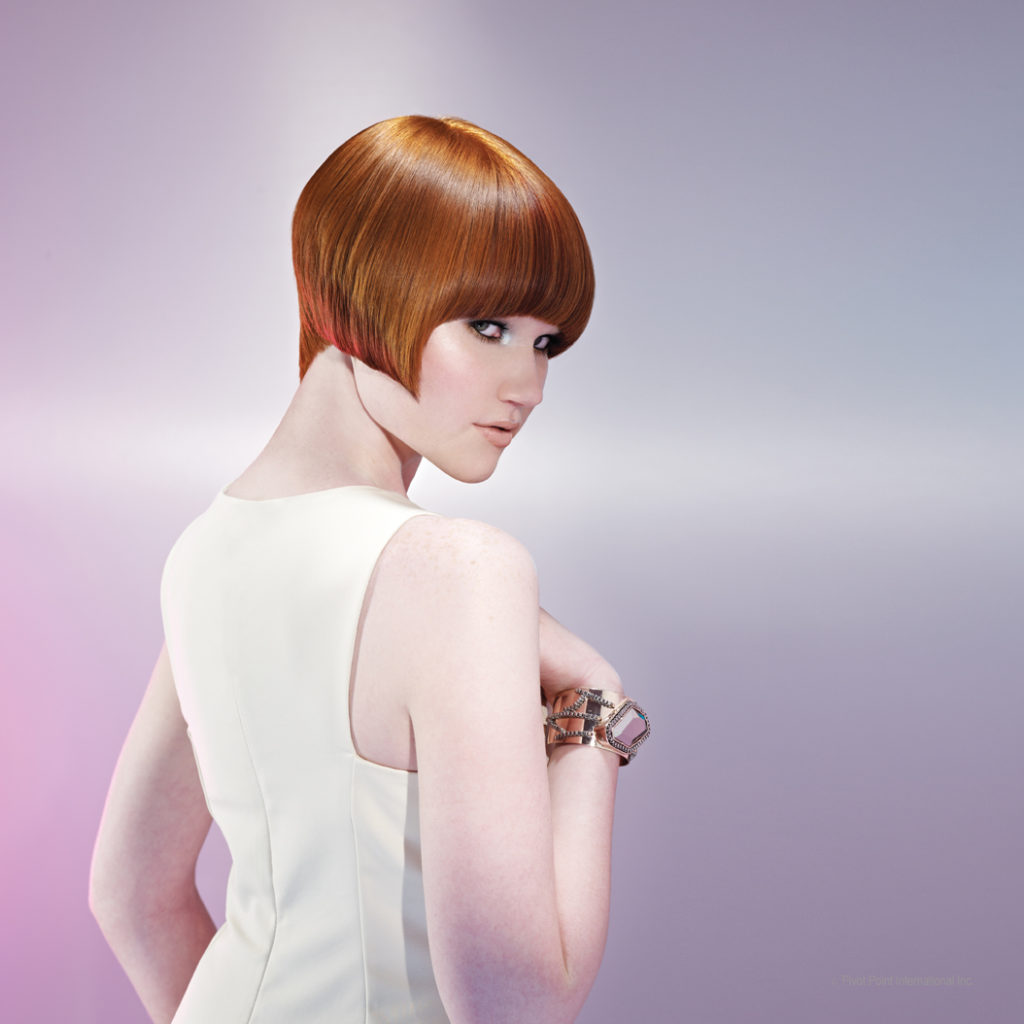
 3
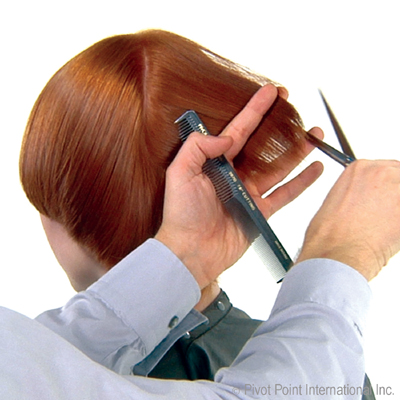
3Begin by dividing the nape vertically in half. On the right side, distribute lengths up to the sectioning line using perpendicular distribution. Project 90 degrees at the sectioning line and sculpt parallel.
-
 4
4Next, release a diagonal-forward parting on the right side. Use perpendicular distribution and a medium projection angle. Sculpt parallel to the parting, using the previously sculpted section as a guide, to establish a mobile design line.
-
 5
5Turn the head to the right and tilt it forward. On the left side, release a thick diagonal-back parting encompassing the entire hairline.
-
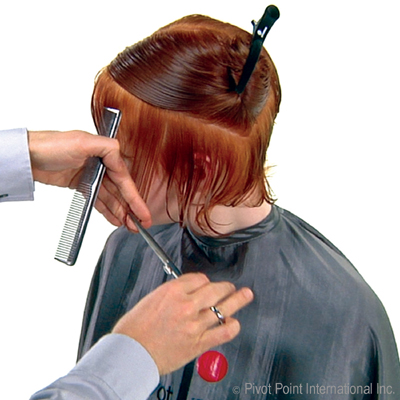 6
6Distribute lengths downward. Position your fingers slightly nonparallel to the parting to retain length and sculpt.
-
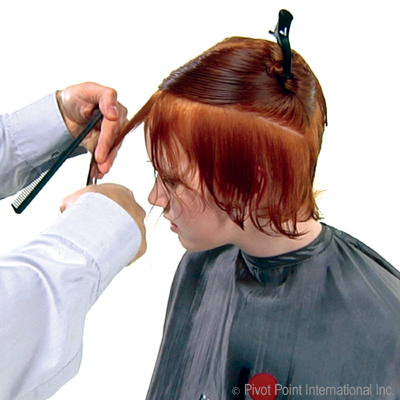 7
7Continue to work up to the sectioning line using a stationary design line and the same sculpting technique.
-
 8
8After air forming, take a thick pivotal parting at the center back. Use medium projection and notch to blend the left and right sections. Work toward the left converging pivotal partings to the center back and notching to blend. Work until lengths no longer reach the center back.
-
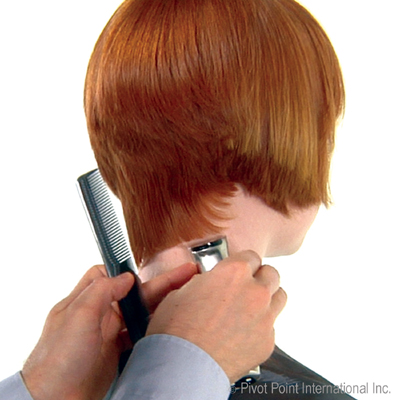 9
9In the nape, use the comb to visualize the diagonal line to be sculpted. Use a freehand technique and trimmers to sculpt a diagonal-left line. Start on the left and work to the right.
-
 10
10Next, move to the fringe and tilt the head forward. Use comb control and the trimmers to refine the line. Work to the heavy side.
-
 11
11At the side, place the trimmers on the skin to refine the perimeter.
-
 12
12The color graphic shows back-to-back diagonal slices within a triangle in the interior, applied with a level 7 red-orange. A level 6 mahogany red is applied to a large curved section at the front hairline. A level 8 copper gold is applied to the remaining lengths.
-
-
YOU MIGHT LIKE THIS
-
Bobs
Face-Framing Midlength Cut and Color from Pivot Point
-
Hair
Pivot Point International “Cecina” Step-by-Step
-
Hair
Long and Layered Men’s Cut from Pivot Point
-
Hair
Futuristic Layered Cut and Color from Pivot Point International
-
Bobs
Soft, Golden Blonde Pixie Bob
TRENDING NOW!
-
BTC Hair Trend Report
The Biggest Haircut Trends of 2024
-
Copper
What Is The "Cowboy Copper" Hair Trend? Here's What It Really Means...
-
Bobs
How to Avoid a Bulky Bob: 4 Techniques To Try
-
Hair Color
WWYD: How To Stop Your 6N From Turning Orange
-
Uncategorized
TikTok's Viral "Scandinavian Hairline" Is Actually Not New...
-
Celebrity
10 BIPOC Celebrity Hairstylists Who Are Making Major Waves In The Industry Right Now
-
Glossing/ Toning
How To Achieve "Glass Hair": Smart Hacks From Hairdressers
-
Curly
Long Layers: 10 Pro Tips + Common Cutting Mistakes

