
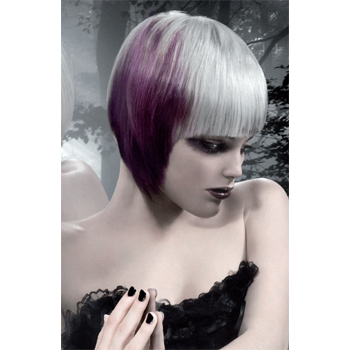
Alfaparf Audacious Contrasts Color Technical

Advertisement
Advertisement
Advertisement
Alfaparf Audacious Contrasts Color Technical
HOW-TO STEPS 
-
 1
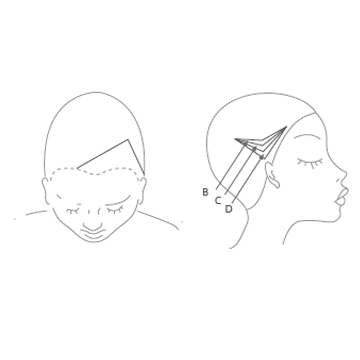
1Formula A: 1 part Evolution of Color Pure Violet 3.22 + 1.5 parts Oxid’o
Formula B: 1 part Evolution of Color Pure Violet 4.22 + 1.5 parts Oxid’o
Formula C: 1 part Color Wear 9.21 + 1 part clear&gloss +2 parts Color Wear ActivatorNATURAL BASE: 6
-
 2
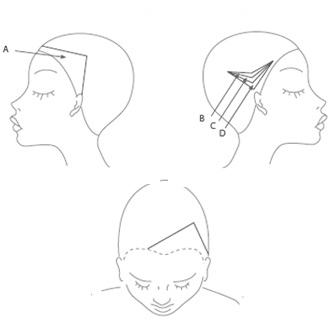
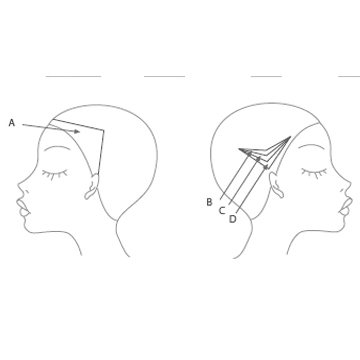
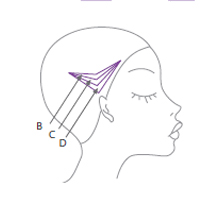
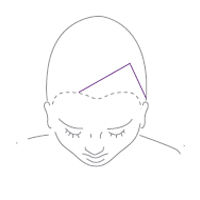
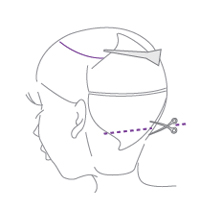
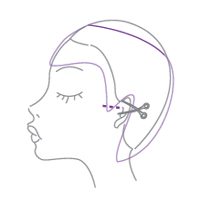
2Divide the hair into panels as shown in the picture.
-
 3
3Color panel A and panel D with Formula A.
-
 4
4Apply Formula B to panel D.
-
 5
5Bleach the remaining part of the hair up to tone height 10 and apply Jean’s Color Purple to panel B.
-
 6
6Tonalize the resting part with Formula C.
-
 7
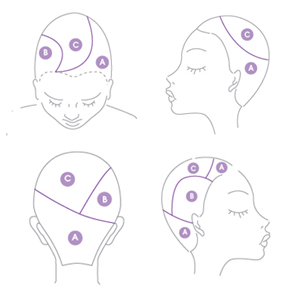
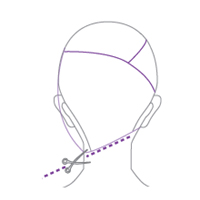
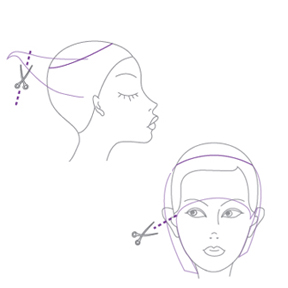
7Part the hair as shown in the picture.
-
 8
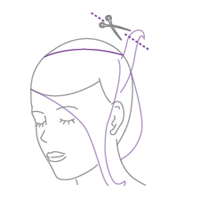
8Section A: part the lower section starting from the ear to create diagonal lines on the head. Make a 2 cm (0.8 inches) cut line parallel to the section and continue with other lines raised at 90° from the base.
-
 9
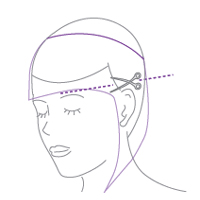
9Continue creating radial lines overlapping each lock over the previous one. Starting from the occipital bone, overlap each lock over the previous one and regulate each line with a slight lifting.
-
 10
10Define the perimeter with a curved line.
-
 11
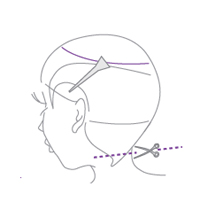
11Take vertical sections keeping the nape length as point of reference, cut rounding the higher part and stretching towards the perimeter. Continue with radial lines with the point of the axis and cut each lock at 90° from its base.
-
 12
12Define the temple area taking a curved line.
-
 13
13Continue using the scissors tips to define the sideburns, rounding the shape over the ear.
-
 14
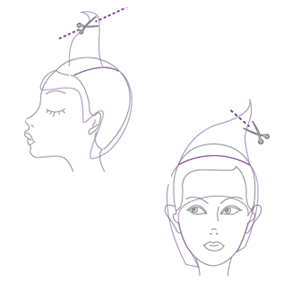
14Complete the fringe with a diagonal curved line.
-
 15
15Section B: take the lower length as point of reference and realize a vertical layered cut. Continue with vertical lines overlapping each lock over the first. Join the profile to the frontal side.
-
 16
16Section C: take the lower part of the fringe as guideline and cut short to long starting from the point of reference towards the opposite side. Shift the whole section over the central line.
YOU MIGHT LIKE THIS
-
Hair Color
Alfaparf Velvet Effects Color Technical
-
Hair Color
Slate Blonde and Cool Cocoa Contrasts from Redken
-
Balayage
Chemical-Free Balayage
-
Hair Color

Sombré: The Evolution of Ombre
-
Brunette
How-To: Cool-Toned Brunette
TRENDING NOW!
-
Hair Color
WWYD: How To Stop Your 6N From Turning Orange
-
BTC Hair Trend Report
The Biggest Haircut Trends of 2024
-
Bobs
How to Avoid a Bulky Bob: 4 Techniques To Try
-
Glossing/ Toning
How To Achieve "Glass Hair": Smart Hacks From Hairdressers
-
Copper
What Is The "Cowboy Copper" Hair Trend? Here's What It Really Means...
-
Celebrity
10 BIPOC Celebrity Hairstylists Who Are Making Major Waves In The Industry Right Now
-
Curly
Long Layers: 10 Pro Tips + Common Cutting Mistakes
-
BTC Hair Trend Report
WWYD: How Hairstylists Are Navigating Inflation

