
MEMBERS ONLY: Pleated Rosettes from Ann Bray

Advertisement
Advertisement
MEMBERS ONLY: Pleated Rosettes from Ann Bray
HOW-TO STEPS 
-
 1
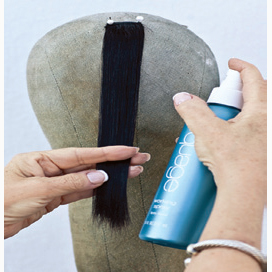
1Begin with a 2-inch wide weft of hair (natural not synthetic). Fold the weft in half horizontally (to make a thicker 1-inch section). Secure it onto a wig block (mannequin form covered in wool fabric traditionally used when working with wigs) with a couple of pins at the base. Spray generously with Aquage Working Spray on both sides of the section from about 6-8 inches away. Aquage Working Spray is Ann’s favorite thermal setting product.
-
 2
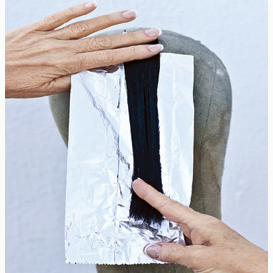
2Place weft on top of a sheet of foil that is slightly longer than the weft, to make sure weft can be covered from base to ends.
-
 3
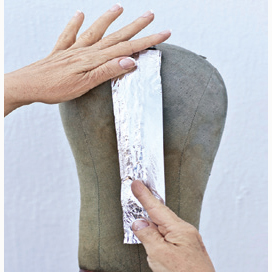
3Fold foil over weft.
-
 4
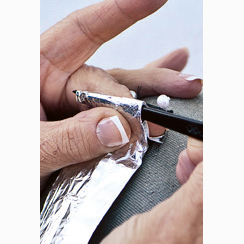
4Take a 2-inch section of the foil wrapped strand. Place a rat-tail comb in the middle. Fold in half over the end of a rat-tail comb. It’s very important that you perform this step cleanly to properly mark a crisp, sharp edge across the weft.
-
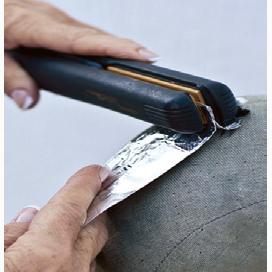 5
5Press the folded section of the weft for a few seconds with a ceramic flat iron to set the fold in place.
-
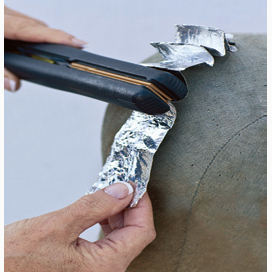 6
6Repeat steps 4 through 5 on subsequent 2-inch sections until you reach the ends.
-
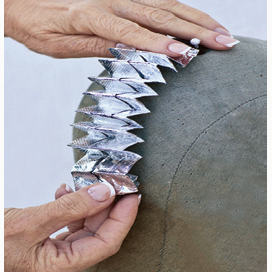 7
7When the entire foil covered weft is pressed it should look like an accordion pleat from base to ends.
-
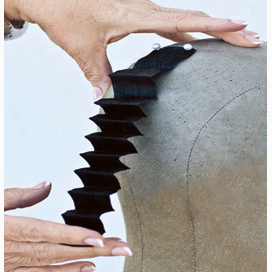 8
8Allow the weft to cool off for a few minutes to room temperature before removing foil away. Delicately and gently remove the foil exposing the now fully pleated weft. If the edges are not crisp and well defined, you probable did not use enough Aquage Working Spray. We advise you to test the amount needed on one or two wefts until you achieve ideal result before making multiple pleated wefts.
-
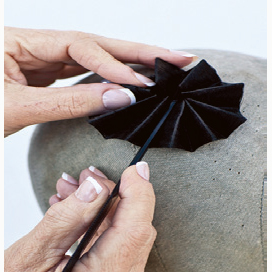 9
9The final step for making the individual pleated rosette is to form the weft in a radial pattern until the ends meet the base forming a complete fan-shape circular rosette. To secure the ends to the base, either use a Bobby-pin (if you plan to reuse the wefts), or glue them together with a hot glue-gun (to permanently form the Rosette). Ann recommends that you make as many rosettes as needed to cover the surface of the style.
YOU MIGHT LIKE THIS
-
Hair Color
Redken Disrupted Softeness by Ann-Christin Nilsen
-
Hair
Texturized Halo of Hair from Aveda
-
Hair
Edgy Twisted Pony Hawk from Aveda
-
Hair
The Roughed-Up Pony from Aveda
-
Hair Color
Warm, Fiery Red from Joico
TRENDING NOW!
-
Hair Color
WWYD: How To Stop Your 6N From Turning Orange
-
BTC Hair Trend Report
The Biggest Haircut Trends of 2024
-
Bobs
How to Avoid a Bulky Bob: 4 Techniques To Try
-
Glossing/ Toning
How To Achieve "Glass Hair": Smart Hacks From Hairdressers
-
Copper
What Is The "Cowboy Copper" Hair Trend? Here's What It Really Means...
-
Celebrity
10 BIPOC Celebrity Hairstylists Who Are Making Major Waves In The Industry Right Now
-
Curly
Long Layers: 10 Pro Tips + Common Cutting Mistakes
-
BTC Hair Trend Report
WWYD: How Hairstylists Are Navigating Inflation

