
Redken Disrupted Softeness by Ann-Christin Nilsen

Advertisement
Advertisement
Advertisement
Redken Disrupted Softeness by Ann-Christin Nilsen
HOW-TO STEPS 
-
 1
1LOWLIGHT
Formula 1
-1 ¾ oz. (52.5 ml) 5T Color Fusion
– ¼ oz. (7.5 ml) Hi-Fusion Blue
– 2 oz. (60 ml) 20 volume Pro-oxide Cream Developer
Formula 2
– 1 oz. (30 ml) Hi-Fusion Violet
– 1 oz. (30 ml) 20 volume Pro-oxide Cream Developer
Glaze
Formula 3
– 2 oz. (60 ml) 04WG Sun Tea Shades EQ
– 2 oz. (60 ml) Shades EQ Processing Solution -
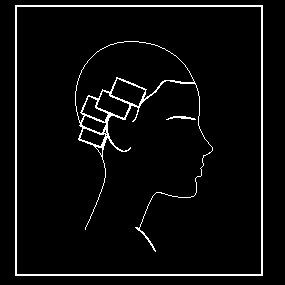 2
2Start on the side. Take a diagonal forward slice and place onto a foil. Apply Formula 1 from the scalp area through the mid-shaft. At the ends, do not saturate completely, diffuse the color to transition from dark to light. Following the hairline, alternate Formulas 1 and 2 in foils leaving ½” in between. Repeat on the opposite side.
-
 3
3In the back, brick-lay foils with horizontal slices and diagonal back slices. Alternate formulas
and softly diffuse the color onto the ends. Process at room temperature for 30 minutes. Rinse and shampoo with Extreme. Dry the hair -
4
Apply Formula 3 from scalp to ends. Process at room temperature for 20 minutes. Rinse and shampoo with Color Extend. Follow with Redken Chemistry.
-
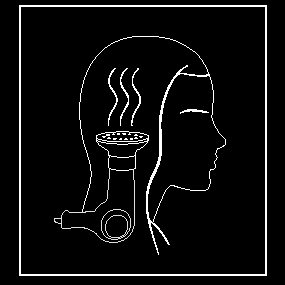 5
5On towel-dried hair, apply rootful 06 root lifting spray and follow with blown away 09 protective blow-dry gel. Rough-dry. Lightly mist dry hair with wool shake 08 gel-slush texturizer
and diffuse dry to build texture. -
6
Section the hair horizontally and create a brick-lay pattern of sub-sections starting at the nape working your way up to the front and sides.
-
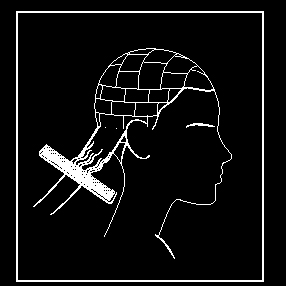 7
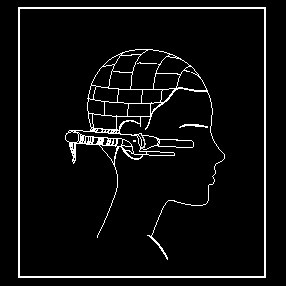
7Before placing in the set with an iron, add some texture to each sub-section. Take the first sub-section and elevate at a 45° angle below horizontal 90° and lightly backcomb the section
to create a “lacy” texture. -
 8
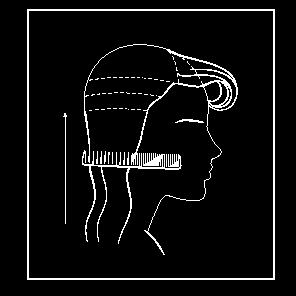
8Keeping the tines of the comb pointed towards the scalp, lightly smooth the surface of the section.
-
 9
9Use a ¾” iron, and begin by pulling the iron through the ends to smooth, then root tong leaving the ends out. (The lacing in the hair will create further texture for the final shape.)
-
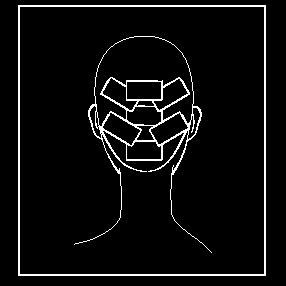
 10
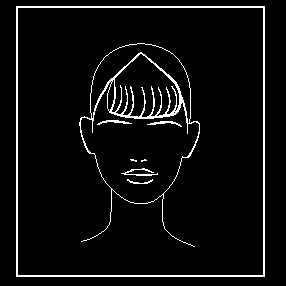
10Fringe—Make a triangle section using the corners of the eyes as reference points and extend 2” behind the hairline.
-
 11
11Backcomb the entire section. Lightly smooth the surface making sure to leave some texture. Elevate the hair to horizontal 90° and roll from the ends toward the hairline and pin.
-
 12
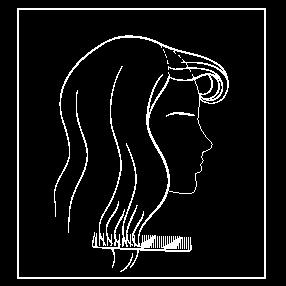
12Drop the set and lightly brush the hair. Work in horizontal sections from the nape up, use a “ruching” technique to increase movement and texture. To ruche the hair, insert the wide teeth of the comb into the strand about 8” from the scalp then push about 4” back toward the scalp. Repeat several more times starting further away from the scalp each time.
-
 13
13To create a stronger looking perimeter, pinch the ends of large sections and insert the wide teeth of the comb through the strand just above your fingertips. Ruche from the ends to a few inches past the desired finished length. Repeat all over the head until the perimeter is at the desired length then with the fine teeth of the comb, backcomb the remaining ends giving them a frothy texture that will act as a halo for the perimeter of the style.
-
14
Keyword search: colorglobal
YOU MIGHT LIKE THIS
-
Blonde

SHADES OF SILVER
-
Blonde
Face-Framing Lilac
-
Balayage
Beige and Blended
-
Hair
Redken Big Bang by Leah Freeman
-
Blonde
Autumn Ash
TRENDING NOW!
-
BTC Hair Trend Report
The Biggest Haircut Trends of 2024
-
Monthly Product Launch List
11 New Game-Changing Hair Launches To Add To Your Arsenal
-
Copper
What Is The "Cowboy Copper" Hair Trend? Here's What It Really Means...
-
Blonde
Conditioner Before Toner: Common Hair Myth Debunked
-
Frizz
Straighten & Smooth 2A, Fine-Medium Density Hair
-
Copper
Muted Bronze
-
Haircuts
SHAG 101: The Dos And Don'ts
-
BTC Hair Trend Report
WWYD: How Hairstylists Are Navigating Inflation

