
Back to Basics

Advertisement
Advertisement
Advertisement
Advertisement
Back to Basics
HOW-TO STEPS 
-
 1
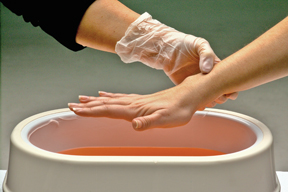
1Before you dip a client’s hand in paraffin, wash your hands with soap and have her wash her hands too.
Apply lotion to the hand and gently massage into the skin. Test the temperature of the wax. Position the hand for the dipping procedure. The palm should be flat with the wrist slightly bent and the fingers slightly apart.
-
 2
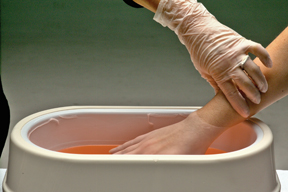
2Have the client dip one hand into the wax up to the wrist for a few seconds. Remove. Allow the wax to harden and repeat the process three to five times.
-
 3
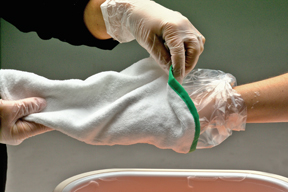
3Wrap the hand in plastic wrap and cover with a cloth mitt. Keep the paraffin on for about 10 to 15 minutes.
-
 4
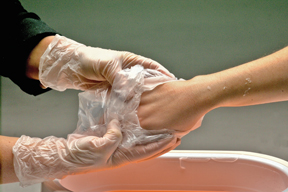
4Remove paraffin by massaging the client’s hands starting at the wrist to gently loosen the wax. Peel the paraffin from the hands.
-
 5
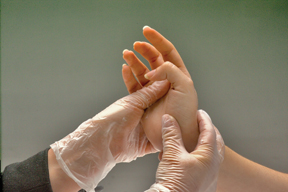
5A massage is one of the most popular parts of a nail service, and if you give a good, lengthy one you’re practically guaranteed to have your clients melting.
Apply lotion. With one hand, brace the client’s arm. With the other hand, hold the client’s wrist and bend it back and forth slowly until the client has relaxed.
-
 6
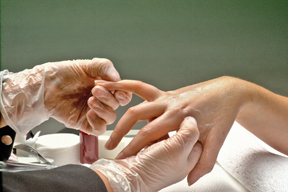
6Bring the client’s arm down. Gently rotate fingers to form circles, working toward the thumb.
-
 7
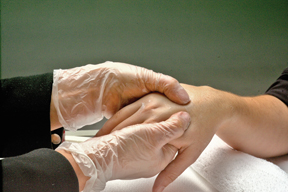
7Place the client’s elbow on the cushion and, with your thumbs in the client’s palm, rotate in a circular movement in opposite directions.
-
 8
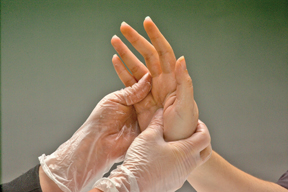
8Place your thumbs on top of the client’s hand, with your fingers below the hand. Move your thumbs in a circular movement in opposite directions from the client’s wrist to the knuckle on back of the client’s hand.
-
 9
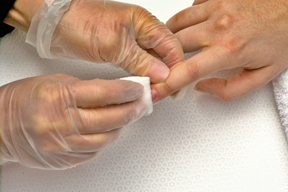
9Properly prepping a nail for an enhancement application is crucial. If you leave oil or moisture on the nail plate, your client’s nails are more apt to lift.
Remove old polish.
-
 10
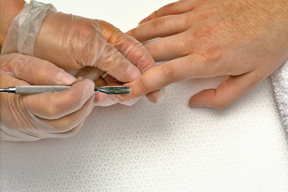
10Gently push back cuticles with a cotton-tipped orangewood stick or a pusher that can be disinfected.
-
 11
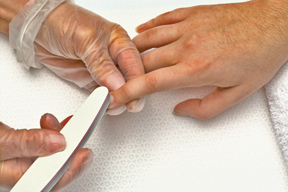
11Lightly buff nails with a medium or fine abrasive to remove the shine and natural oil. Avoid using a coarse abrasive and do not use too much pressure.
-
 12
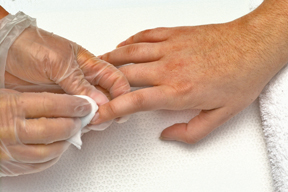
12Apply a nail antiseptic dehydrator. The antiseptic will remove more of the remaining natural oil and dehydrate the nail for better adhesion. The nail is now properly prepped for application of your favorite enhancement system.
-
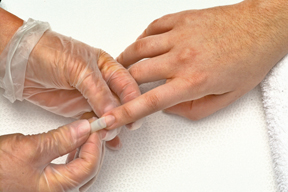 13
13Before you apply a tip you must always properly prep the nail. That way you’re ensuring the tip will stick to the nail and won’t lift.
Select the proper size tip. The tip should completely cover the nail plate from sidewall to sidewall but never cover more than half the length of the nail. Trim tip if the well covers too much of the nail.
-
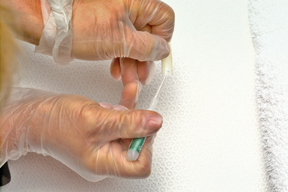 14
14Apply glue to the well of the tip. Apply adhesive from the middle of the nail plate to the free edge, making sure to avoid the skin. Slide on tip slowly. Hold it in place for a few seconds until dry.
-
 15
15Apply a bit of adhesive to seam between the natural nail plate and the tip to strengthen the stress point. Trim the tip using a tip cutter or large nail clippers.
-
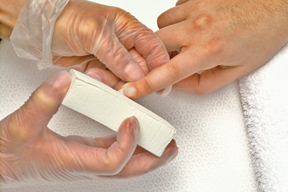 16
16Remove the shine from the tip with a semi-coarse abrasive holding the file flat on the nail. Then, use a buffer block to buff down the area between the natural nail plate and tip extension. Shape the nail.
-
17
This article is excerpted by permission from the April ’05 edition of NAILS Magazine.
Sometimes you may get so caught up in the latest and greatest advances in nail technology that you tend to forget the basic practices you learned in school. It’s easy to think that you’ve mastered basic techniques such as filing a nail or fitting a tip, but let some time go by and you may find that in your eagerness to learn how to use colored acrylics, hybrid gel and acrylic systems, or spa-style pedicure lines, you end up losing some of that important attention to detail that your clients appreciate.
That’s why we’ve compiled this back to basics handbook, which we think you’ll find extremely useful… The steps may sound basic, but it never hurts to revisit some of the tried and true — and most important — steps in any nail service.
Check out additional fundamentals in the April ’05 edition of NAILS Magazine.
YOU MIGHT LIKE THIS
-
Nails
Nocturnal Sky Nail Art
-
Nails
Muted Mosaic Nail Art
-
Nails
Cat Eye Nail Art
-
Unleash Your Wild Side With Nude & Leopard Print Nail Art
-
Nails
Pink Rainbow Nail Art
TRENDING NOW!
-
Curly
Long Layers: 10 Pro Tips + Common Cutting Mistakes
-
BTC Hair Trend Report
The Biggest Haircut Trends of 2024
-
Copper
What Is The "Cowboy Copper" Hair Trend? Here's What It Really Means...
-
Haircuts
SHAG 101: The Dos And Don'ts
-
Bobs
The '90s Bob: How To Cut & Style This Trending Haircut
-
BTC Hair Trend Report
Quiet Luxury Blonde: The "Old Money" Trend Explained
-
Blonde
Dear Clients, Read This Before Going Blonde!
-
Balayage
How To Turn A Brassy Lift Into A Brunette Balayage

