
Australian Men’s Hairdresser of the Year Marc Mendicino’s “Square” How-To

Advertisement
Advertisement
Australian Men’s Hairdresser of the Year Marc Mendicino’s “Square” How-To
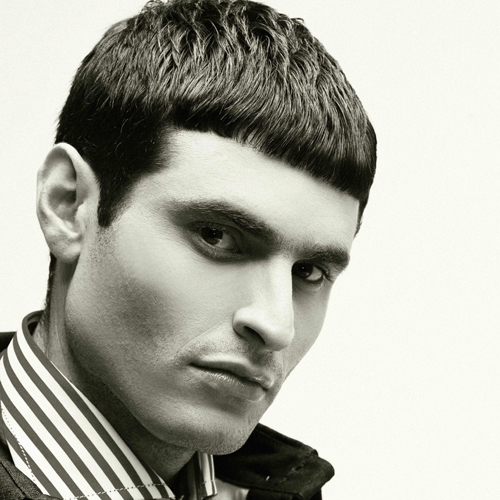
Marc Mendicino’s Displaced Collection won him the coveted title of Men’s Hairdresser of the Year in the 2009 Australian Hair Fashion Awards. Displaced presents styles that are individual whilst remaining wearable, masculine and technically strong, combining street-cool with sophistication. His “Square” how-to from this collection proves it IS hip to be square these days! Subscribe to behindthechair.com “On Paper” Magazine–4 Issues Only $29.95!

Next Issue: COLOR with Beth Minardi!
HOW-TO STEPS 
-
 1
1 -
 2
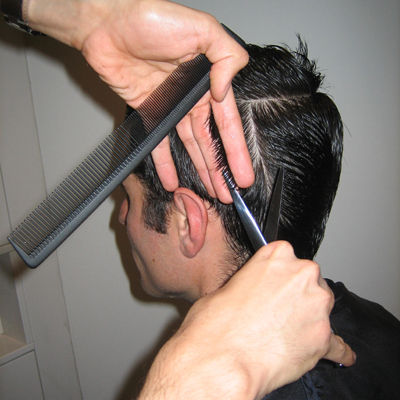
2A horseshoe section is taken from high recession to high recession, following the widest point of the head. Diagonal back sections are taken and the hair is elevated to 90 degrees, cut blunt while decreasing in length.
-
 3
3Continue Step 1 until the center back of the head is reached. The same technique is repeated through the opposite side until the previous cut section is reached. Ensure to check balance as you go along.
-
 4
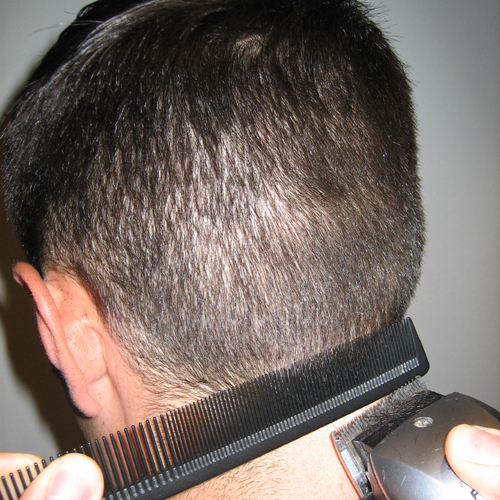
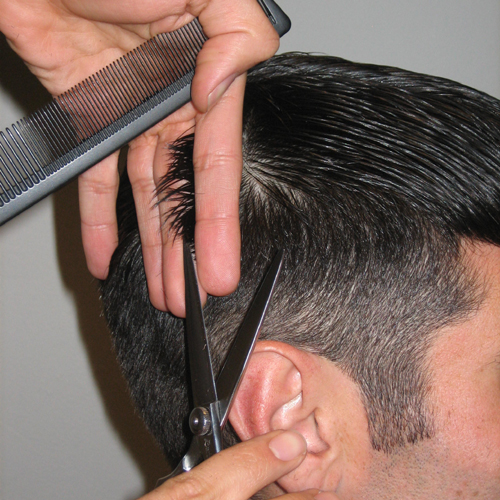
4Clipper over comb technique is then used to taper through the edges and ensure there is an even weight distribution through the perimeter.
-
 5
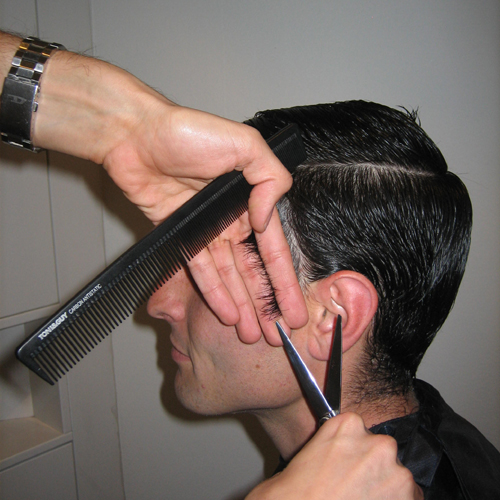
5The hairline is then detailed, using clippers around the ears and nape area, ensuring to follow the natural growth pattern.
-
 6
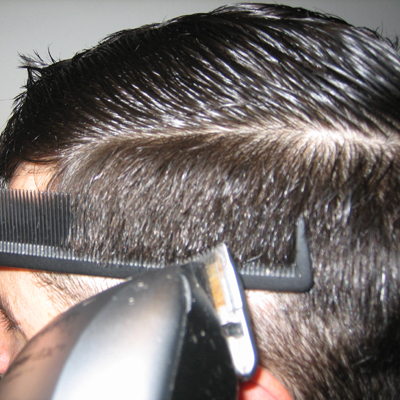
6Vertical sections, approximately a ½ inch in thickness, are taken to connect the top section with the sides. Hair is elevated to 90 degrees and cut blunt to follow the guide.
-
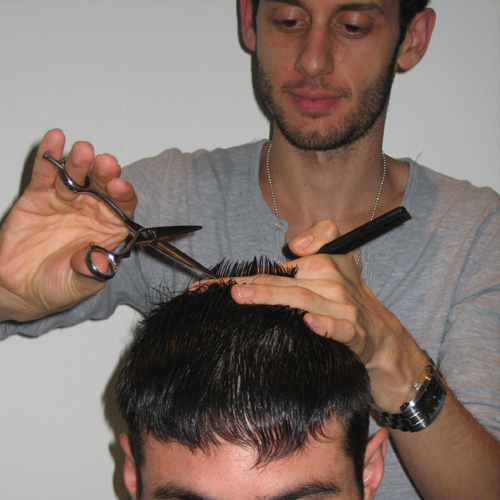 7
7Horizontal sections are taken across the top of the head, elevated to 90 degrees and point cut square. This is continued until the front hairline is reached.
-
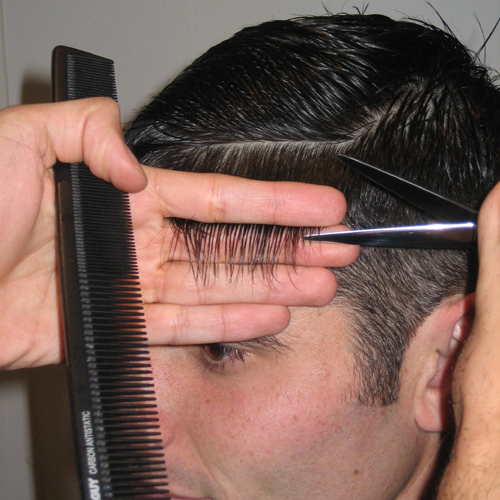 8
8The fringe is then elevated to one fingers depth, cut blunt and square straight across, ensuring to blend the line with the previously cut side areas. The cut is then dried flat and forward. The top and side areas are deep point cut to remove weight and add texture, ensuring not to disturb the square line through the fringe.
-
 9
9Finish with a dry paste to enhance texture and sharpness to the fringe.
YOU MIGHT LIKE THIS
-
Balayage
Mother of Pearl Brunette by Angelo Seminara
-
Balayage


Mother of Pearl Blonde by Angelo Seminara
-
Hair Color
Dimensional Deep Copper
-
Hair
Orianthi’s Rocker-Chic Hair How-To
-
Hair
Kate Hudson’s “NINE” Premiere Hair How-To
TRENDING NOW!
-
BTC Hair Trend Report
The Biggest Haircut Trends of 2024
-
Blonde
Conditioner Before Toner: Common Hair Myth Debunked
-
Monthly Product Launch List
11 New Game-Changing Hair Launches To Add To Your Arsenal
-
Copper
What Is The "Cowboy Copper" Hair Trend? Here's What It Really Means...
-
Copper
Muted Bronze
-
Haircuts
SHAG 101: The Dos And Don'ts
-
Frizz
Straighten & Smooth 2A, Fine-Medium Density Hair
-
Business
Don't Fall Victim To Hair Industry Greenwashing—Read This First

