
Pivot Point International “Jasmin” Mini-Tech

Advertisement
Advertisement
Advertisement
Advertisement
Pivot Point International “Jasmin” Mini-Tech
Try your hand at this step-by-step from Pivot Point International!
See the Collection: Visual Rendition!
Get the DF “Visual Rendition” Collection and Technical Book and DVD Set NOW!
To learn more, go to www.pivot-point.com

Subscribe to behindthechair.com “On Paper” Magazine–4 Issues Only $29.95!
Next Issue: COLOR with Beth Minardi!
HOW-TO STEPS 
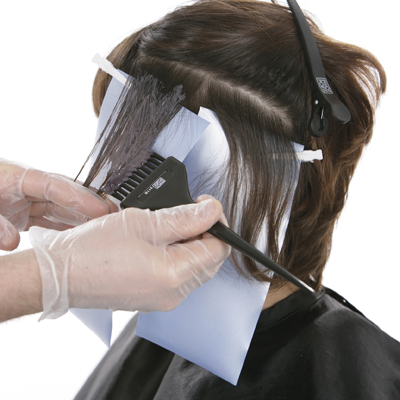
-
 1
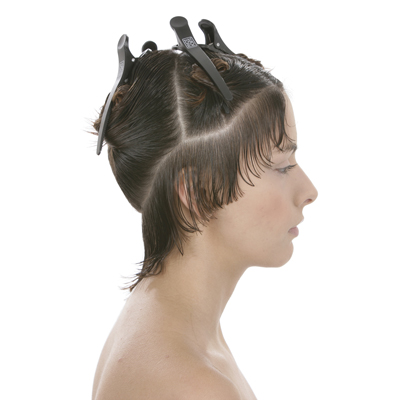
1Jasmin’s shape had grown out and she is eager to have a fresh style.
-
 2
2A progression of graduated lengths creates an asymmetrical design.
-
 3
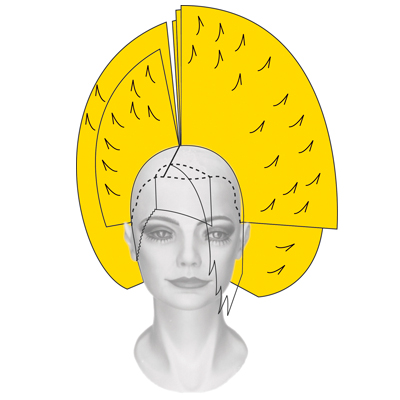
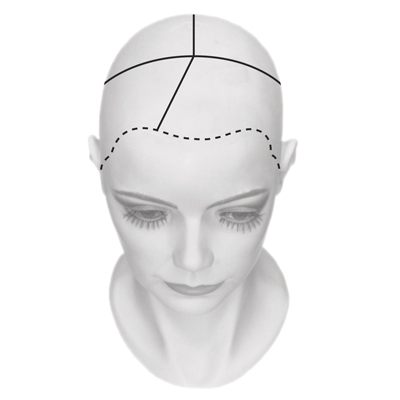
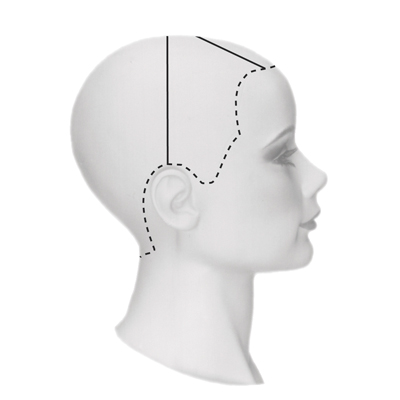
3Section vertically from ear to ear.
-
 4
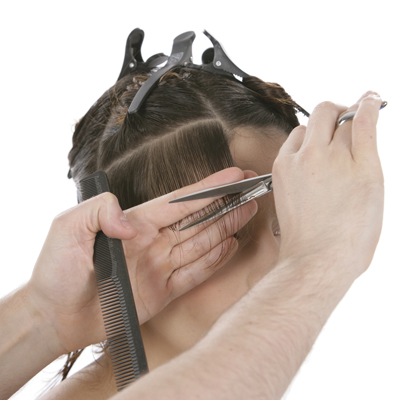
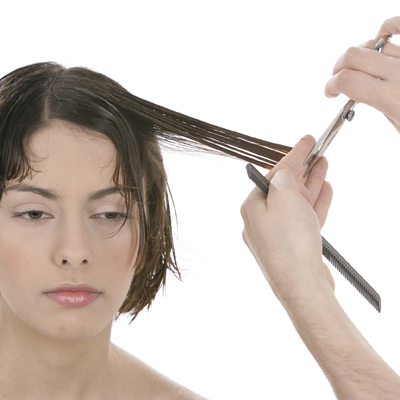
4Subsection the front with a diagonal side part beginning above the right eye extending to the ear-to-ear parting. Section the back vertically in the center.
-
 5
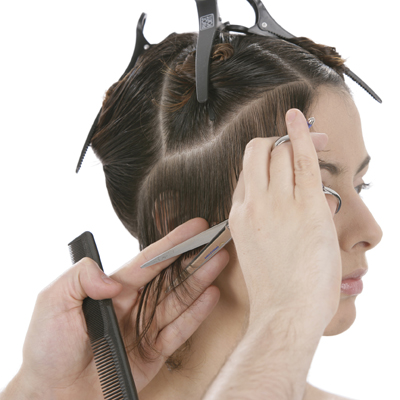
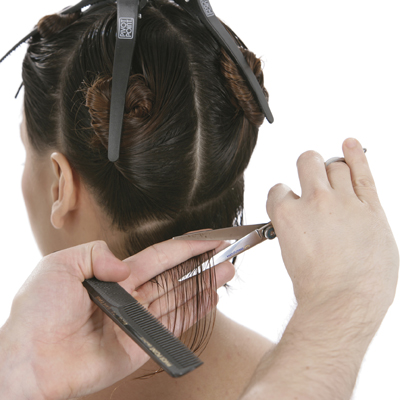
5Create a hairline parting along the right side and nape perimeter. Begin on the right side and distribute the hair naturally. Position your fingers along a medium diagonal-back line and use one-finger projection as you sculpt a diagonal-back line. Continue along the right side. Extend the diagonal line all the way through the nape perimeter using the same sculpting techniques.
-
 6
6After completing the hairline parting, the result is a slightly graduated diagonal-back line. Use this parting as your design line.
-
 7
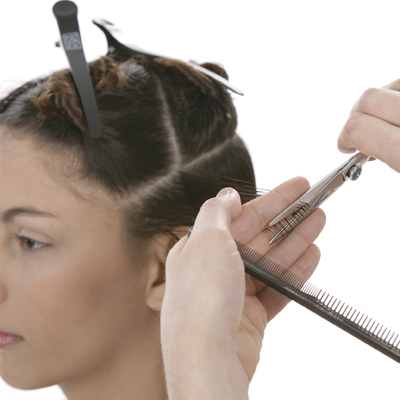
7Release a diagonal parting parallel to the established design line throughout all three sections. Beginning on the right side, use perpendicular distribution, low projection and a parallel finger position. Sculpt following the initial design line.
When you reach the right ear, increase the projection to a medium angle and sculpt following your design line.
-
 8
8Then, take the next parting and increase the projection to a high angle as you sculpt toward the left.
Continue taking diagonal partings and sculpt in the same manner. Work until your parting reaches the top of the left ear.
-
 9
9Next, extend the diagonal parting into the left side section. On the left side, use perpendicular distribution, high projection and sculpt using the previously sculpted parting as a guide.
Continue sculpting with the same techniques until the partings reach the crest area. In the crest, use the last projected parting as a stationary design line. Continue through the interior with diagonal-left partings and sculpt following the stationary design line.
-
 10
10At the top, distribute in the same manner and sculpt with the same techniques.
-
 11
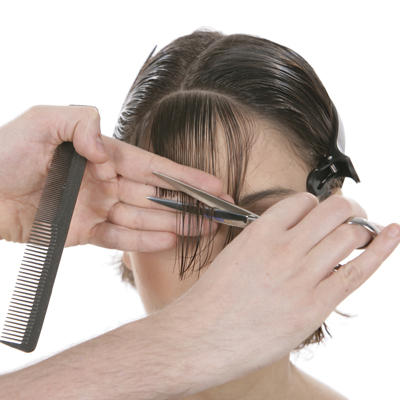
11In the fringe area, take a small curved section from the recession area on the right to above the middle of the left eye. Distribute naturally. Use one-finger projection and sculpt a diagonal-right line using the previously sculpted lengths from the right side as a guide.
Not that the fringe section is slightly off-center and the resulting diagonal line is at a low angle.
-
 12
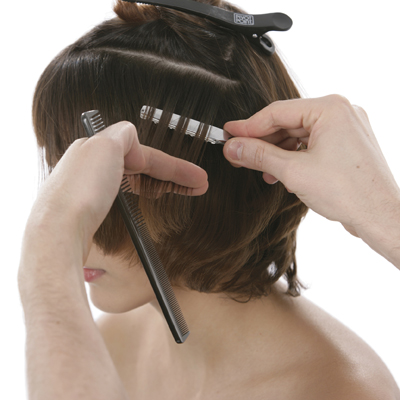
12After air forming the hair, take thin diagonal-back partings. Weave the razor through each slice and etch from the midstrand to the ends. Use this texturizing technique throughout the design to visually blend the lengths and to create additional softness.
-
 13
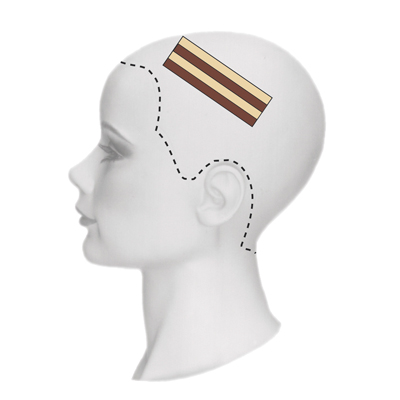
13The color graphic shows four diagonal-back slices placed on the left side just above the crest. A neutral brown and a medium golden blonde are alternately applied in the slices.
-
 14
14Release the first diagonal-back slice. Apply a level-4 dark brown permanent color with a 20-volume (6%) developer from base to ends. Hold the brush at an angle to create a soft, diffused effect.
-
 15
15Take another diagonal slice and apply a golden blonde high-lift permanent color with 30-volume (9%) developer with a color painting technique to create a ‘V’-shaped color placement within the slice.
Place two more adjacent slices on the left, alternating the dark and the light color. Process, rinse, shampoo and apply a semi-permanent clear gloss from scalp to ends for additional shine. Process, rinse, shampoo and condition prior to styling.
-
 16
16 -
 17
17
YOU MIGHT LIKE THIS
-
Hair
Pivot Point International “Jens” Mini-Tech
-
Hair
Pivot Point International “Carlijn”
-
Hair
Pivot Point International “Cecina” Step-by-Step
-
Hair
Pivot Point International “Kitty” Mini-Tech
-
Hair
Long and Layered Men’s Cut from Pivot Point
TRENDING NOW!
-
BTC Hair Trend Report
The Biggest Haircut Trends of 2024
-
Copper
What Is The "Cowboy Copper" Hair Trend? Here's What It Really Means...
-
Curly
Long Layers: 10 Pro Tips + Common Cutting Mistakes
-
Blowouts
Bombshell Blowouts: 4 Ways To Create Lift With Longevity
-
Frizz
Straighten & Smooth 2A, Fine-Medium Density Hair
-
Ask A BTC Expert
5 Foil Tips & Tricks From @the.blonde.chronicles
-
Copper
Muted Bronze
-
Haircuts
SHAG 101: The Dos And Don'ts

