
Classic Angled Bob

Advertisement
Advertisement
Advertisement
Advertisement
Classic Angled Bob
Products Used
HOW-TO STEPS 
-
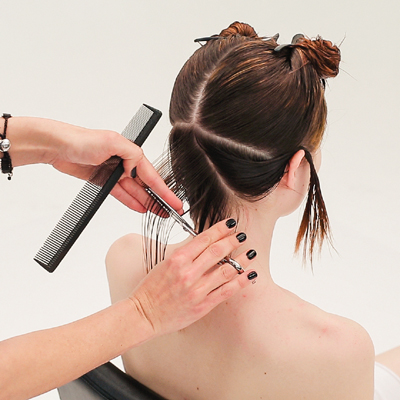
 1
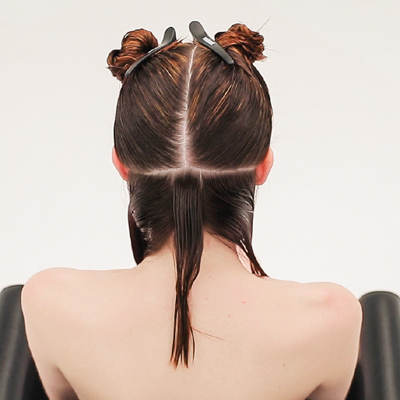
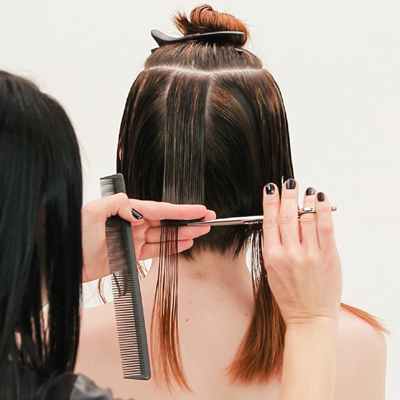
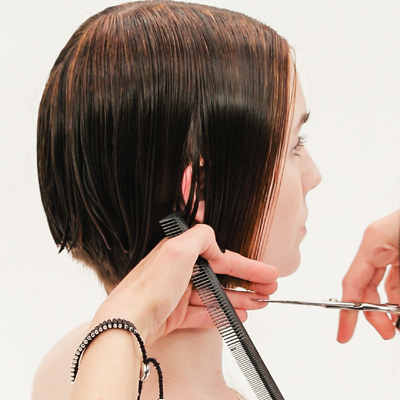
1Establish a profile parting from the font hairline to the nape. Take a diagonal forward parting from the occipital out to the middle of each ear, and take a vertical section no wider than 1-inch.
-
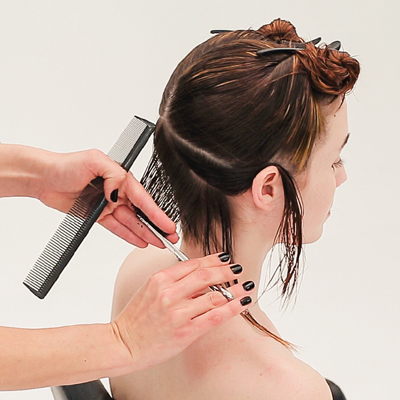
 2
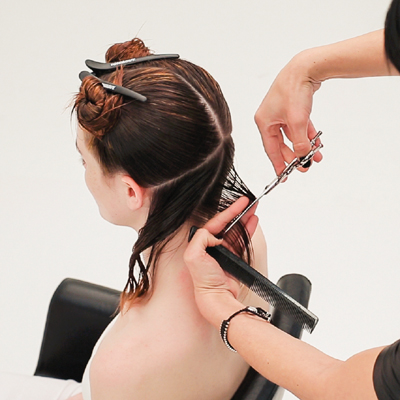
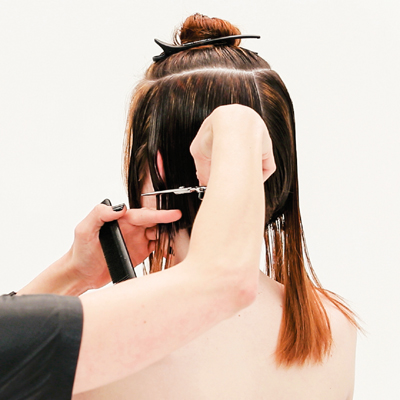
2Comb perpendicular, then elevate to 45 degrees. Starting at the top of the section, cut to decrease the length down to the nape.
Want to learn the whole collection? CLICK HERE to enter BTC University!
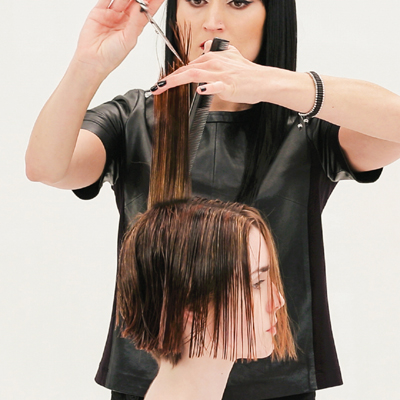
-
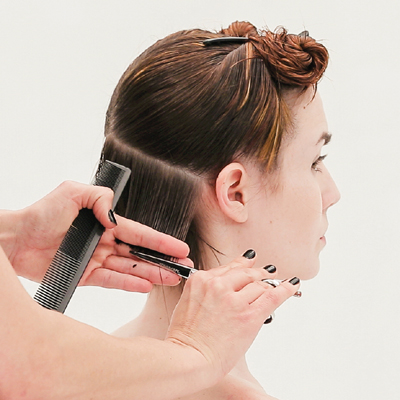
 3
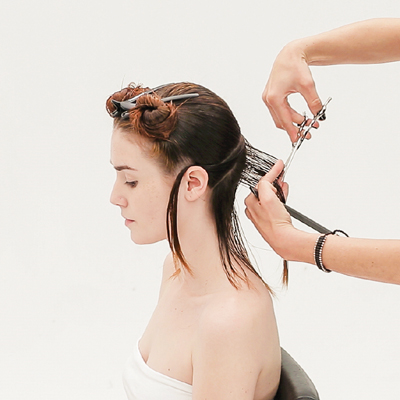
3Take the bottom section of hair, using the vertical section as a guide to length, and take the first pivoting diagonal forward to the corner of the hairline, comb perpendicular, elevate to 45 degrees and cut to decrease the length.
-
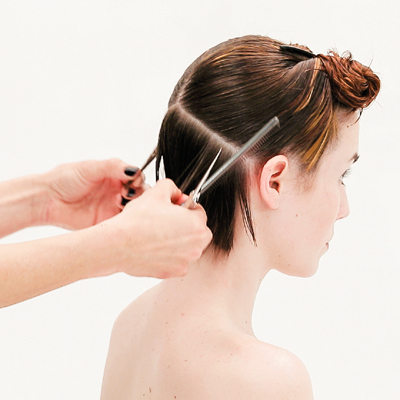
 4
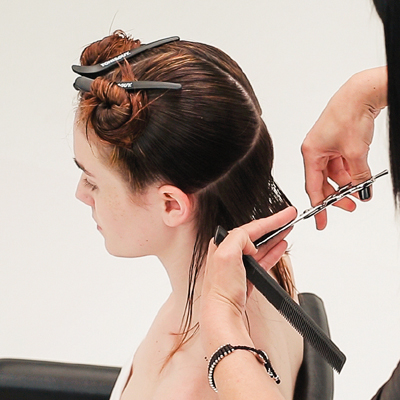
4Take the second pivoting diagonal forward section through the side hairline. With the same distribution and elevation, cut to follow the guide.
Want to learn the whole collection? CLICK HERE to enter BTC University!
-
 5
5Take the last pivoting section, comb perpendicular to the original diagonal forward parting, elevate to 45 degrees and cut to follow the guide.
-
 6
6On the opposite side, take the first pivoting section to the corner of the hairline, change your hand position with your fingers pointed down, comb perpendicular, elevate to 45 degrees and cut to follow the guide.
-
 7
7Take the second pivoting diagonal forward section through the side hairline. With the same distribution and elevation, cut to follow the guide.
Want to learn the whole collection? CLICK HERE to enter BTC University!
-
 8
8Take the last pivoting section, comb perpendicular to the original diagonal forward parting, then elevate to 45 degrees and cut to follow the guide.
-
 9
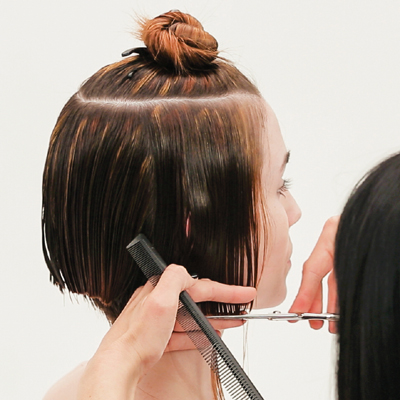
9Cross-check by pulling equal amounts of hair from the same reference point and measure to see if the lengths are balanced.
-
 10
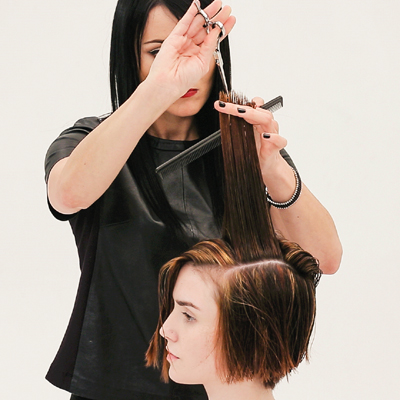
10Take a horizontal section, from just below the crown, though the recession area. Return to center back and keep the profile parting in place. Comb to natural fall, elevate to a stationary 45 degrees and cut onto the guideline.
-
 11
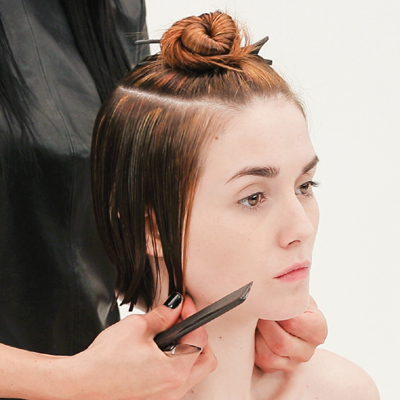
11At the ear area, tap the hair above and below the ear to relax the amount of tension for the ear protrusion. Cut the line square, increasing in length, following the jaw line.
Want to learn the whole collection? CLICK HERE to enter BTC University!
-
 12
12Repeat this technique on the opposite side. Continue to tap the hair above and below the ear, and cut the line square, slightly increasing in length.
-
 13
13Cross-check by pulling equal amounts of hair from the same reference points and measure to see if the lengths are balanced.
-
 14
14Release the remaining hair and continue by following the techniques in Steps 10 through 13. At the front hairline, slightly overdirect the hair to preserve the corner.
-
 15
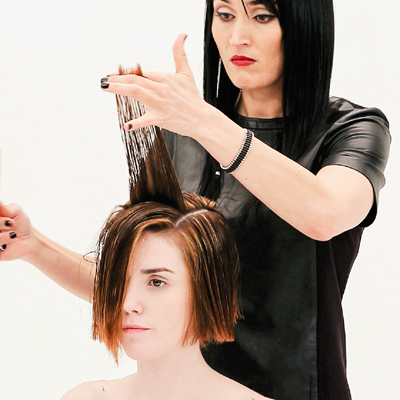
15Take a 1-inch profile section from the front hairline to the crown. Using the guide from the crown and the front hairline perimeter, comb perpendicular, elevate to 90 degrees and point-cut on an angle from short to long.
Want to learn the whole collection? CLICK HERE to enter BTC University!
-
 16
16Take a vertical section, overdirect to the center guide, elevate to 90 degrees and cut from short to long. Work the technique through to the parietal ridge.
-
 17
17Repeat the technique on the opposite side. Cut to decrease in length. Stand on the opposite side of the section being cut, to keep the overdirection consistent.
-
 18
18Finish by cross-checking the layers with the horizontal sections. Visually, the line should create a slight U.
-
 19
19
More from
TONI&GUY
-
Award-Winning
Luminescent
-
Collections
Reverie
-
Award-Winning
London Hairdresser Of The Year Winning 2020 Collection
-
Manufacturer
Join TONI&GUY For A Free Hour-Long Education Experience
-
Business
Assistants & Apprentices: 5 Pieces Of Advice To Read ASAP
-
BTC "On Tour"
BTC Hosts First Ever International Show: “On Tour” London
-
BTC Events
BTC “On Tour” London
-
BTC "On Tour"
“On Tour” London Cocktail Party
-
BTC Events
BTC “ON TOUR” DALLAS
-
BTC ON TOUR
“On Tour” Dallas Cocktail Party
-
BTC Events
BTC “On Tour” Dallas Show—Here’s Everything That Happened!
-
Barbering
Low Skin Fade On Textured Hair
-
Salon Decor
TONI&GUY Galleria Salon Gets A New Look
-
Chain Salons
TONI&GUY Renovated Its NorthPark Location
-
Barbering
Our 5 Most Popular Men’s Haircuts
-
Business
TONI&GUY Debuts Á La Carte Style Menu
-
Manufacturer
TONI&GUY Announces Winners Of The 2017 Photographic Awards
-
Haircuts
10 Cuts For Every Client In Your Chair
-
Bobs
Shattered Inversion
-
Events
TONIandGUY 2016 Creative Release and Photographic Awards
-
Business
Ready To Own? Four Things You Should Know
-
Business
Ready to Open Your Own Salon? Read This First
-
Celebrity
FKA Twigs’ Quirky VMA Curls
-
Curly
Square Layers from TONI&GUY
YOU MIGHT LIKE THIS
-
Bobs
Graduated Modern Bob from TONI&GUY
-
Hair
Men’s Scissor-Over-Comb from TONI&GUY
-
Hair
TONIandGUY Reflective Collection How-To: Britni
-
Bobs
Stacked A-Line Bob With Texture
-
Bobs
Asymmetrical Bob from TONIandGUY
TRENDING NOW!
-
BTC Hair Trend Report
The Biggest Haircut Trends of 2024
-
Blowouts
Bombshell Blowouts: 4 Ways To Create Lift With Longevity
-
Copper
What Is The "Cowboy Copper" Hair Trend? Here's What It Really Means...
-
Curly
Long Layers: 10 Pro Tips + Common Cutting Mistakes
-
Ask A BTC Expert
5 Foil Tips & Tricks From @the.blonde.chronicles
-
Frizz
Straighten & Smooth 2A, Fine-Medium Density Hair
-
Haircuts
SHAG 101: The Dos And Don'ts
-
Hair Extensions
Clients With Hair Loss? Read This To Get Their Pre-Thinning Density Back

