
Classic Crop Fade

Advertisement
Advertisement
Advertisement
Advertisement
Advertisement
Advertisement
Advertisement
Classic Crop Fade
HOW-TO STEPS 
-
 1
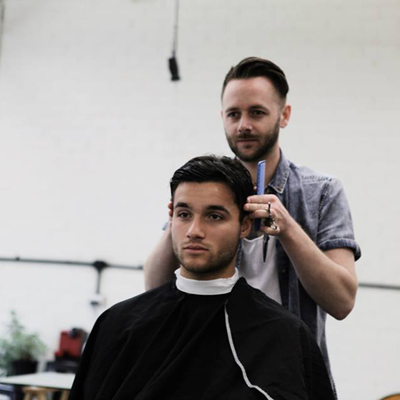
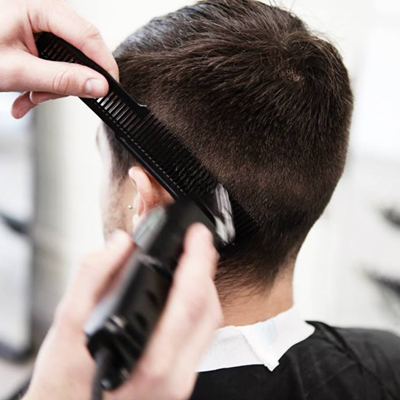
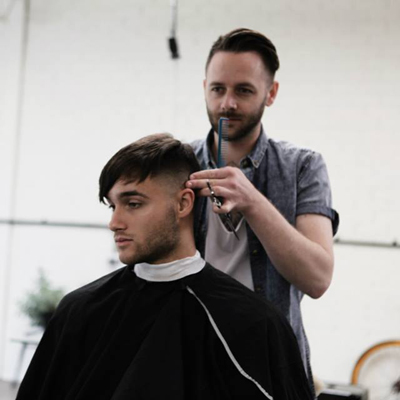
1When you consult with a new client, it’s important to check the bone structure, especially on the sides of the head. It is also CRUCIAL to understand what’s there BEFORE you start cutting.
-
 2
2Generally speaking for shorter hair, men’s haircuts start at the top and work downward to slim the shape, where as for women, you start at the bottom and work up to build the shape.
-
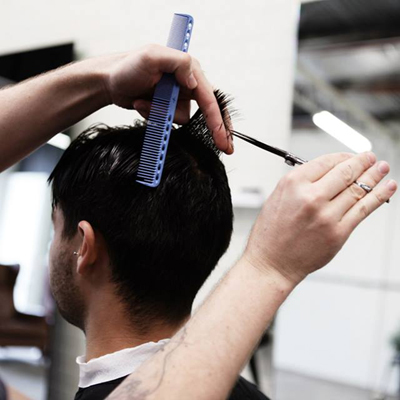
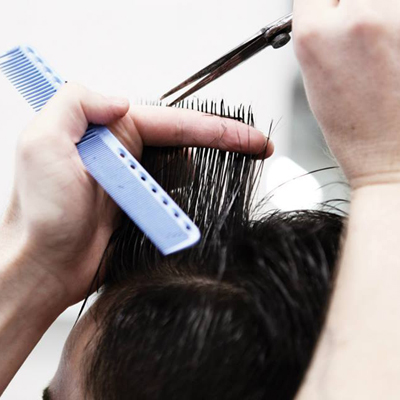
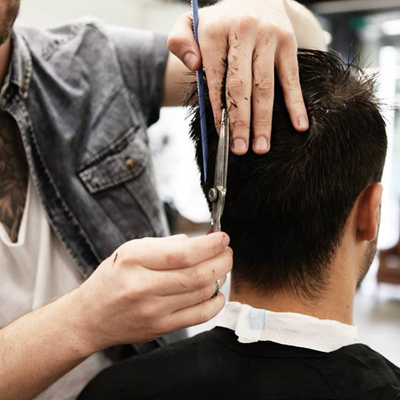
 3
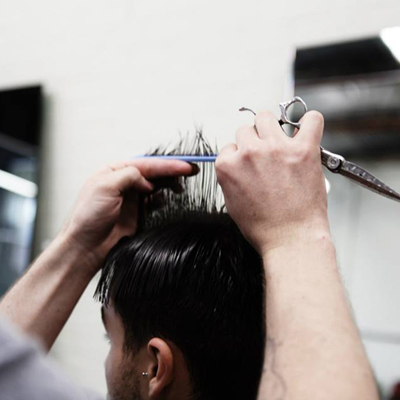
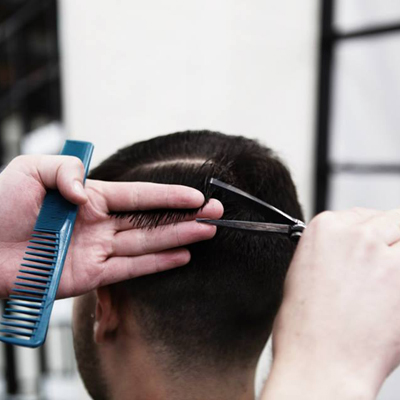
3Beginning at the fringe, take a center parting pulling straight up and point-cutting. Starting at the front dictates how much length you will need to leave. If you work from the crown forward it’s hard to know where the length will end up.
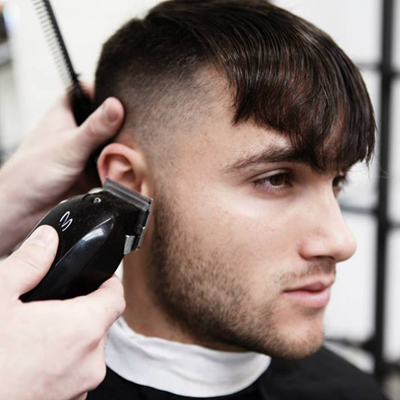
-
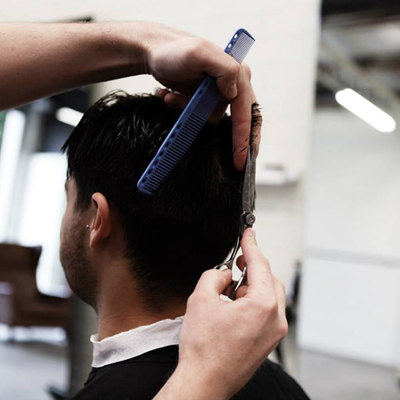
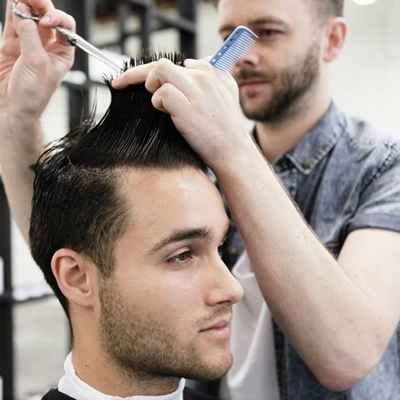
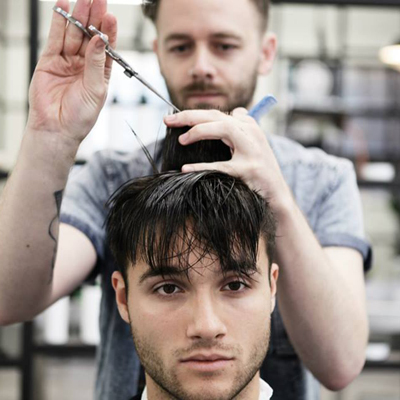
 4
4As you work toward the crown, start to angle your guide downward to slim the crown area down. Always keep your desired shape in mind.
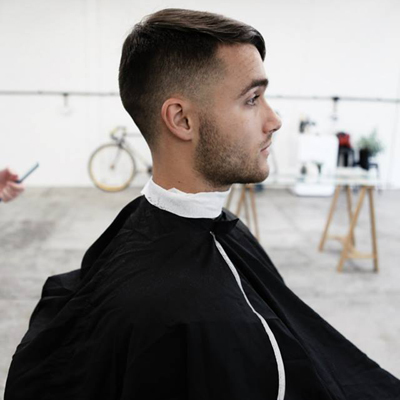
-
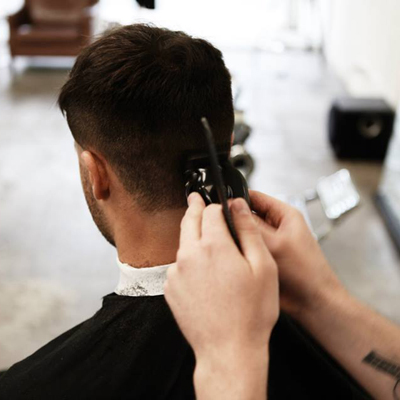
 5
5Keep angling the crown area downward toward the nape. Note: Rob’s cutting arm should be higher, but the camera got in the way!
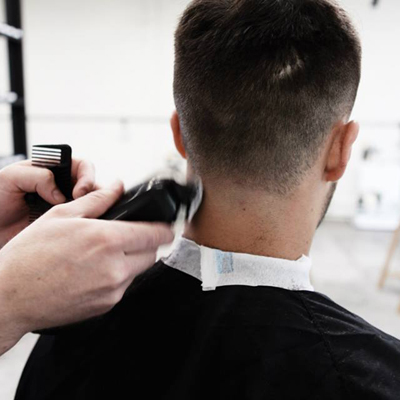
-
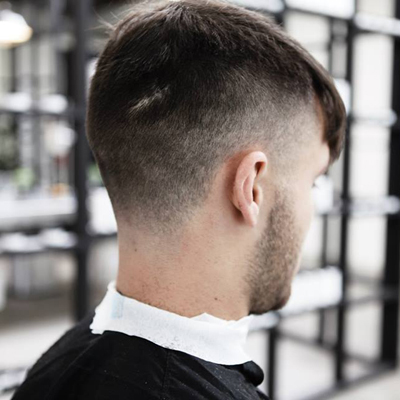
 6
6Continue slimming the shape into the back with vertical layering.
-
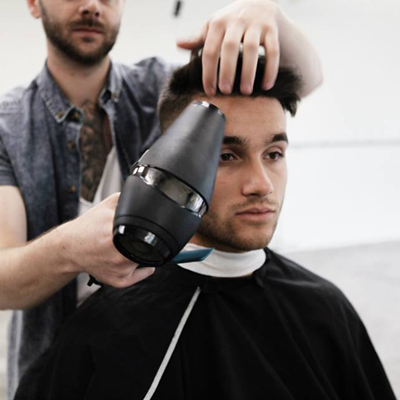
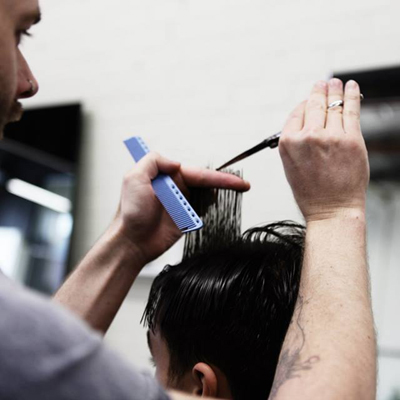 7
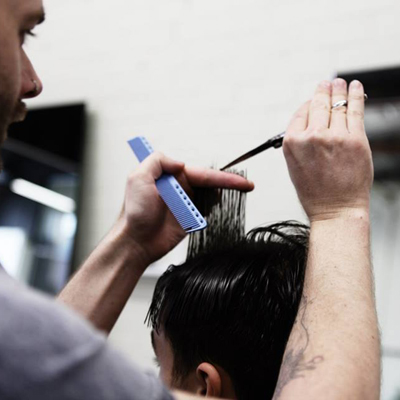
7Return to the fringe area and take a parallel section to the initial guide, this time overdirecting toward the first section. You are essentially creating a square layer.
-
 8
8Repeat on the opposite side, overdirecting to the center.
-
 9
9 -
 10
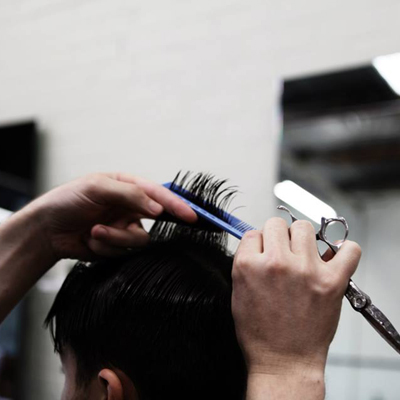
10Rob is distorting the section to create more texture. He is not too keen on thinning scissors, razors or slicing, so he likes to use other techniques first to create texture.
-
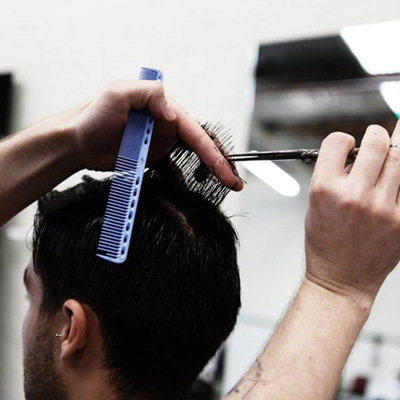
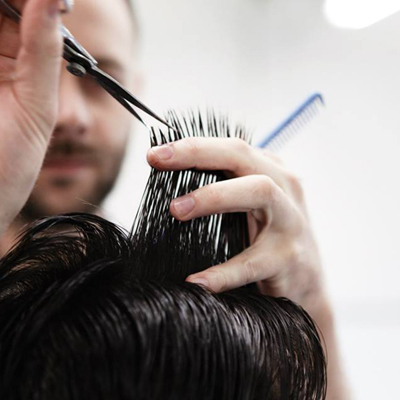
 11
11The interior is all layered the same way, overdirect into the center and point-cut following the same angles.
-
 12
12 -
 13
13Gather the hair into the center to check the length.
-
 14
14Try to keep your elbows high to cut this section, as this will help keep the hand angling the hair into the nape.
-
 15
15Once you finish layering the interior, vertically cross check the sections horizontally. The result from the overdirection should be a square layer.
-
 16
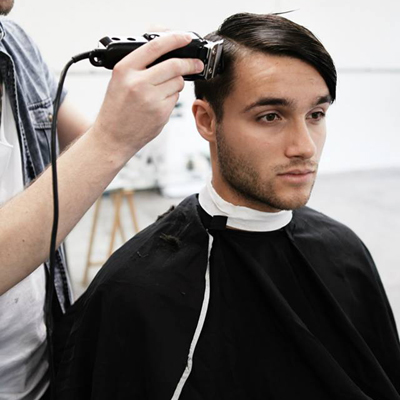
16After you establish the length for the interior, section out at the recession area and begin placing your guide in for clipper-over-comb. It is important to start at the top and work downward, so you can flatten the shape quickly and easily on the sides.
-
 17
17Not cutting the crown area too short will help avoid growth patterns. Repeat the clipper-over-comb guideline on the opposite side, ignoring the underneath length.
-
 18
18Once you are happy with your guideline, begin removing all excess hair underneath the guideline in preparation for the fade. This may seem complicated, but once you’re comfortable with clipper-over-comb, the whole process takes about two minutes! Clipper-over-comb allows you to control the bone structure while you are working, flattening areas tighter where they need to be. Shaving it all off will only expose the bones, and you will not be able to manipulate them the way you want unless the client is happy for you to go shorter and shorter!
-
 19
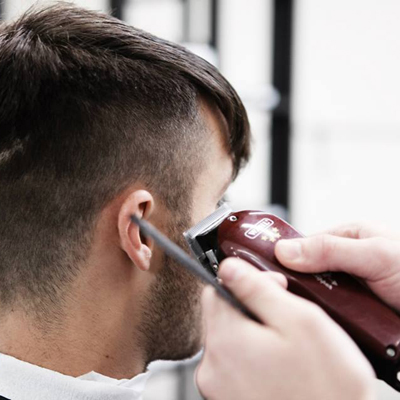
19Once you have removed all unnecessary hair, you can begin to set up your fade. For his client, Rob only wanted a hint, as this looks cleaner and grows out better without being too intimidating for the client who is not ready to go all the way to a bald fade! Create a guideline through the temple area with a balding clipper.
-
 20
20Create a guideline at the back.
-
 21
21Switch to a normal clipper and use the #5 blade to begin softening the line. Use short, sharp, fast movements as opposed to big, scooping actions. This won’t remove the line, only a 0 blade will. Rob fluctuates with the taper lever between the #5 and 0 to remove the balding clipper guideline. It won’t take too long, and you’ll end up with a nice balanced fade that doesn’t go halfway up the head.
-
 22
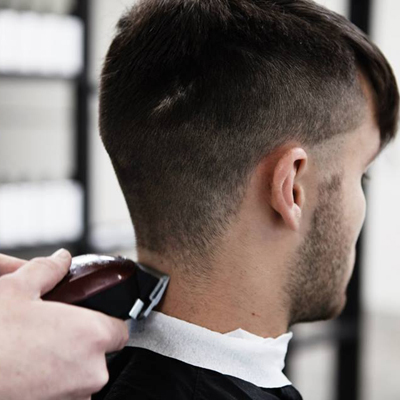
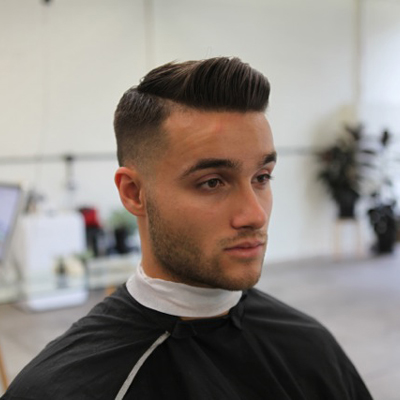
22Another really important detail is to reverse fade into the beard area, there is nothing worse than a clean fade with a snap on beard! The finished result should look like the above image, just a hint of skin throughout the temple area, nothing too invasive!
-
 23
23Begin the same process at the nape guideline…starting with the #5 blade first and fluctuating between the #5 and 0 to remove the line.
-
 24
24You will notice as the line disappears that even though it is tight in the back, it is really only the last inch that fades down, not half the head! Tip: You will need to use multiple angles to erase the fade guideline.
-
 25
25Here is the finished result of the faded area. Clean edges that don’t go too high into the head, and aid the cut to grow out nicer. Repeat the same process on the opposite side.
-
 26
26Its IMPERATIVE to look at your fade from afar. Use the mirror throughout the whole cut to keep everything in line. Because the cut is heavily asymmetric from right to left, you don’t want the disconnection to fall over the back of the head so you will need to join the corner in and begin the disconnection from the ear forward.
-
 27
27Overdirect to a stationary guide at the crown. Repeat until there is no more hair. Because you have already layered the interior, there won’t be too much to cut. When you are finished you should be able to see how the crown blends from shorter to longer into the disconnected lengths in the fringe area.
-
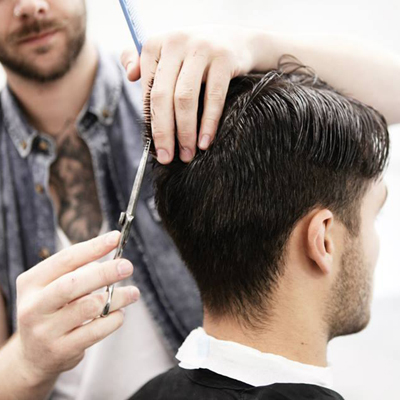
 28
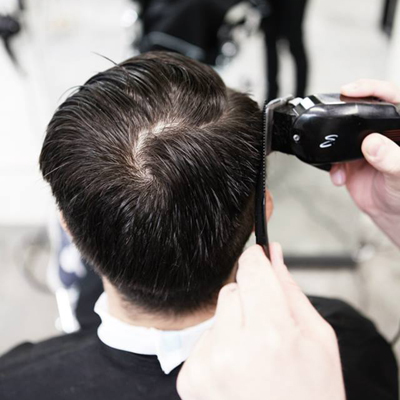
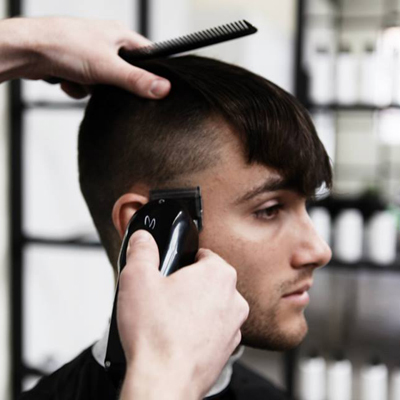
28Using a scissor-over comb technique, refine the crown area and sides.
-
 29
29The finished result before styling. Notice how the haircut compliments Rob’s client’s bone structure rather than fight it. To style, use your hands to rake comb through the hair and blow-dry to add natural volume.
-
 30
30Always blow-dry the hair into the shape you want, not just because you want the hair dried quickly. To give the hair added texture, Rob applied Morris Motley Treatment Styling Balm and broke the hair up with his hands.
-
 31
31 -
 32
32
YOU MIGHT LIKE THIS
-
Hair
Men’s Clipper/Skin Fade
-
Barbering
Soft Crown Layers + Clipper-Cut Fade
-
Haircuts
Men’s Prohibition Undercut from Australian BTC Member Rob Mason
-
Barbering
Razor-Cut Texture + Taper Fade
-
Haircuts
The Layered Undercut
TRENDING NOW!
-
BTC Hair Trend Report
The Biggest Haircut Trends of 2024
-
Blonde
Conditioner Before Toner: Common Hair Myth Debunked
-
Monthly Product Launch List
11 New Game-Changing Hair Launches To Add To Your Arsenal
-
Copper
What Is The "Cowboy Copper" Hair Trend? Here's What It Really Means...
-
Copper
Muted Bronze
-
Haircuts
SHAG 101: The Dos And Don'ts
-
Frizz
Straighten & Smooth 2A, Fine-Medium Density Hair
-
Business
Don't Fall Victim To Hair Industry Greenwashing—Read This First

